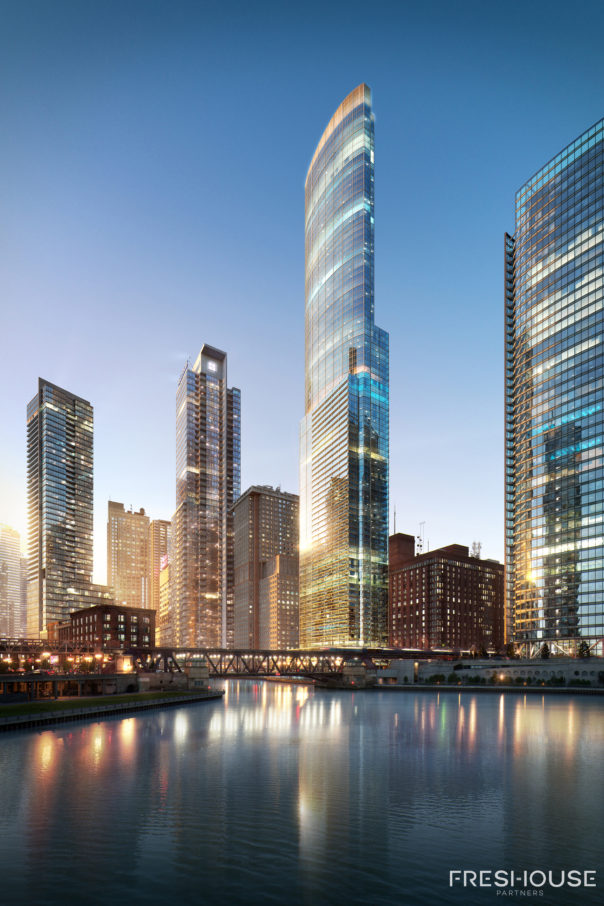
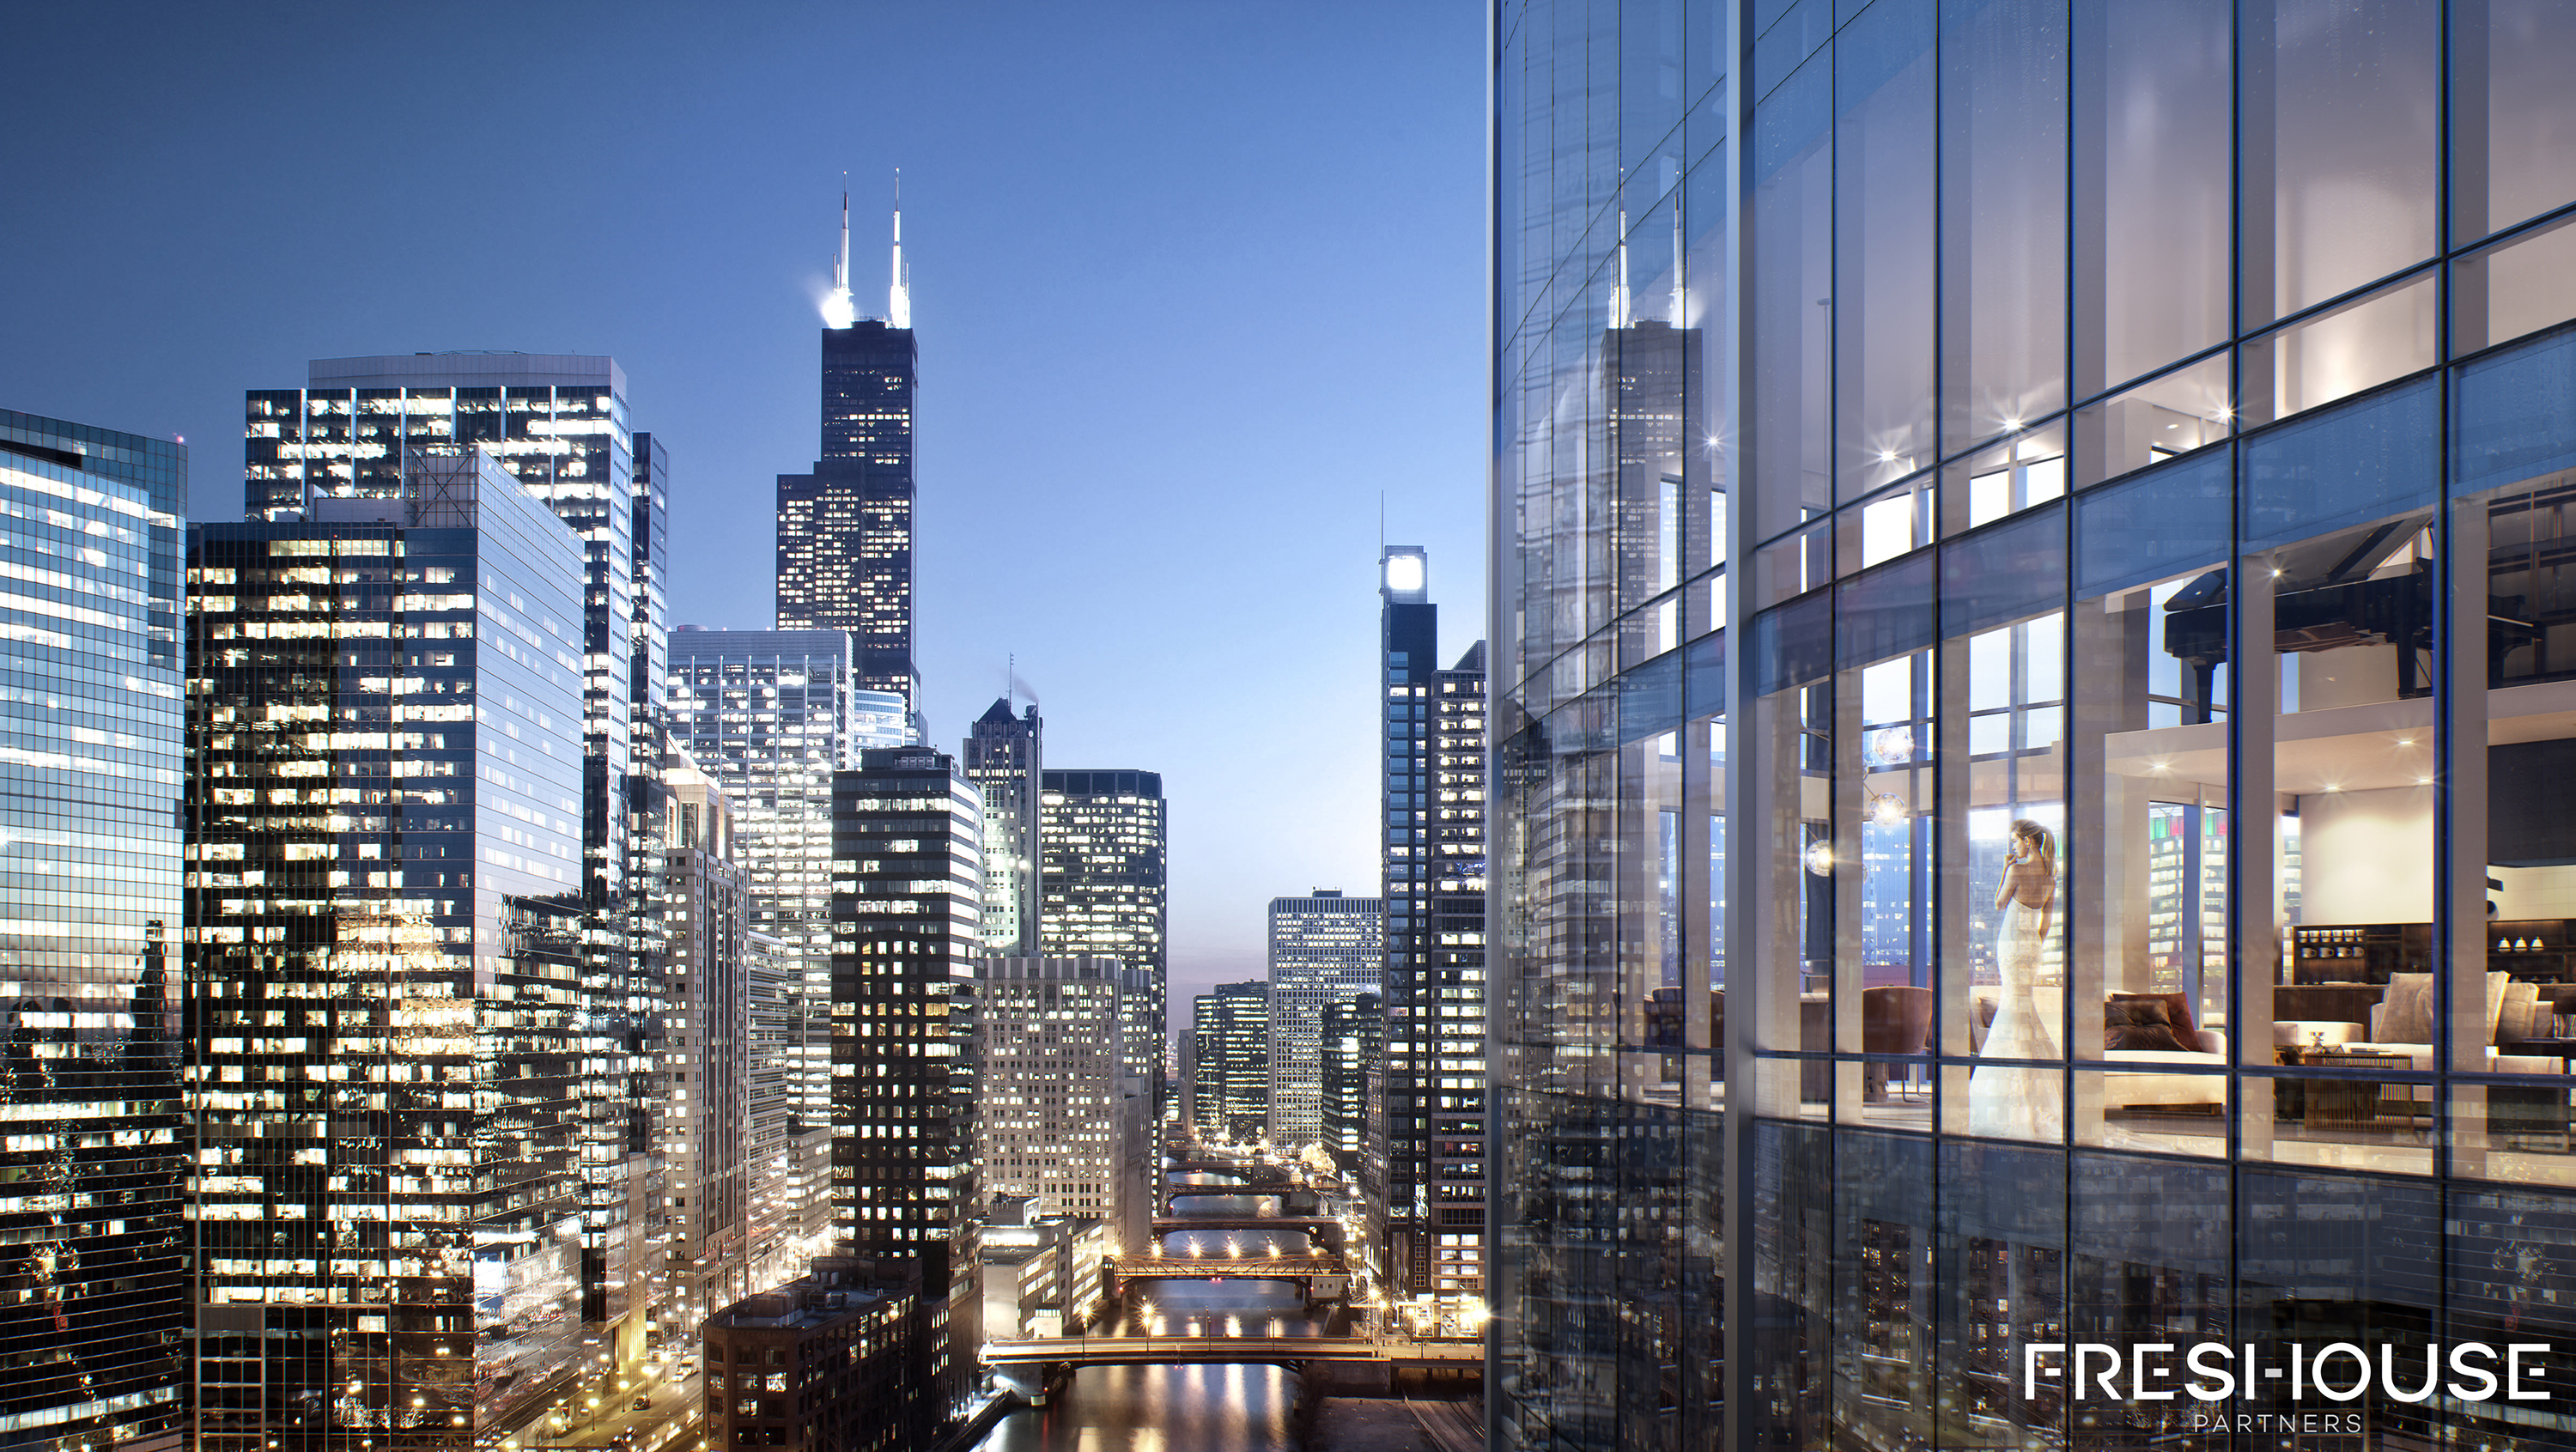
We spoke with 3D artist Lê Anh Nhân about what went into the making of his recent set of Chicago High Rise renders. Just how much was 3D, and how much backplates or photography? Read more below, you may be surprised!
Hello everyone!
First, I want to thank Corona Renderer for giving me the opportunity to share my work with everyone.
I am a 3D artist from Vietnam. I studied for 5 years at the University of Architecture Design. In my fourth year of college, I started becoming interested in 3ds Max. Because of my passion for CGI, I followed the ArchViz path when I left the university, and I am currently working at Fresh House & Partners.
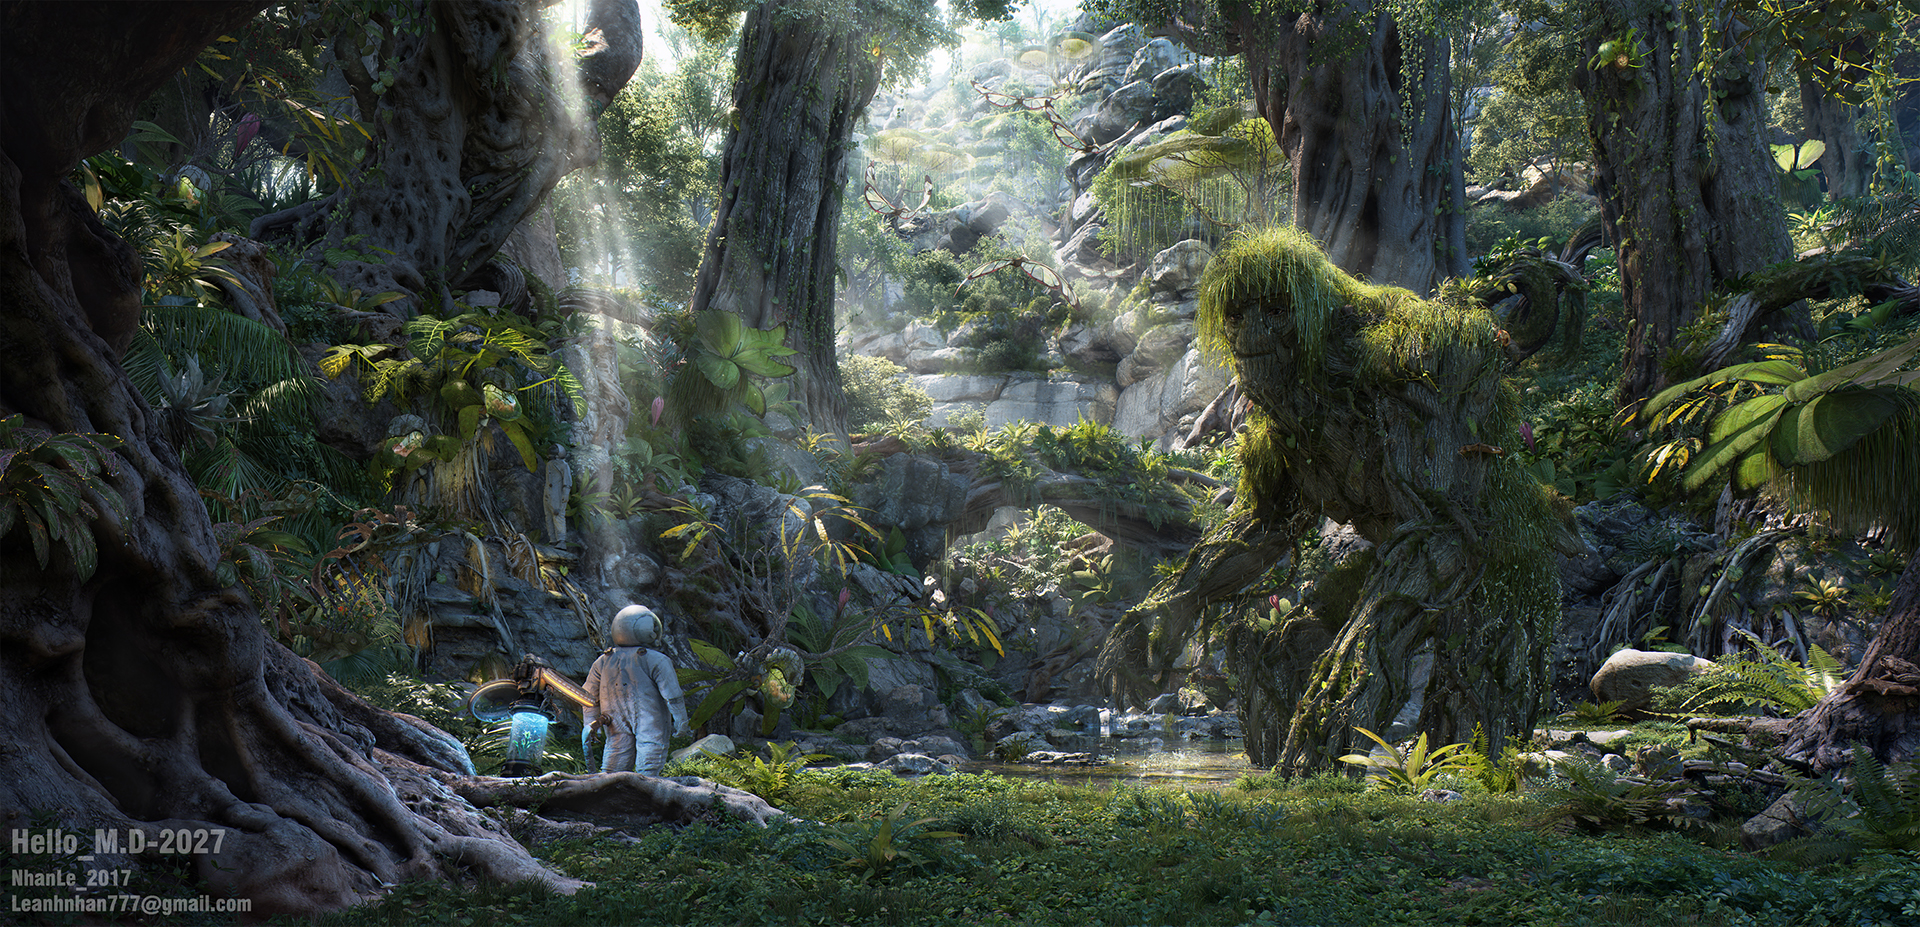
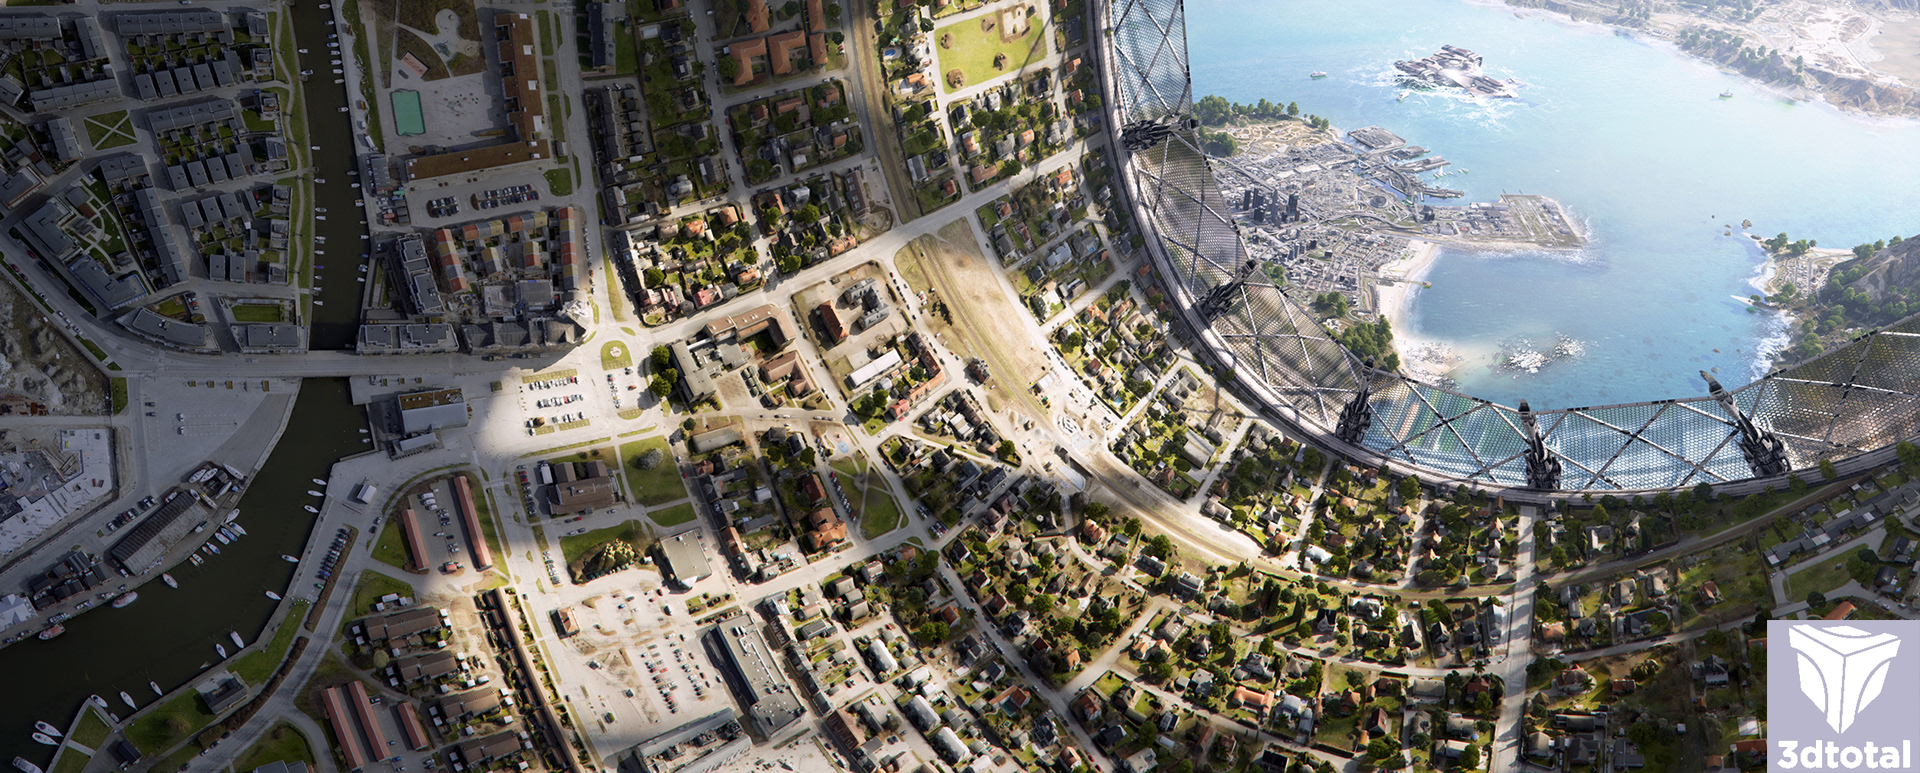
As a quick introduction to me, here are some of my images from the last few years:

Just before diving in to the making-of section, let me tell you a little bit about the company I’m working for at the moment – Fresh House is an innovative Marketing Solution, Branding Strategy, and Architectual Visualization firm in Vietnam and was founded by Mr. Anh Nguyen in 2012.
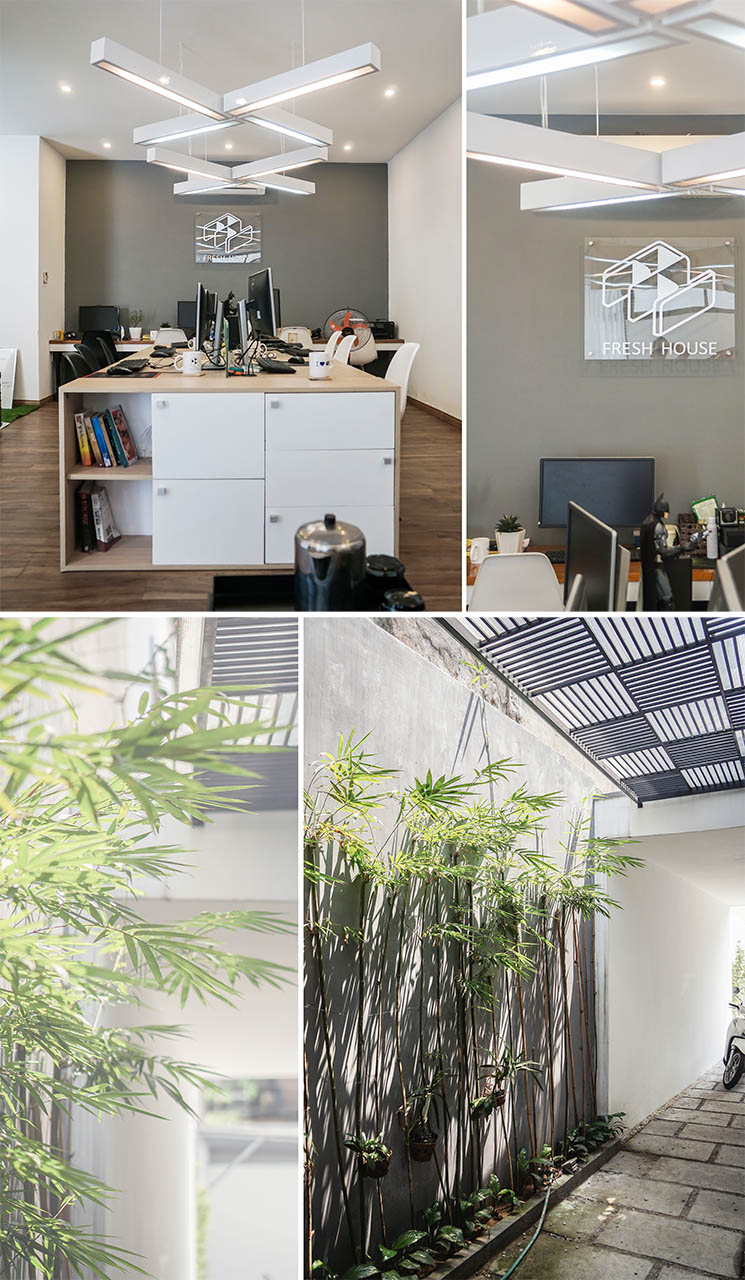
We believe that our professional experience in visualization as well as in marketing and communication for various types of project, along with our deep knowledge about the market and our insight into what customers need, has made us one of the best agencies in the Real Estate market.
And now that we have been introduced, let’s begin the making-of!
I- Reference:
This project comes from an image I accidentally found on the internet, and it really motivated me. The reference image was only at a resolution of around 2,000px, making it difficult to see and understand every detail, so I wandered around all day in the Google Map of the area to collect all the details that I could, right down to the smallest. I ended up collecting a lot of pictures, here is just a small sample:

I wanted to test Corona Renderer in this project, so that I could learn more about its pros and cons. I was aware that this scene was going to be very large with a lot of lighting, so I tried to carefully optimize my scene as I was making it, especially for those details which would be at a distance. Before embarking on the project, I wasn’t sure that Corona could render a large project like this, because I only have 32 GB of RAM on my computer (hint: it could!)
II– Modeling:
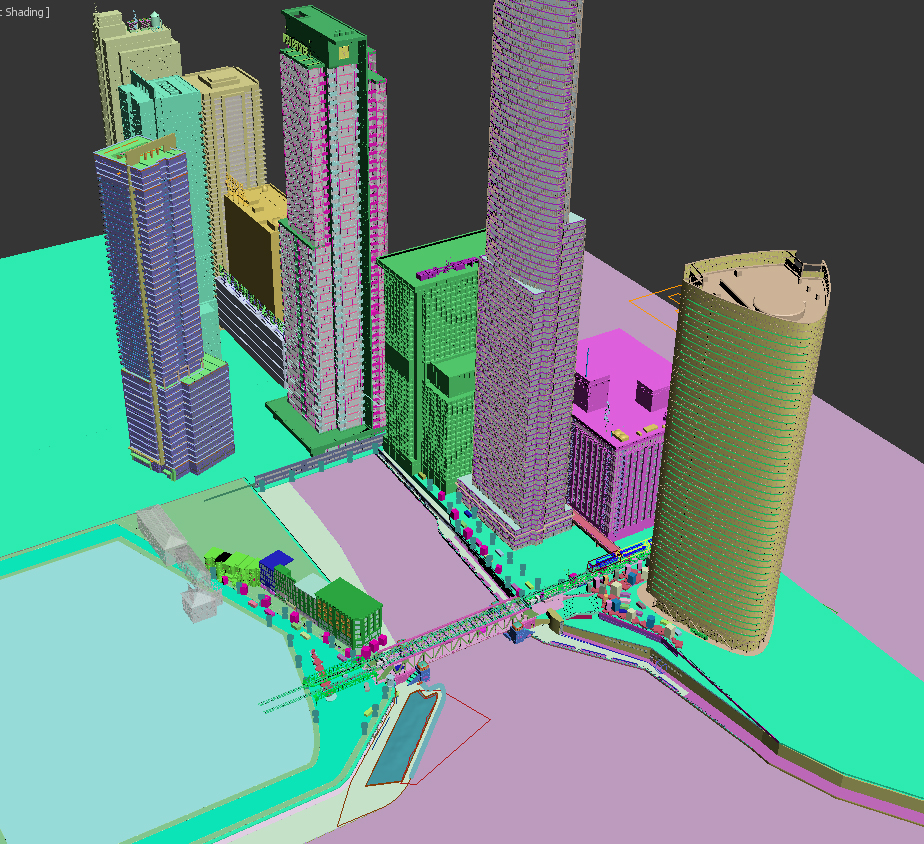
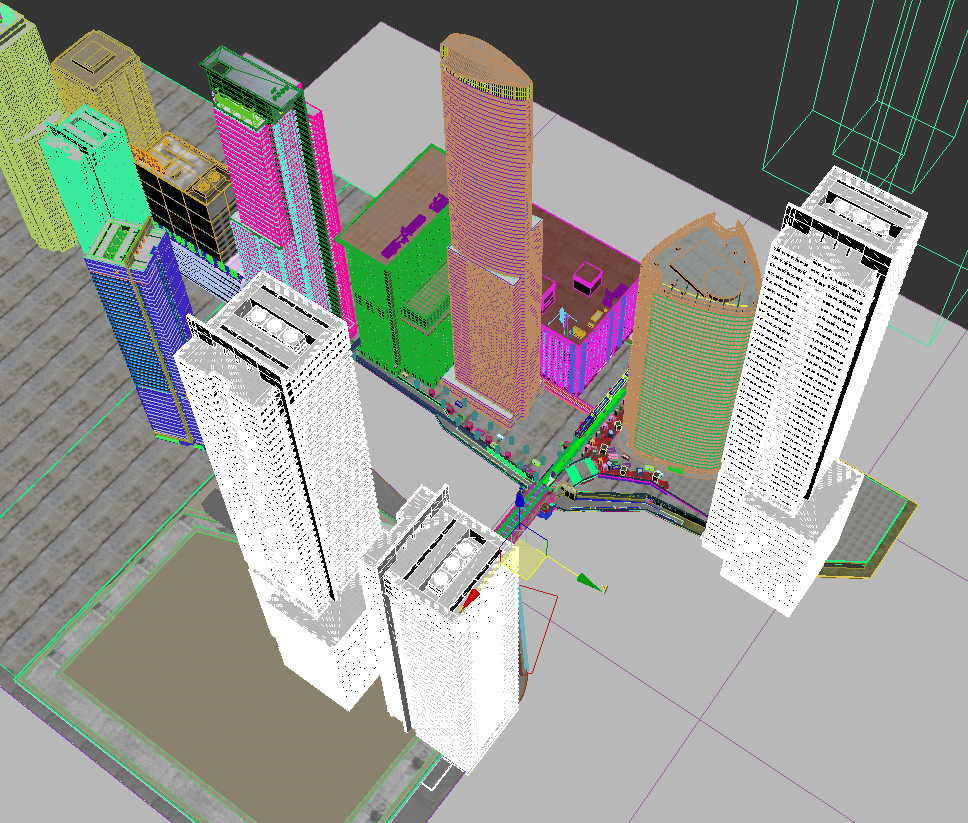
When starting a scene, I always create some simple blocks first, to visualize the amount of work I will need to do, and to check the initial lighting as well as the layout of the scene. It also helps me to relax before a pile of details are added in the future!

For the high-rise buildings, I used some models from Evermotion’s Archmodels vol. 181 to shorten the modeling time, and added my own details and textures to fit my needs. The low-rise buildings, traffic routes, and bridges have almost no models available, so I spent a lot of time modeling and texturing those myself. It was really a challenge without detailed references, and looking around on Google Maps was the only way to learn every corner of the street.

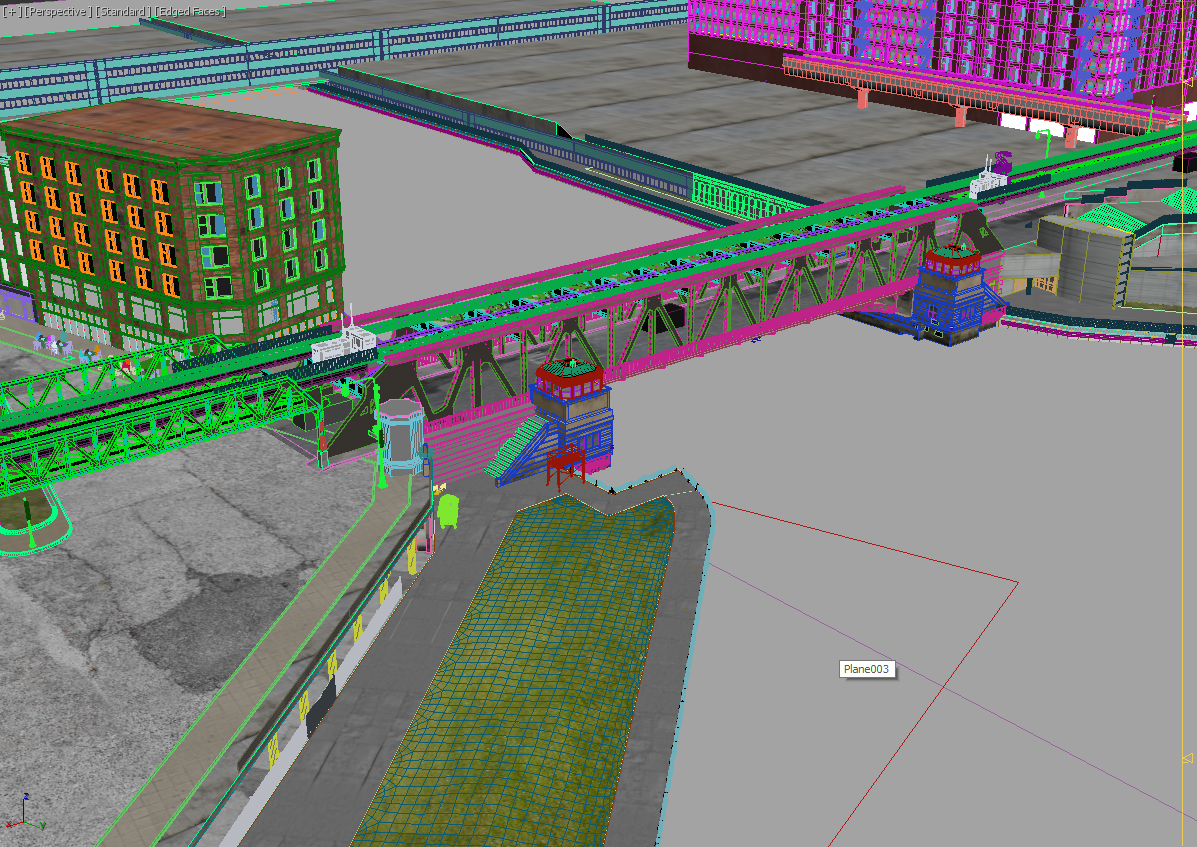
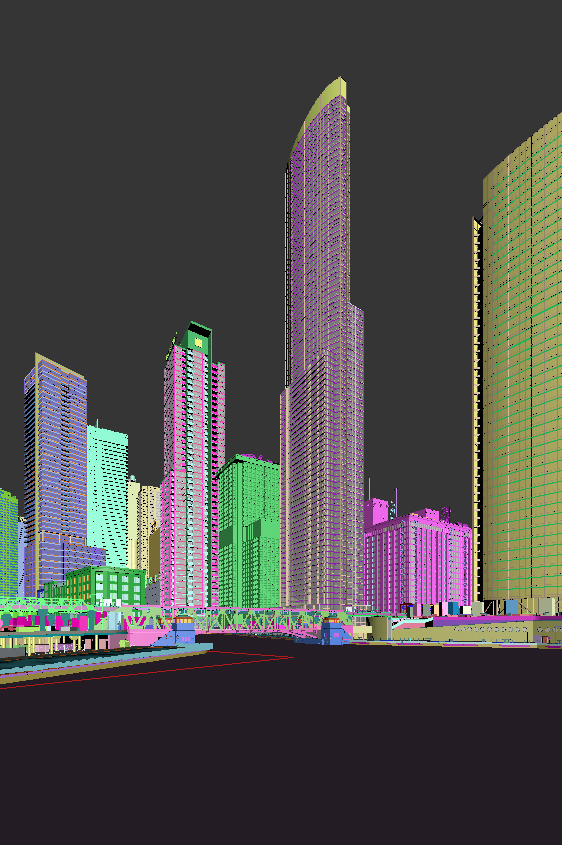
To prevent problems, I just work on the details that the camera will see – here are some screenshots of my scene being assembled:
When I felt that the model of the area itself was okay, I then added cars, street lights and trees to enhance the city vibes. For the cars I used the HD car models from Evermotion, and for the trees I used the Maxtree Plant Models Vol 9 library.
III- Lighting and Materials:
There are two types of lighting in this scene, the natural and the artificial. First, I simulated the evening light with just a simple HDRI, using one by Peter Guthrie (1957 Dusk Clear). The settings are all at defaults, and my camera only has some minor changes. This is my set-up:
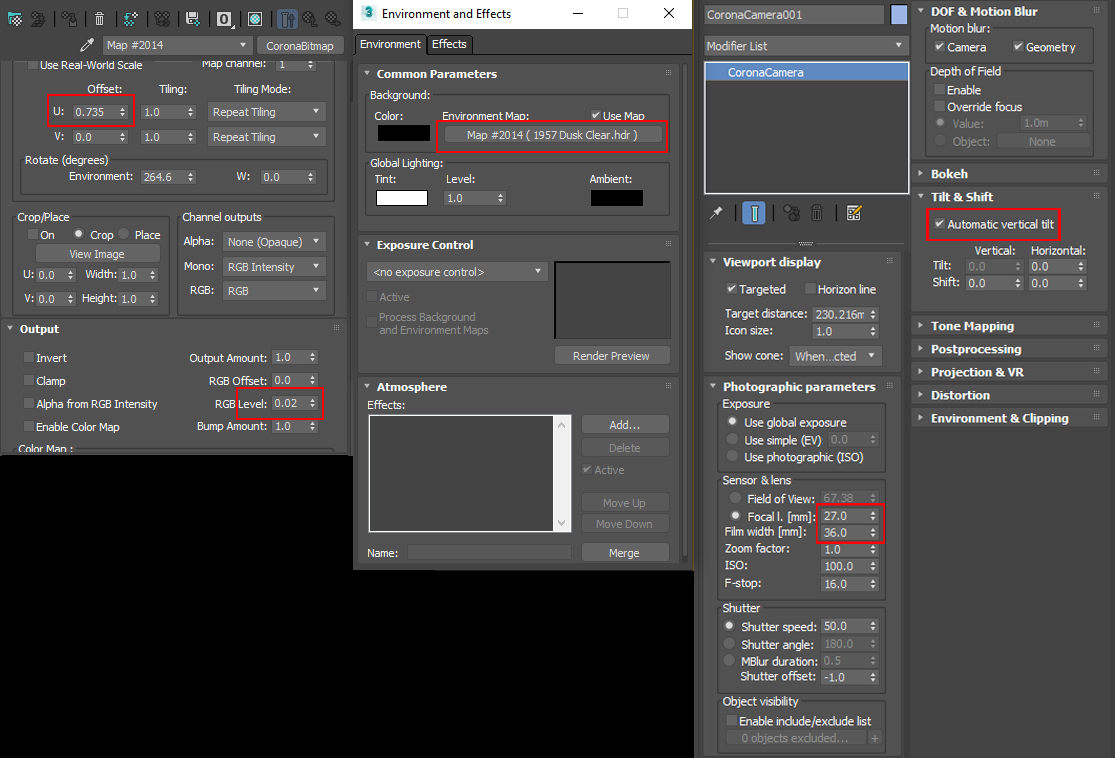
For the ambient light, I wanted it to be neutral so that I can check the model and materials more easily. I always set the light as simple as possible, and it’s best to stick to reality.
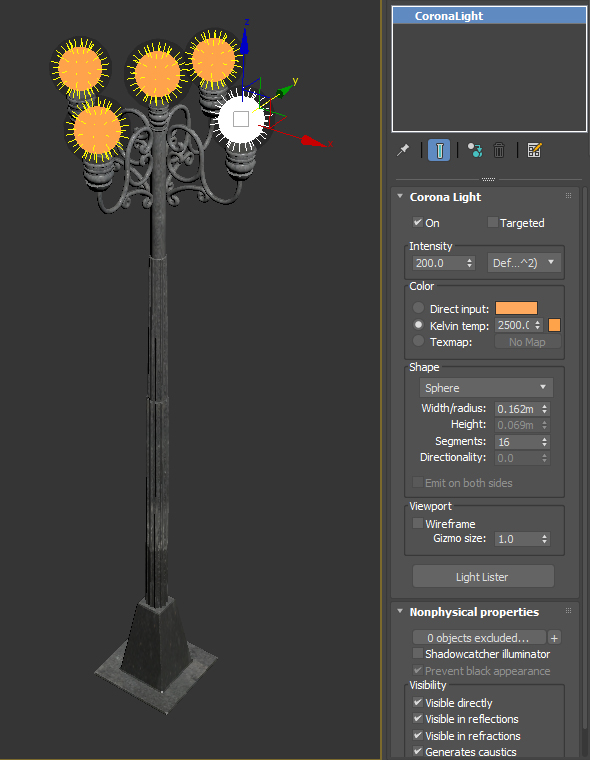
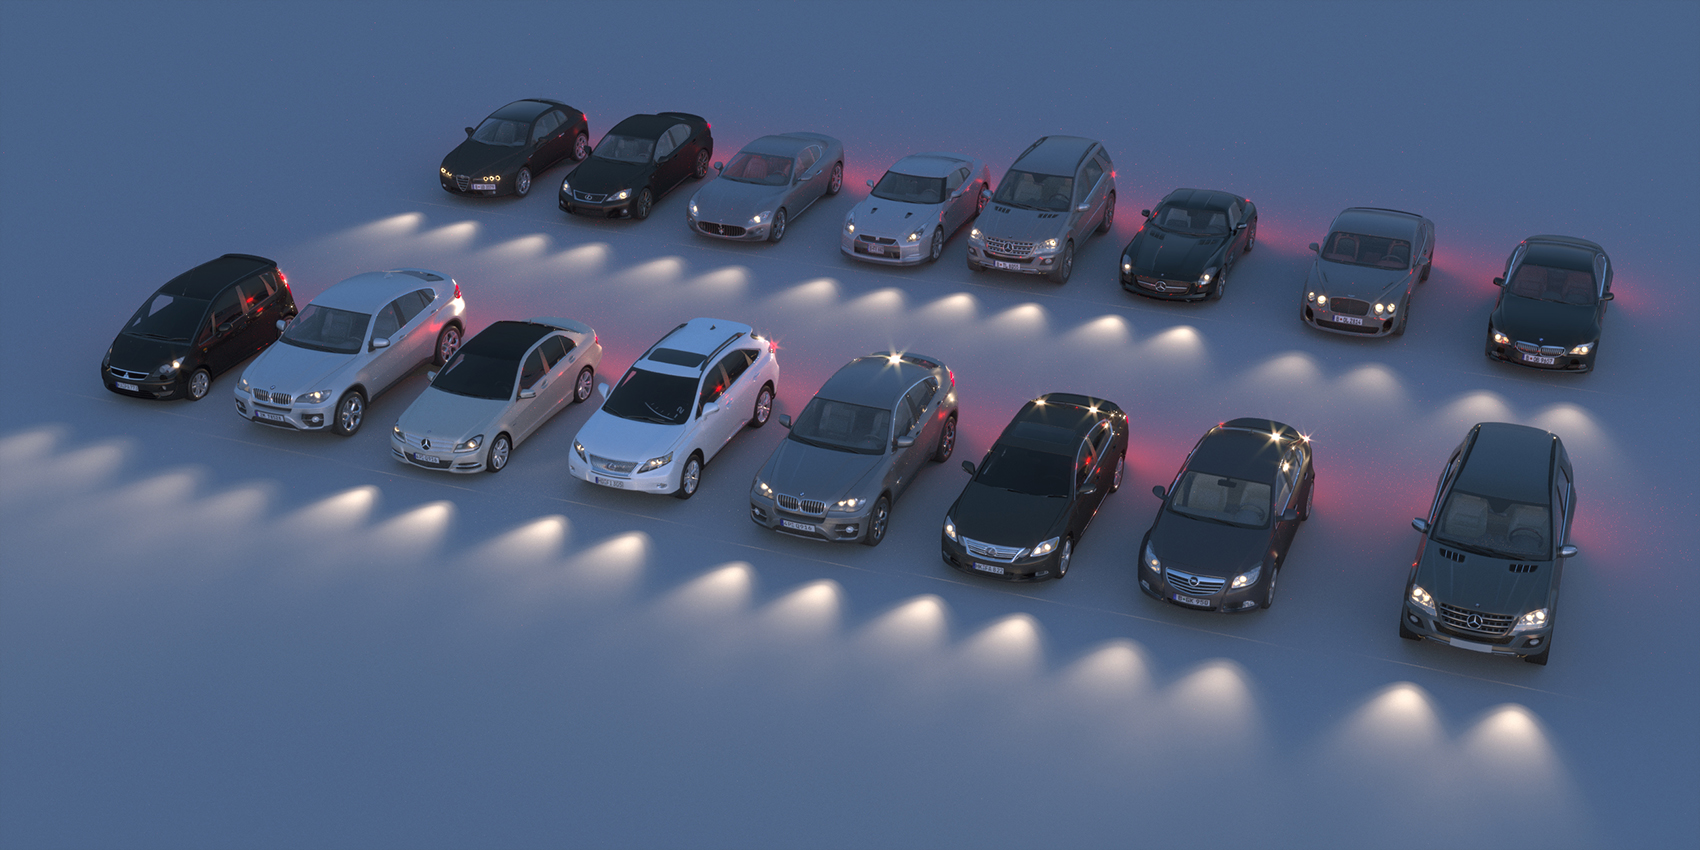
Moving on to the artificial lights, below is the lighting setup for the street lamps and car lights (for these, make the most of Instancing instead of copying when duplicating the lights, as it can help optimize your scenes):
I have two ways to create the interior lighting for high-rise buildings. For those buildings which are close to the camera, I distribute furniture models, blinds, and lights into the floors using iToo Forest Pack Pro.
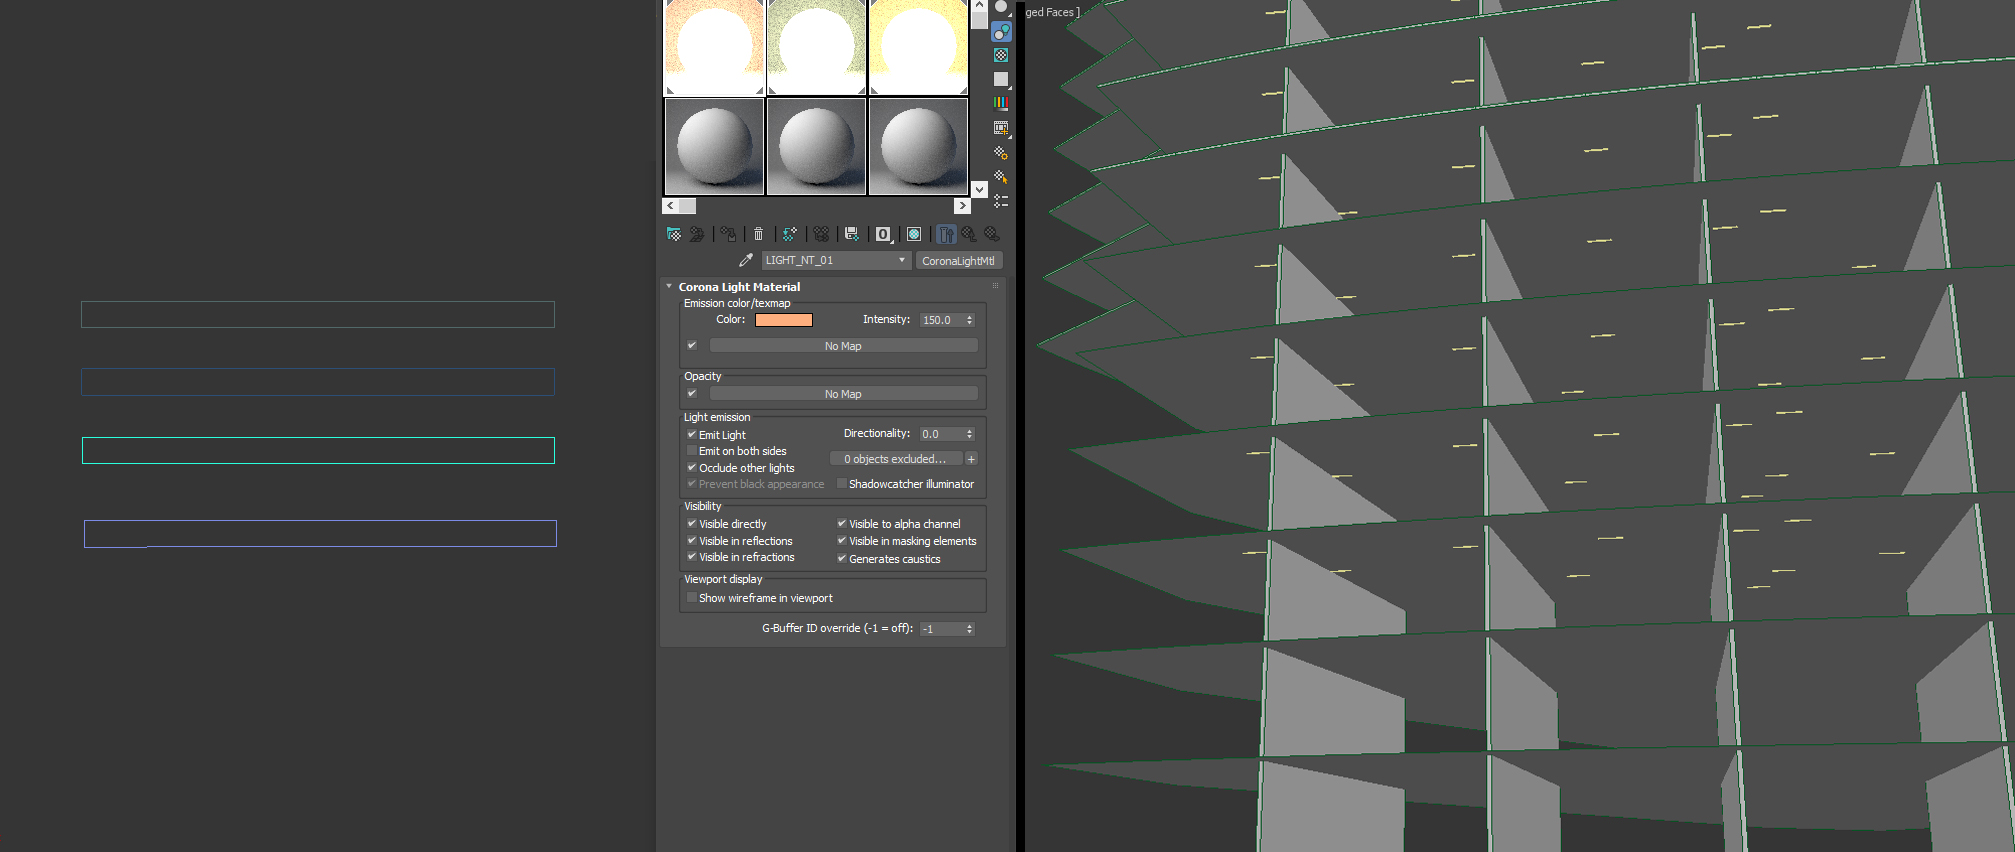
For those buildings that are farther away, I use a texture added to a CoronaLightMtl. If I distributed all the interiors of high-rise buildings with actual geometry and Forest Pack, then my computer RAM would not be enough! Forest Pack consumes quite a lot of memory so I want to use it only in the necessary areas.
You can see the Forest Pack guide on how to distribute the furniture tier-by-tier in this video:
Here are some of my furniture installations using Forest Pack:

I created 4 rectangular blocks corresponding to 4 CoronaLightMtls with different colors, and then I distributed them on each floor using Forest Pack again, and added a few disk-shaped CoronaLights so that the interior light will be a little random. High rise buildings have lots of floors, and there has to be a balance between repetition and variation, in order to capture the “rhythm” of each building.
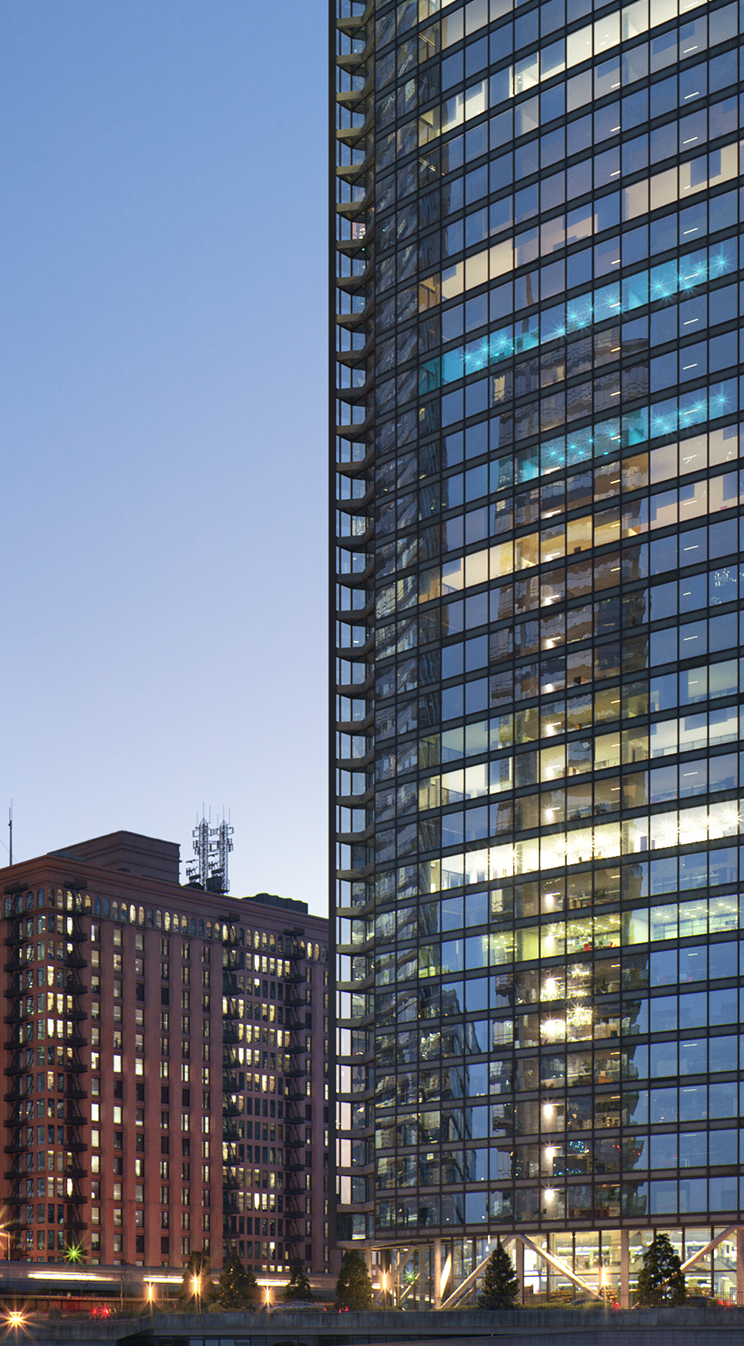
The glass material is also very important to create the atmosphere and rhythm of the building, so I also added a number of surrounding buildings to show up in the reflections:
This is the setup for my glass material:

And the result of the work on the building:
Now we need to complete the rest of the scene. For the river water, the material I set up is quite simple. I focused a lot on the texture of the river, mixing many images of different rivers in Photoshop to come up with my Displacement map and Normal map, as seen below:

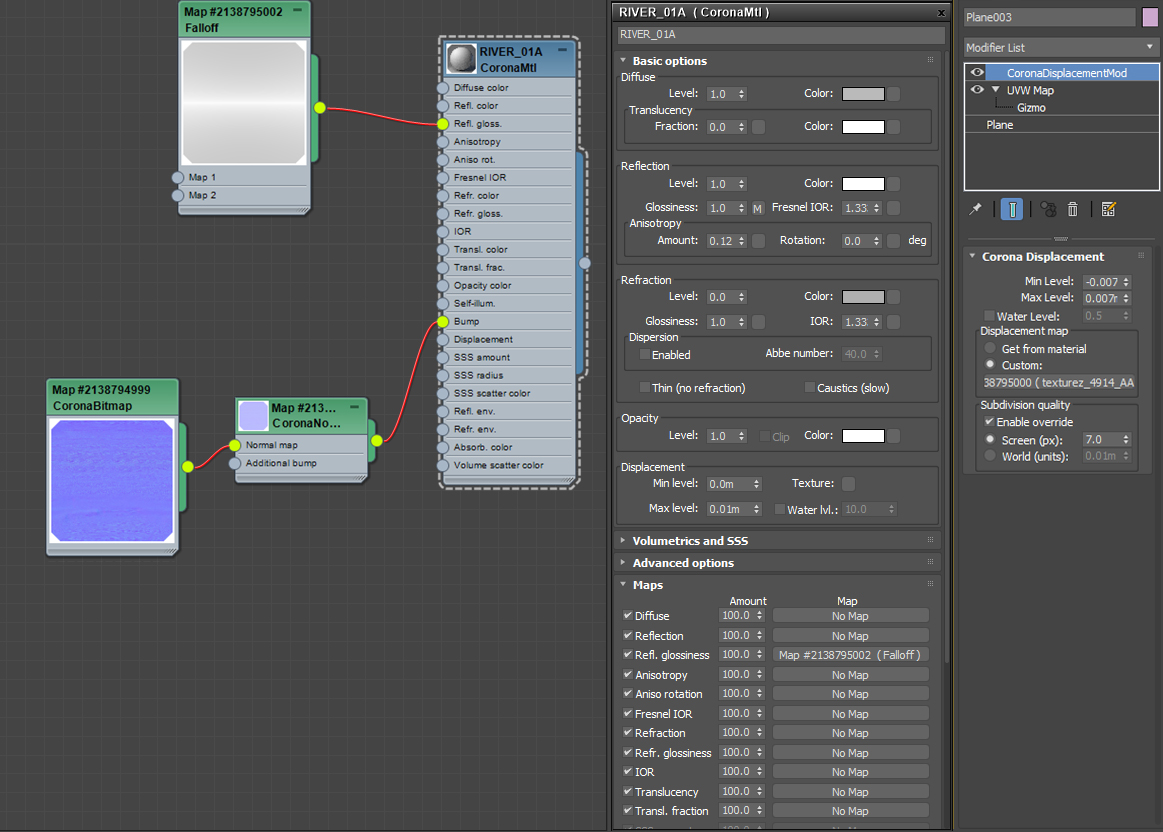
While it might be easier to achieve the results from the reflections on the water by post-processing it in Photoshop, I prefer full CGI. Actually, Corona supports users a lot, saves lots of time, and I like the way Corona’s lighting setup works. All that means I am very confident about the lighting.
The Bloom and Glare is also fast and efficient, so I don’t have to use much Photoshop. Below is the raw image in post, without any Bloom and Glare yet:

My personal approach is to create multiple versions of Bloom and Glare, which lets me be more flexible in post-production. For example, some areas need strong Bloom and Glare, such as the areas filled only with smaller lights, while other areas may need less intense Bloom and Glare. It mostly depends on your intentions. For this image, I created 3 different versions of the Bloom and Glare.
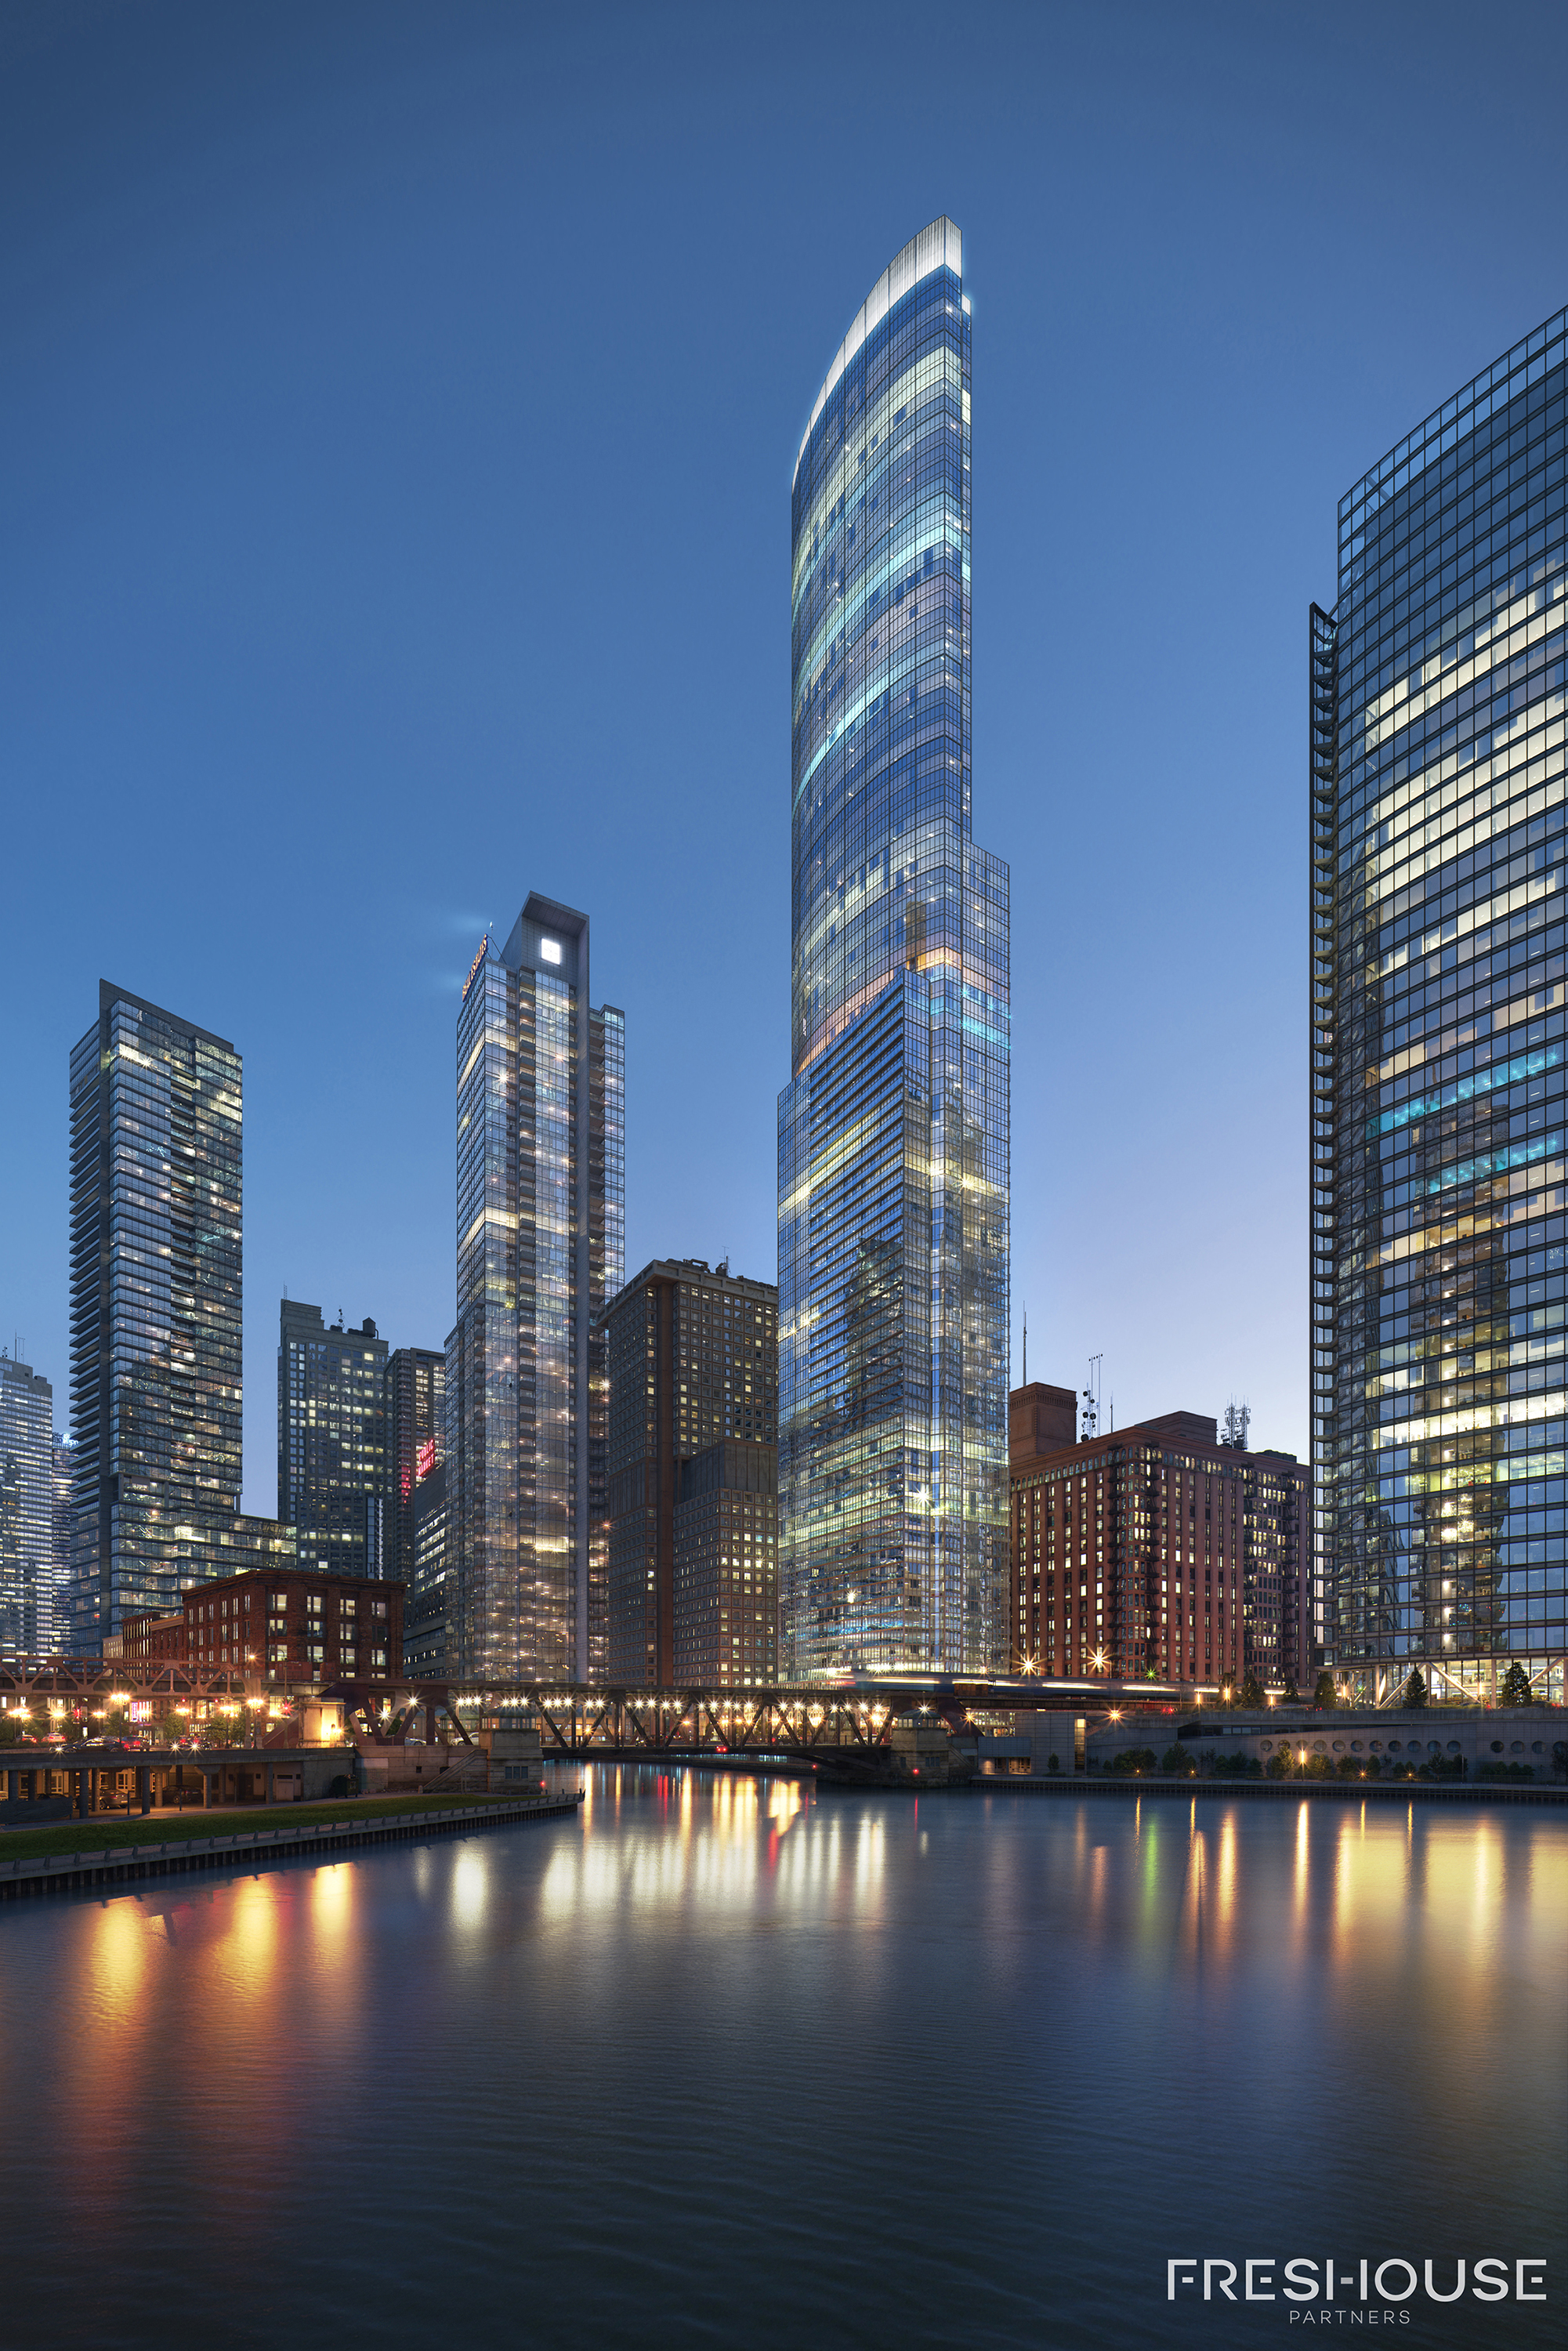
For the last steps, I balanced the color, adjusted the light, and I mainly use the Camera Raw plugin for Photoshop – simple and effective. Here is the final image:
You can see my progress through the video below in this VFX Breakdown video:
And here are some other images from this project, based on the techniques and the scene modeled above, but with some variations:


I hope you like these final renders, and that you’ve enjoyed this walk-through of my process in making them!
Lê Anh Nhân
Links:
Behance: behance.net/leanhnhan
Really good breakdown and outstanding images. Mostly I wonder how you populated the interior but you did it great. Deservedly on the start page. I just ask myself why did you smaller the world size. Thanks for sharing
The final glow in the picture and the finishing is just amazing. Amazing rendering.