
We are pleased to announce that Corona Renderer for Cinema 4D Beta 2 is released!
It has taken longer than we anticipated to move from Beta 1 to Beta 2, but it has been worth the wait! That largest part of the work on Beta 2 was the implementation of the Corona Material Node Editor, which adds a whole new way of working with materials (any materials, not just Corona Materials) and will revolutionize material editing in Cinema 4D.
But that’s not all! Some quick highlights are adding the Skin and Hair materials, a scene converter, the UVW Randomizer shader, the Corona Triplanar shader, advanced Bokeh effects, support for the native Layered shader, support for Cinema 4D R20, and more.
And of course there have been a huge number of bug fixes too.
NEW FEATURES VIDEO
Life is busy! If you don’t have time to read the blog, this video will give you a quick overview of the main new features in this release!
Read full details of what’s new in Corona Renderer for Cinema 4D Beta 2!
DOWNLOAD
If you want to get straight to the download, you will find the latest version at:
https://corona-renderer.com/download/
COMPANY NEWS
Just before diving in to the Beta 2 release, let’s pause and take a look at some major points from around the company.
THE TEAM
We are still hiring! We are also looking for Support Representatives, Project Managers, and Researchers, so if you are interested in working with us, please be sure to check our Jobs section regularly.
DEVELOPMENT
3ds Max plugin
Corona Renderer 3 for 3ds Max is on the way, with the Release Candidates already out as we work toward the final release. Don’t forget that Corona Renderer for Cinema 4D is based on the same core, so Beta 2 is already using the Corona Renderer 3 core!
Over on Max, we’ve added NVIDIA’s GPU Optix denoising, which lets you use denoising during Interactive Rendering, optimized memory usage, and improved displacement (so you get better quality with existing settings, or you can save up to 50% memory by lowering the displacement quality settings but get the same quality result).
Check out what is happening over on 3ds Max on our roadmap.
Corona Renderer for ARCHICAD
Back when Beta 1 was released, we mentioned that we were doing some test integrations of Corona Renderer in another application – since then, testing has gone well, and we’ve been able to reveal that this is an integration of Corona Renderer for ARCHICAD.
We’ve already got a lot up and running, including Interactive Rendering, Corona Materials, LightMix, and more. We’ll publish more news about this as soon (e.g. once you have access to a public alpha).
Corona Renderer for Cinema 4D
With Beta 2 complete, we’re happy to announce that we have set the expected release date for Corona Renderer for Cinema 4D! If all goes to plan, you can expect the first commercial release around January 7th 2019 – more on the roadmap!
BETA 2 QUICK FACTS
Now back to the star of today’s show! Here is the overview of the changes since Beta 1:
New Additions
- Cinema 4D R20 fully supported
- Added the Corona Node Material Editor
- Added Skin and Hair materials
- New Motion Blur implementation
- Added Scene Converter
- Added implicit conversion for many lights and shaders from Cinema 4D and V-Ray
- Added UVW Randomizer and Triplanar shaders
- Added advanced bokeh effects
- Added supports for denoising and noise and time limit in Team render
Improvements
- Improved responsiveness of material previews
- A LOT of bug fixes!
And now all the new features and improvements in detail!
WHAT’S NEW
Corona Node Material Editor
Cinema 4D R20 introduced its own node materials, but these serve a very different purpose than the Corona Node Material Editor – the native node materials are a new type of material, a node material, and you “go inside” each of those materials separately to create and edit them.
The Corona Node Material Editor serves a very different function though –
It is a global or world view of materials
Our Node Material Editor is a way to view any of your scene materials – as many as you like at once – and then create or edit them using visual nodes, which greatly simplifies material creation.
You can use views to organize your materials
You can create as many views as you like, for example one view may contain all the wood materials, another all the metal materials, and so on – although how you use views is entirely up to you!
It can handle almost any sort of material
You don’t need to create a special material to use the Corona Node Material Editor. This means that any existing materials can simply be dropped into it, to take advantage of this visual way of working with them.
It also works with native Cinema 4D materials and shaders, Substance shaders, etc.
You can connect one shader to any number of channels, or any number of materials
Natively in Cinema 4D, if you attach a Noise map to the Diffuse for example, then want to add the same Noise map to the Bump, you end up with two separate Noise maps and have to edit or adjust both whenever you want to change them.
The same applied if you wanted to connect a shader to more than one material – you would end up with separate copies of the shader, and would have to modify the parameters in two (or more) places to keep things matching.

Using the Corona Node Material Editor, you can now connect one shader to as many channels – and to as many materials – as you like; change that one shader, and you affect all the channels and materials it is connected to (behind the scenes, this is done using a new Corona Shared shader, but you never need to know or think about that and can just draw your connections to hook up your shaders any way you like!)
It works with the native Layer shader
The native Layer shader is a bit of a different animal from most shaders – for one thing, the number of connections to it can change depending on how many layers you want, and its UI changes accordingly too.
It took some clever work, but we have the native Layer shader working perfectly in the Corona Node Material Editor, including being able to use Folders!
And you can use the native Layered material too – and mix and match all this functionality in any way you want.
You can edit in the Corona Node Material Editor, or in the native C4D material editors
You can swap back and forth between how and where you edit your materials, without having to worry. It’s up to you how you want to work with your materials!
Lots of functionality to ensure ease of use
As you’d expect from Corona Renderer, there are lots of features to make sure your workflow runs smoothly, such as auto-sorting of the node layout, select by selection box, CTRL + Drag to copy the selected nodes, and more.
It is not dependent on which version of Cinema 4D you are running
Since the Corona Node Material Editor is part of Corona Renderer, it will run in any version of Cinema 4D that supports Corona Renderer (R19, R18, etc.)
The Corona Hair and Skin Materials
Skin is one of the most complex materials to render, with many properties unique to skin that cannot be covered in an all-purpose shader. The Corona Skin Material shader has been added, and it makes it easy to control and adjust the look of the skin, and renders fast and efficiently with realistic results. Even if you have never tried rendering realistic skin before, you’ll find it easy to use and will get great results with the default settings.
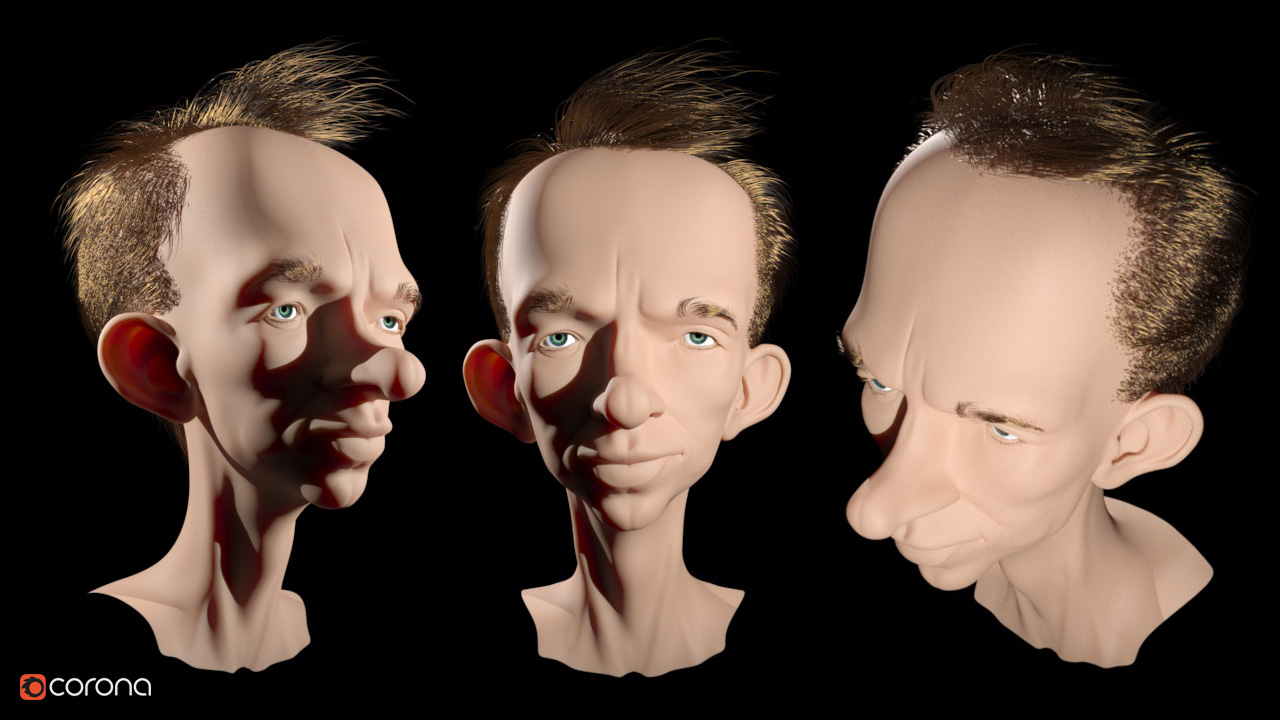
Hair has particular unique qualities that also need a dedicated shader. The Corona Hair Material shader is physically accurate, and handles the unique highlights and transmission properties that hair requires, while still rendering quickly and giving you the ease of use in controlling the material that you expect from Corona Renderer.
Cinema 4D has a somewhat unique approach to hair, in that the Cinema 4D Hair Material actually creates the hair geometry (rather than separate geometry creation and shading). To be able to render hair at the moment, you’ll need to use both the Cinema and Corona Hair materials together – this will be improved in the next release, when we will also fully support the Cinema 4D hair material by internally automatically converting it to the Corona Hair Material.

New Motion Blur implementation
A new implementation of Motion Blur has been added, which works with both Interactive and offline rendering.

This new implementation was required, as the old version was the source of some instability in Corona Renderer.

This new implementation also properly supports simulation, and the motion blurring of instanced objects is greatly improved.
Scene Converter, and Implicit Conversion
Implicit conversion allows Corona to render non-Corona materials and lights, without the need to convert them first. There is also a Scene Converter included, which will carry out explicit conversion (that is, permanently change a non-Corona material or light into a Corona one.)
For explicit conversion, we support the conversion of standard Cinema 4D materials and lights, and the conversion of the following V-Ray items – Standard, Advanced, Displacement and 2-Sided V-Ray materials (V-Ray must be installed); Physical Sun + Sky, Area, Spot, and Omni V-Ray lights; and AdvBitmap and PowerShaders V-Ray shaders. Note – to be able to convert a scene from V-Ray, you will have to have V-Ray installed for Cinema 4D.

Of course, a perfect conversion is nearly impossible. For example, Cinema 4D has lights that are not physically based, and when you use those non-physical options conversion is difficult because Corona Renderer doesn’t have counterparts for them. The same applies to certain parameters in some materials, and so some scenes may have quite different lighting after conversion because some materials that should be transparent may be opaque, for example.
The main purpose of the explicit scene converter is to help you migrate your scenes to Corona Renderer so that you don’t need to set up your materials and lights from scratch and instead need to only tune the parameters after conversion.
For implicit conversion, the main purpose is to let you check how the scene will look in Corona Renderer without having to actually convert it (it will give you an idea of what will convert perfectly, and what might need some tweaking after conversion).
While no conversion will ever be 100% identical, we will be continually improving conversion based on user feedback!
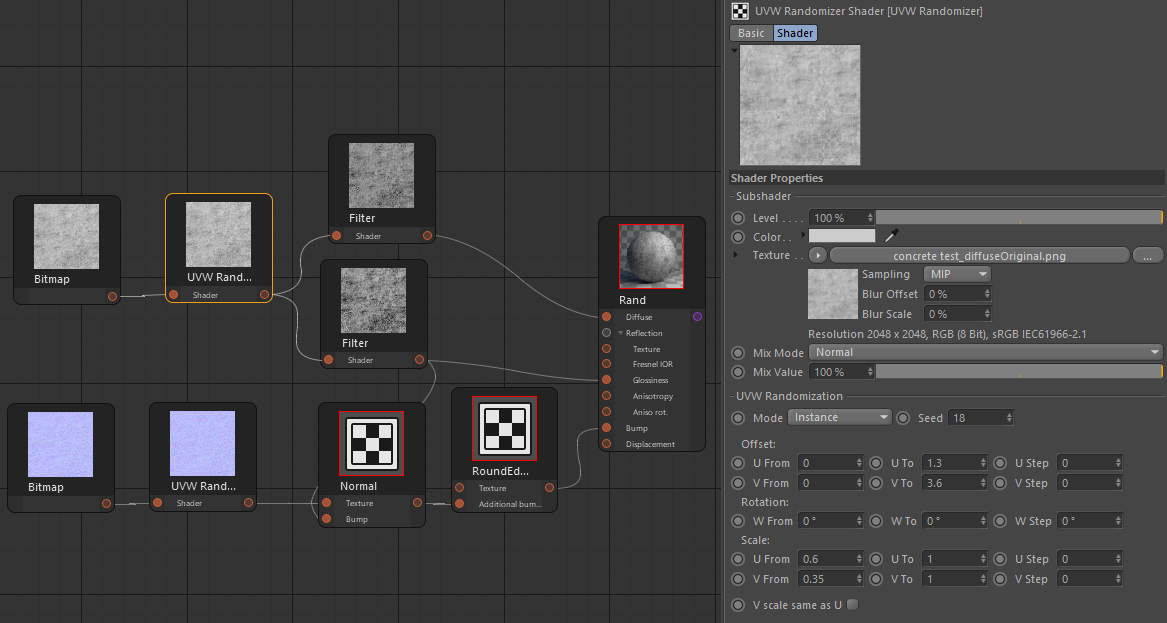
UVW Randomizer and Triplanar shaders
The Corona UVW Randomizer map allows applying random offset / rotation / scale to textures and maps applied to different objects. For example, you can randomize a wood texture applied to a set of planks so that each has a different look in your final render.
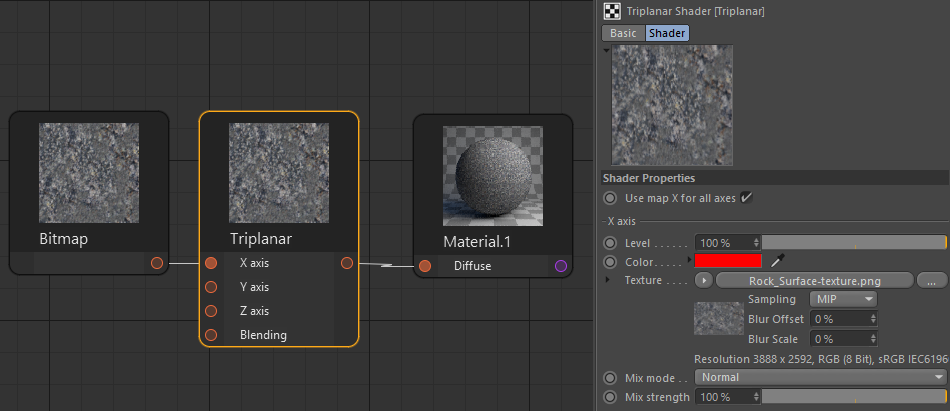
Triplanar mapping is useful for applying textures to objects without having to explicitly unwrap their UVWs. It prevents visible seams by introducing blending between the applied maps, and it does not produce stretching, which is characteristic to standard planar mapping.
In the image below, this free model by Rigsters was downloaded from Sketchfab. On import, as expected it has no UV mapping, and applying a bitmap gives a solid color. Applying a simple default UV tag does not help, as it gives a distorted texture. Rather than come up with a good UV unwrap for the object, all we need to do is apply the Corona Triplanar map (without ever needing to apply a UV Tag at all):

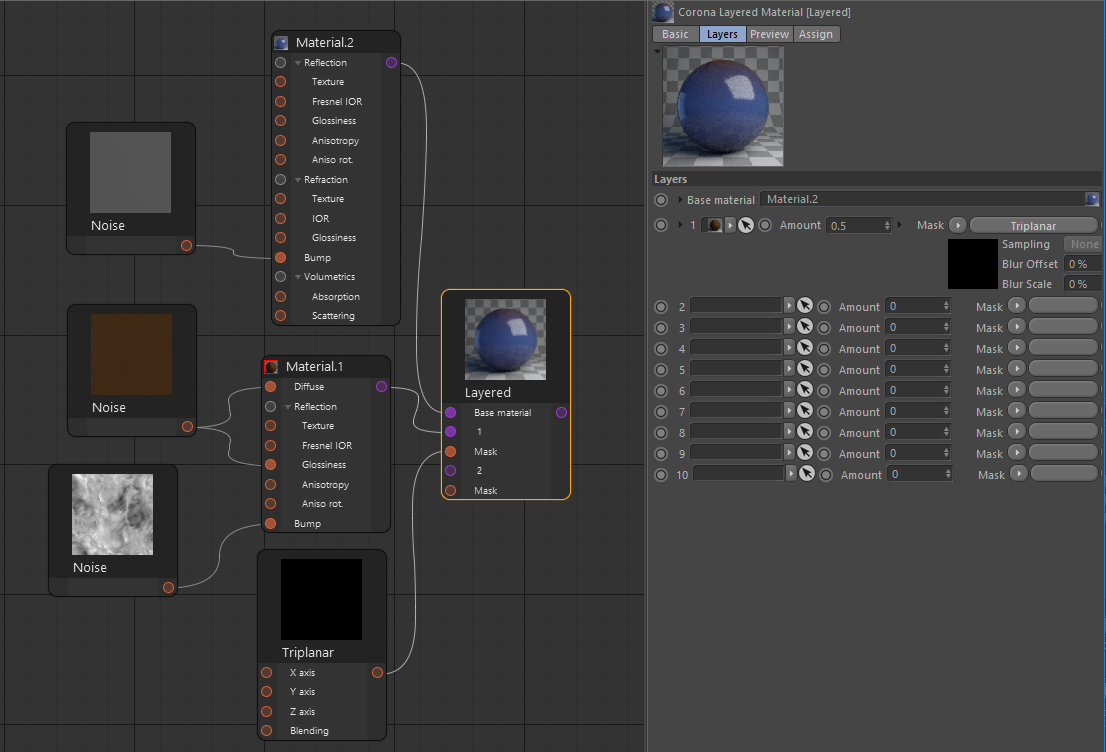
You can also be creative with the Triplanar map – in the example below, Triplanar was used as a mask between two separate materials in the Layer shader, so that vertical surfaces appear like ice, while flat surfaces have a more earth or mud appearance, all without having to do any sort of UV mapping:

New Bokeh Effects
The Corona Camera now adds advanced Bokeh controls for Center Bias, Vignetting and Anisotropy.

Positive values of Center Bias expand the bokeh into rings, while negative values compress the bokeh highlights.
Positive values of Vignetting give a harder edge to the Bokeh toward the outside of the image, while negative values create a harder edge to the Bokeh highlights toward the center of the image.
Anisotropy affects the aspect ratio of the bokeh effect, with values above 0 stretching it horizontally, and below 0 stretching it vertically.
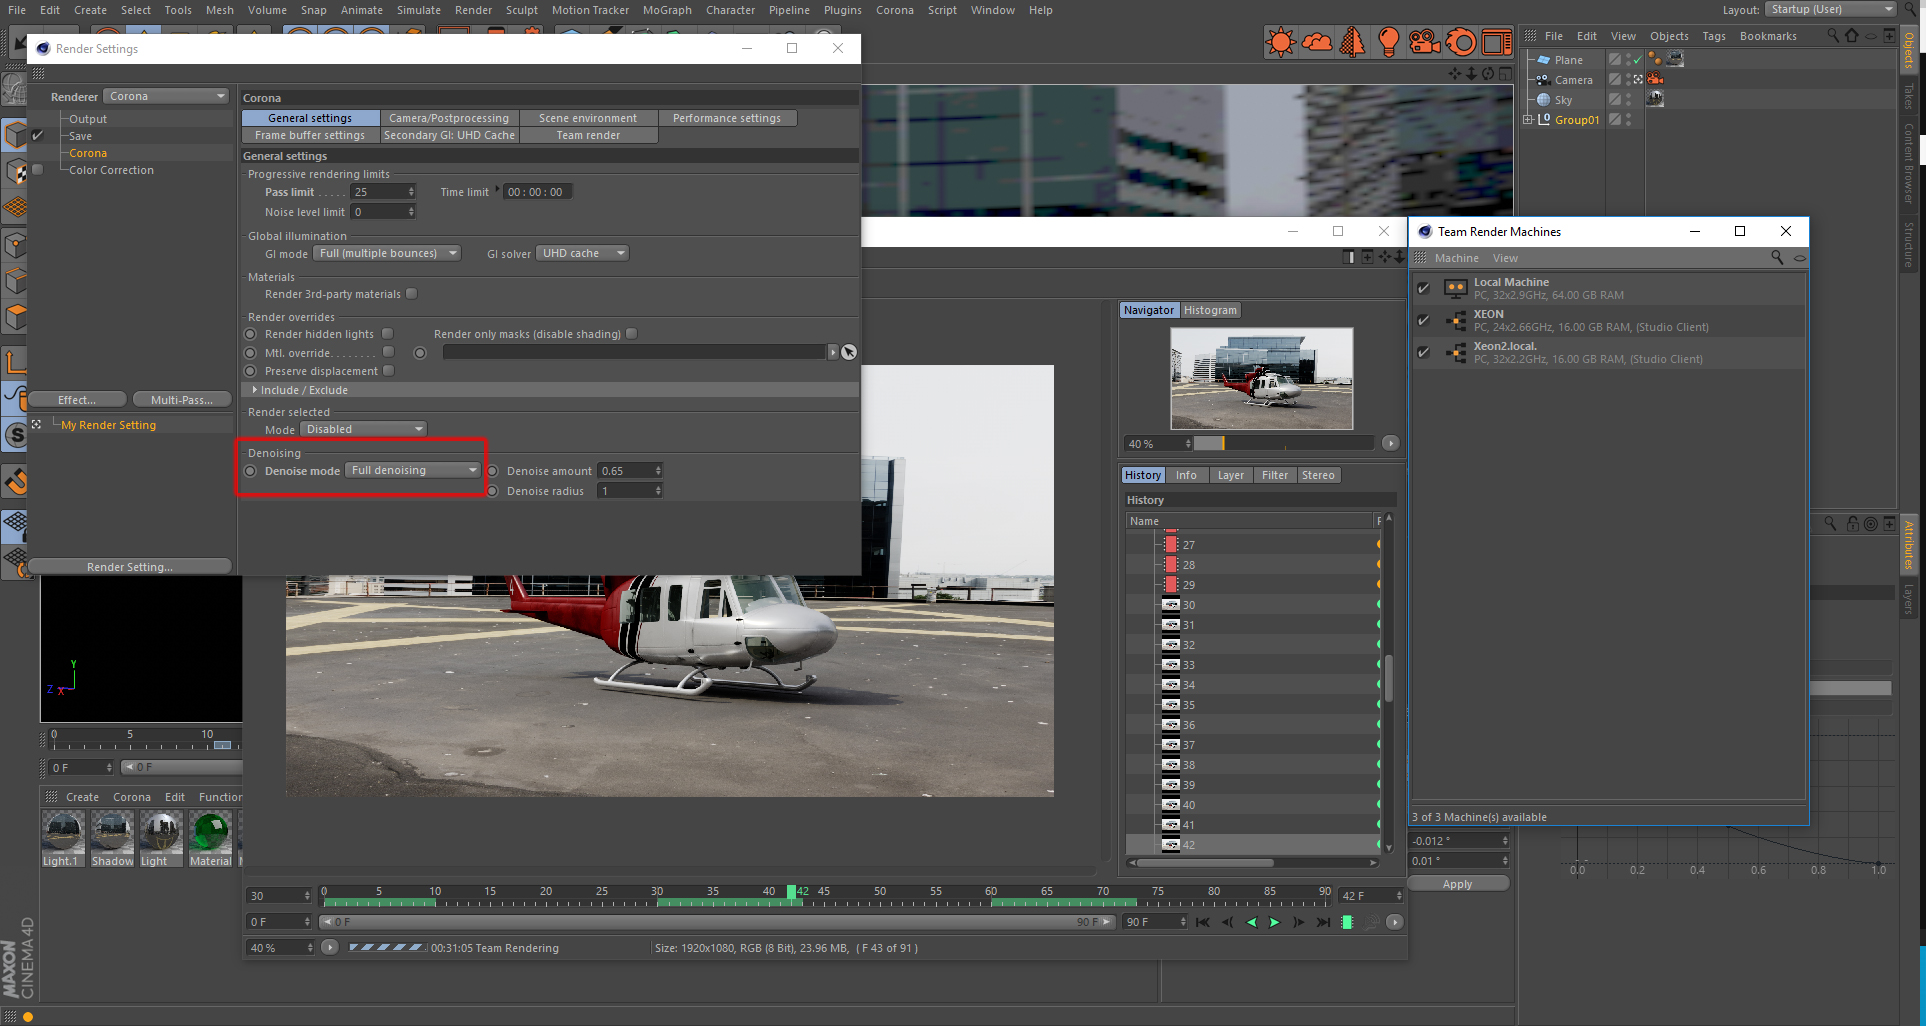
Team Render Improvements
Team Render now supports Denoising, and stopping by Noise and Time limits.
Support for C4D R20
Both Windows and macOS installers now include a version of Corona Renderer for Cinema 4D R20, and it is automatically detected during installation so you can easily start using Corona Renderer without any problem.
Note – there is no API from Maxon for R20’s Node Materials yet, so these will not render using Corona Renderer at this time.
Bug Fixes
And of course there have been a great many bug fixes too (you can check the Beta 2 daily build changelog to see a complete list.)
DOWNLOAD LINK (again)
The top of the page is a long, long way away! You might get dizzy looking up that far, so to to save you going all the way back up there, here’s the download link again:
https://corona-renderer.com/download/
WHAT’S NEXT
The final release date has been set for January 7th 2019, so now we are moving forward with that in mind. The aim will be to add the last remaining features, and then do a lot of testing to ensure stability. No additional Beta version is expected, so the next release will be the Corona Renderer 3 for Cinema 4D daily builds.
You’ll notice that the naming will reflect the Corona Renderer core, so there won’t be a “Corona Renderer 1 for Cinema 4D” because the core is already at version 3. This will avoid any confusion about Max (or any other software) having a “newer” version than Cinema 4D.
As always, follow our progress toward the final release on the Corona Renderer for Cinema 4D roadmap.
We’d like to say a huge thank you to all of you in our community for your testing and feedback; you are all part of what makes Corona Renderer what it is today – and what it will be in the future!
Nik, Ales, Cestmir, and the Corona Team!
Hey Guys, i d like to know if its possible to make the glossiness reflection slider useable when i have a bitmap loaded , would be very handy to dial in the amount of glossiness directly rather then tune the levels on the bitmap itself .. thank you very much for all the work you put into this very nice renderer 😉 with best regards , tom.
Hi Tom! Using a bitmap will always override the slider, sorry – you can however using the Corona Color Correct node rather than have to adjust and resave the bitmap, to make adjustments to brightness, contrast etc and so control the overall glossiness effect from the map, I hope this helps! Thanks! Tom
Hi.
This looks amazing. Does Corona for C4D supports Motion Blur with Hair Dynamics?
Thanks
Hi Chris! We don’t support motion blur with hair dynamics at this time, but it’s something we believe is possible so hopefully will be added at some point (though at the moment we can’t say when that might be – however, you can always track updates on the daily builds section of the forum at https://corona-renderer.com/forum/index.php?board=40 and plans over on the roadmap at https://trello.com/b/dgI8vjDb/corona-road-map-cinema-4d if you want to keep an eye out for when we have it in the plan). Thanks! Tom
Hi Tom.
Thanks for the answer. I love corona and will be waiting for this feature for sure.
This is really awesome!
I came across Corona on a forum randomly while searching for an alternative solution for Octane, because as a student, I can only access to my school’s iMacs, which doesn’t have N card GPUs. Started using Corona from alpha 6 if I remember correctly, and my skills in motion graphics grew with Corona (literally!) It means a lot to me seeing my favorite render engine getting better every day! Hope you guys are also enjoying making this as much as I enjoy using it!
A few suggestions for the team regarding the distribution of Corona next year if I may:
1. Do you guys plan on doing any PR campaign to raise awareness of Corona? Like I said, I came across it randomly on a forum. I have been recommending it to everyone near me but I think it would be even better if there’s more PR action or just words spreading about Corona! Do some call for entries! Pay attention to #coronarender or something~
2. I see you guys have the educational licensing option for 3ds Max. I just hope that it will be the same floating license for c4d too because it is AWESOME!
Awesome! This is huge
Huge news, I’ve been waiting for that for years.
Althought I have a question, does render node require team render to work ? To simplify the question, can I work in c4d prime on 1 pc and render on another pc with render node installed ?
Yes, it requires Team Render to work, because the second machine can only be rendering using Cinema 4D Client (if a full version of Cinema 4D is opened at the same time as another full version of Cinema 4D, both machines would require their own separate full Corona license). The only way to control Cinema 4D in Client mode is through Team Render, either from within a full version of Cinema 4D or from within the Team Render Server. Thanks!
Dear Szymon, how is your experience with CD4 Prime and Corona. We want to use it for small interior scenes snd product vizualisations.