Davide Calabrò is a freelance 3D artist, based in the Netherlands. We spoke with him about what went into the making of his amazingly detailed image, “5th Avenue – Witness of…”
Read about the making of “5th Avenue – Witness of…”
First, I’d like to thank Corona for inviting me to the blog authors club, it’s an honor for me to make this little contribution to the CG community!
Career
My name is Davide Calabrò, I’m 32 and I’ve been working in 3D and visualization since 2013. Before that time, I used Revit, making plans and renderings inside that software, and it was thanks to this experience that I started to get interested in the wider world of the CG community.

I started by doing the Masterclass at State of Art Academy, which gave me the basic knowledge I needed to work with the dark secrets of 3ds Max and V-Ray. Step by step I began working as a freelancer for Italian architectural companies and the real estate market, and shortly thereafter, for international clients too.
All these experiences pushed me to face new challenges and reach new goals; so, after 1 year of experience, I decided to further extend my knowledge and skills, and I moved to the Netherlands, where I still work today. This shift was fundamental for me, giving me the opportunity to improve, discover new potential, and to work with highly experienced people.
Up to now I’ve been working for an International architectural firm and also freelancing. For the last couple of years, as much as work permits, I’ve been constantly taking part in various CG events, like Academy days and Chaos Group events.
Discovering Corona Renderer
At the beginning of my career, I always used V-Ray as my only render engine. Then in the last 2 years, I was attracted to Corona Renderer and the potential of it. I started to test it personally and I was positively impressed.
After having experienced it, I decided to create my first image in Corona, based on my trip to Zanzibar, with the intention of diving more deeply into the technicalities of using the engine. You can see the final image below:

After the positive experience working on this image, I decided to put my skills into play with another image, as you will soon find out more in detail!
Inspiration
Normally, before starting a personal work or commission, I always look for photographic references, both as inspiration and as a guide to obtain a more realistic result.
A few of my favorite Photographer/digital artist are: Fernando Guerra, Jason Hawkes, Iwan Baan, and Hufton and Crow; a few of my favorite digital graphic artists are Michal Karcz and Simon Stålenhag.
One thing I had already thought about creating was a view with a big road in the front. Thinking more about what would be the right subjects for my next work, I started research into historical events from the last few years. From that, I got the idea to base the image in America, on one of most famous streets of New York, and this became the subject of the image.
However, I did not want to stop here, so I tried to organize and design the scene based on the idea that a crime had just happened at the time the photo was taken. I also wanted to create a particular kind of atmosphere, to give the work a more contemporary and dramatic character, based on the attacks that New York has had to face.
All those ideas lead to….
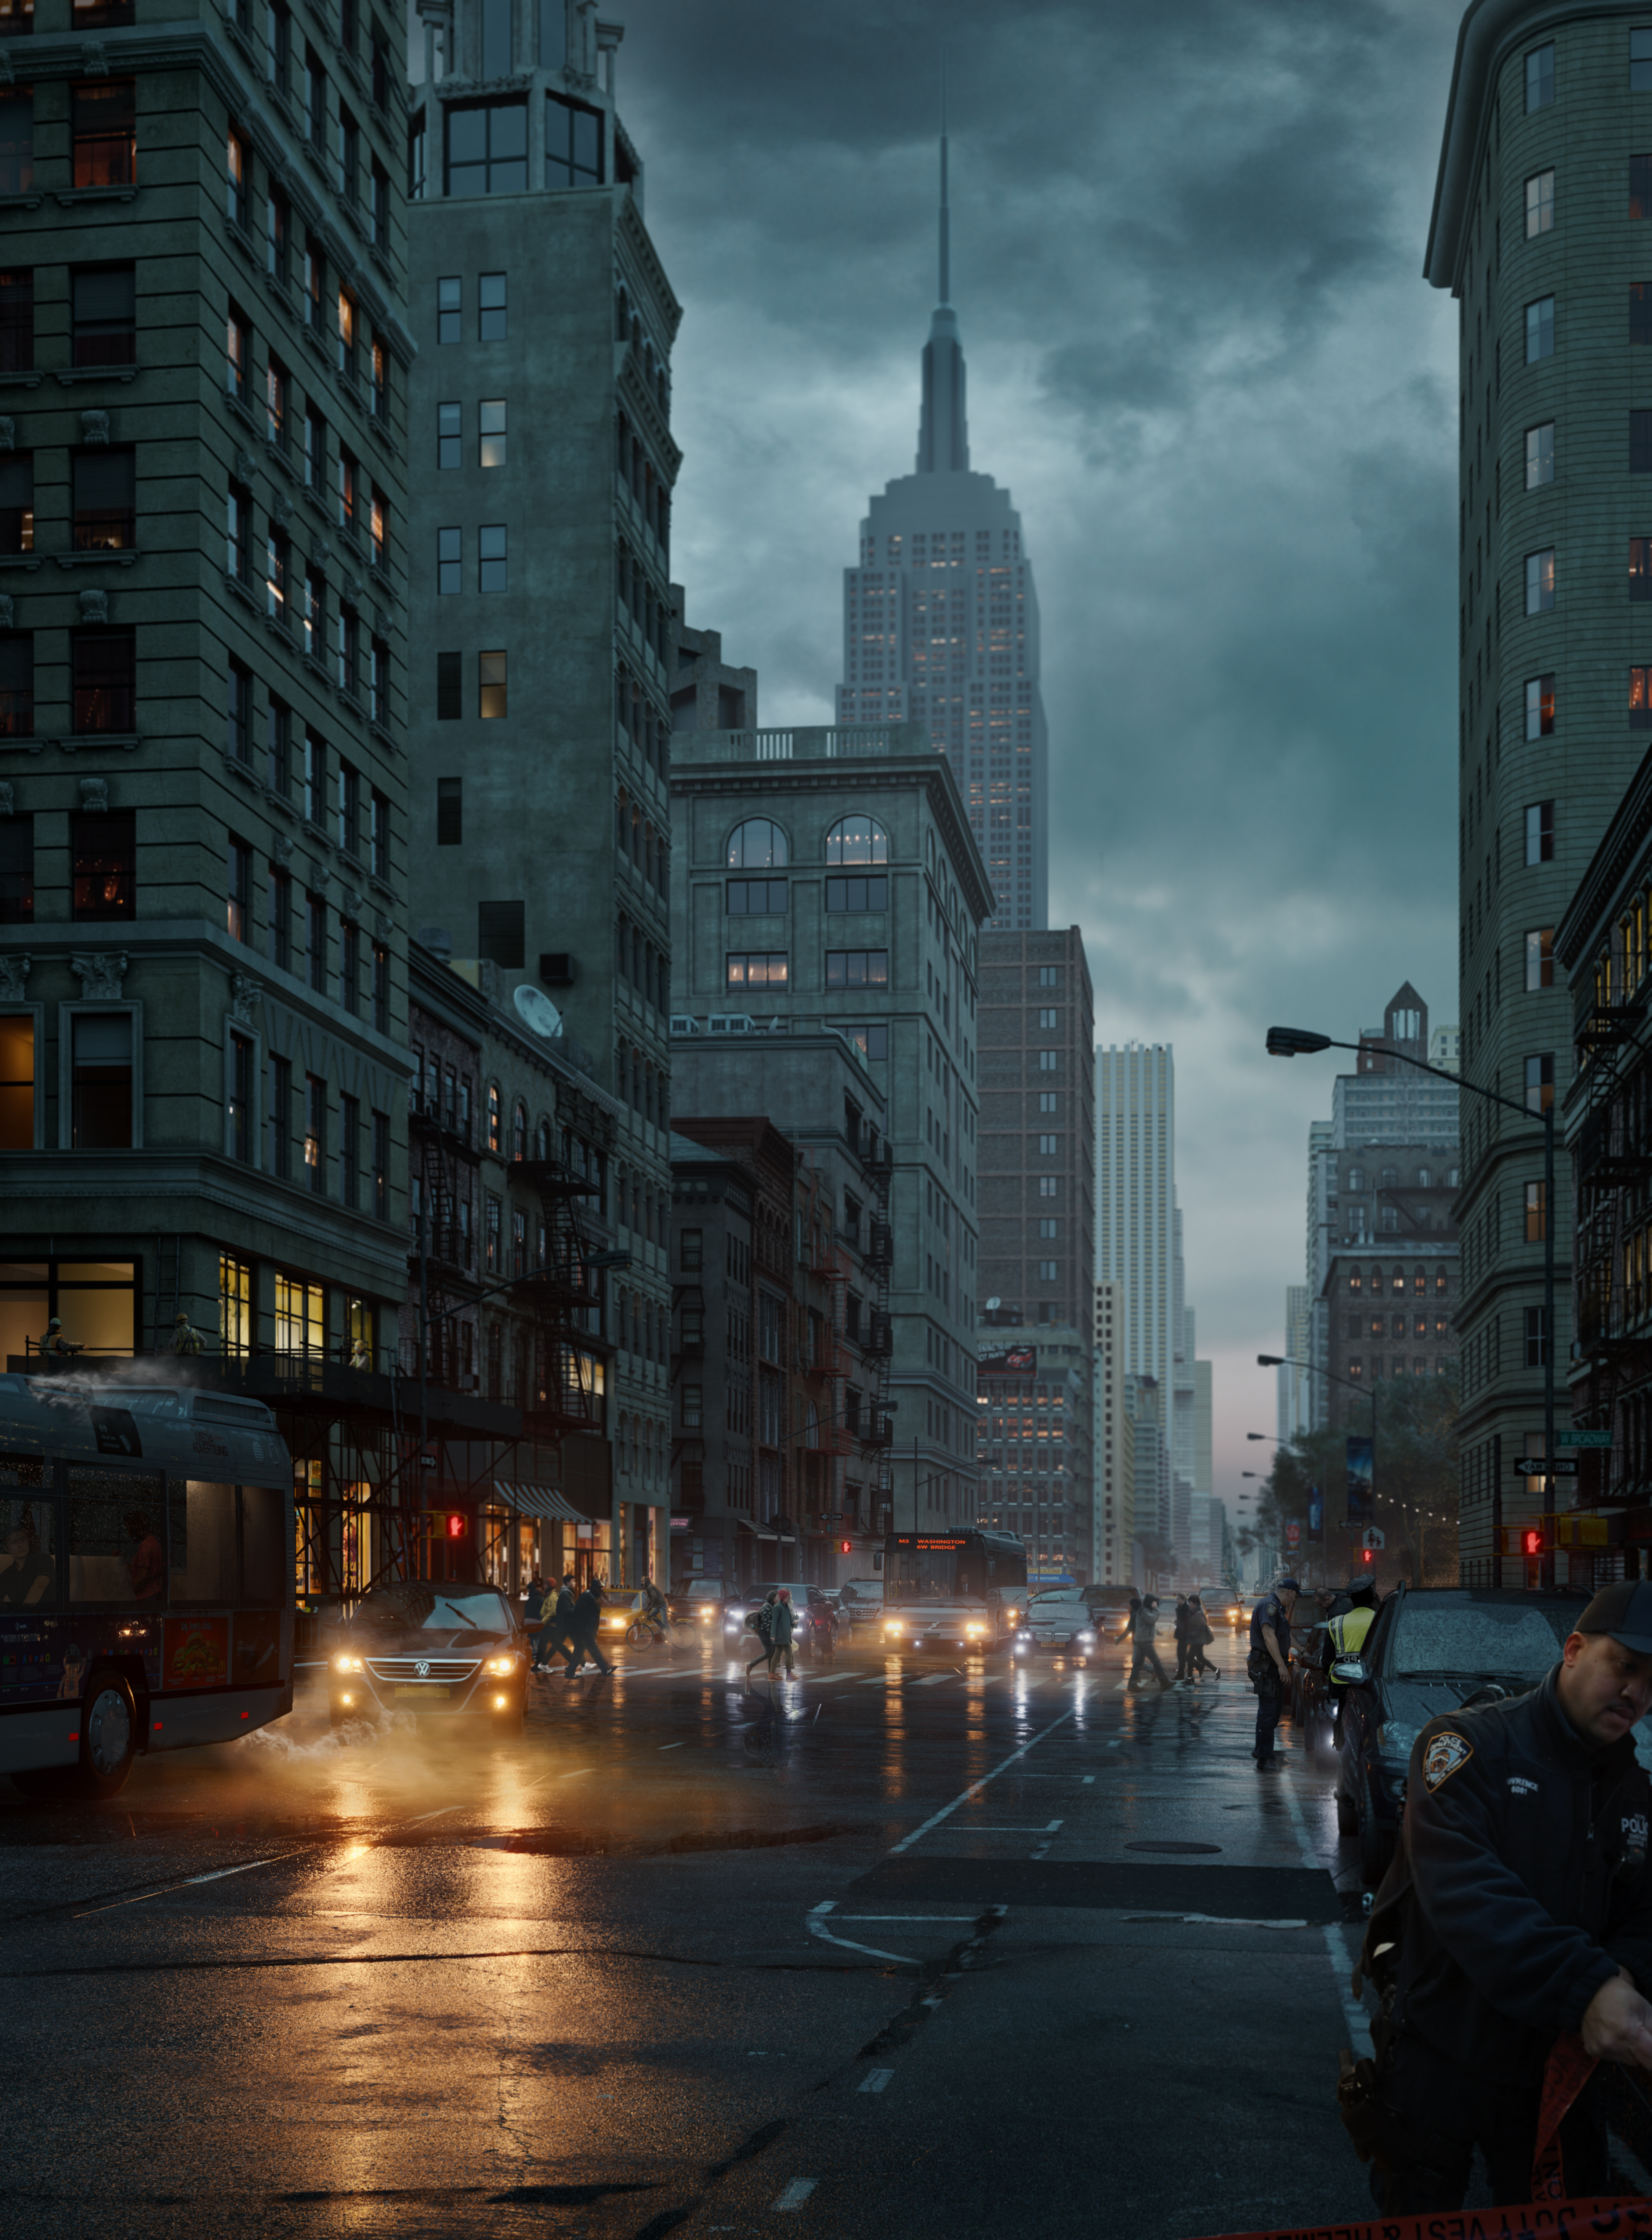
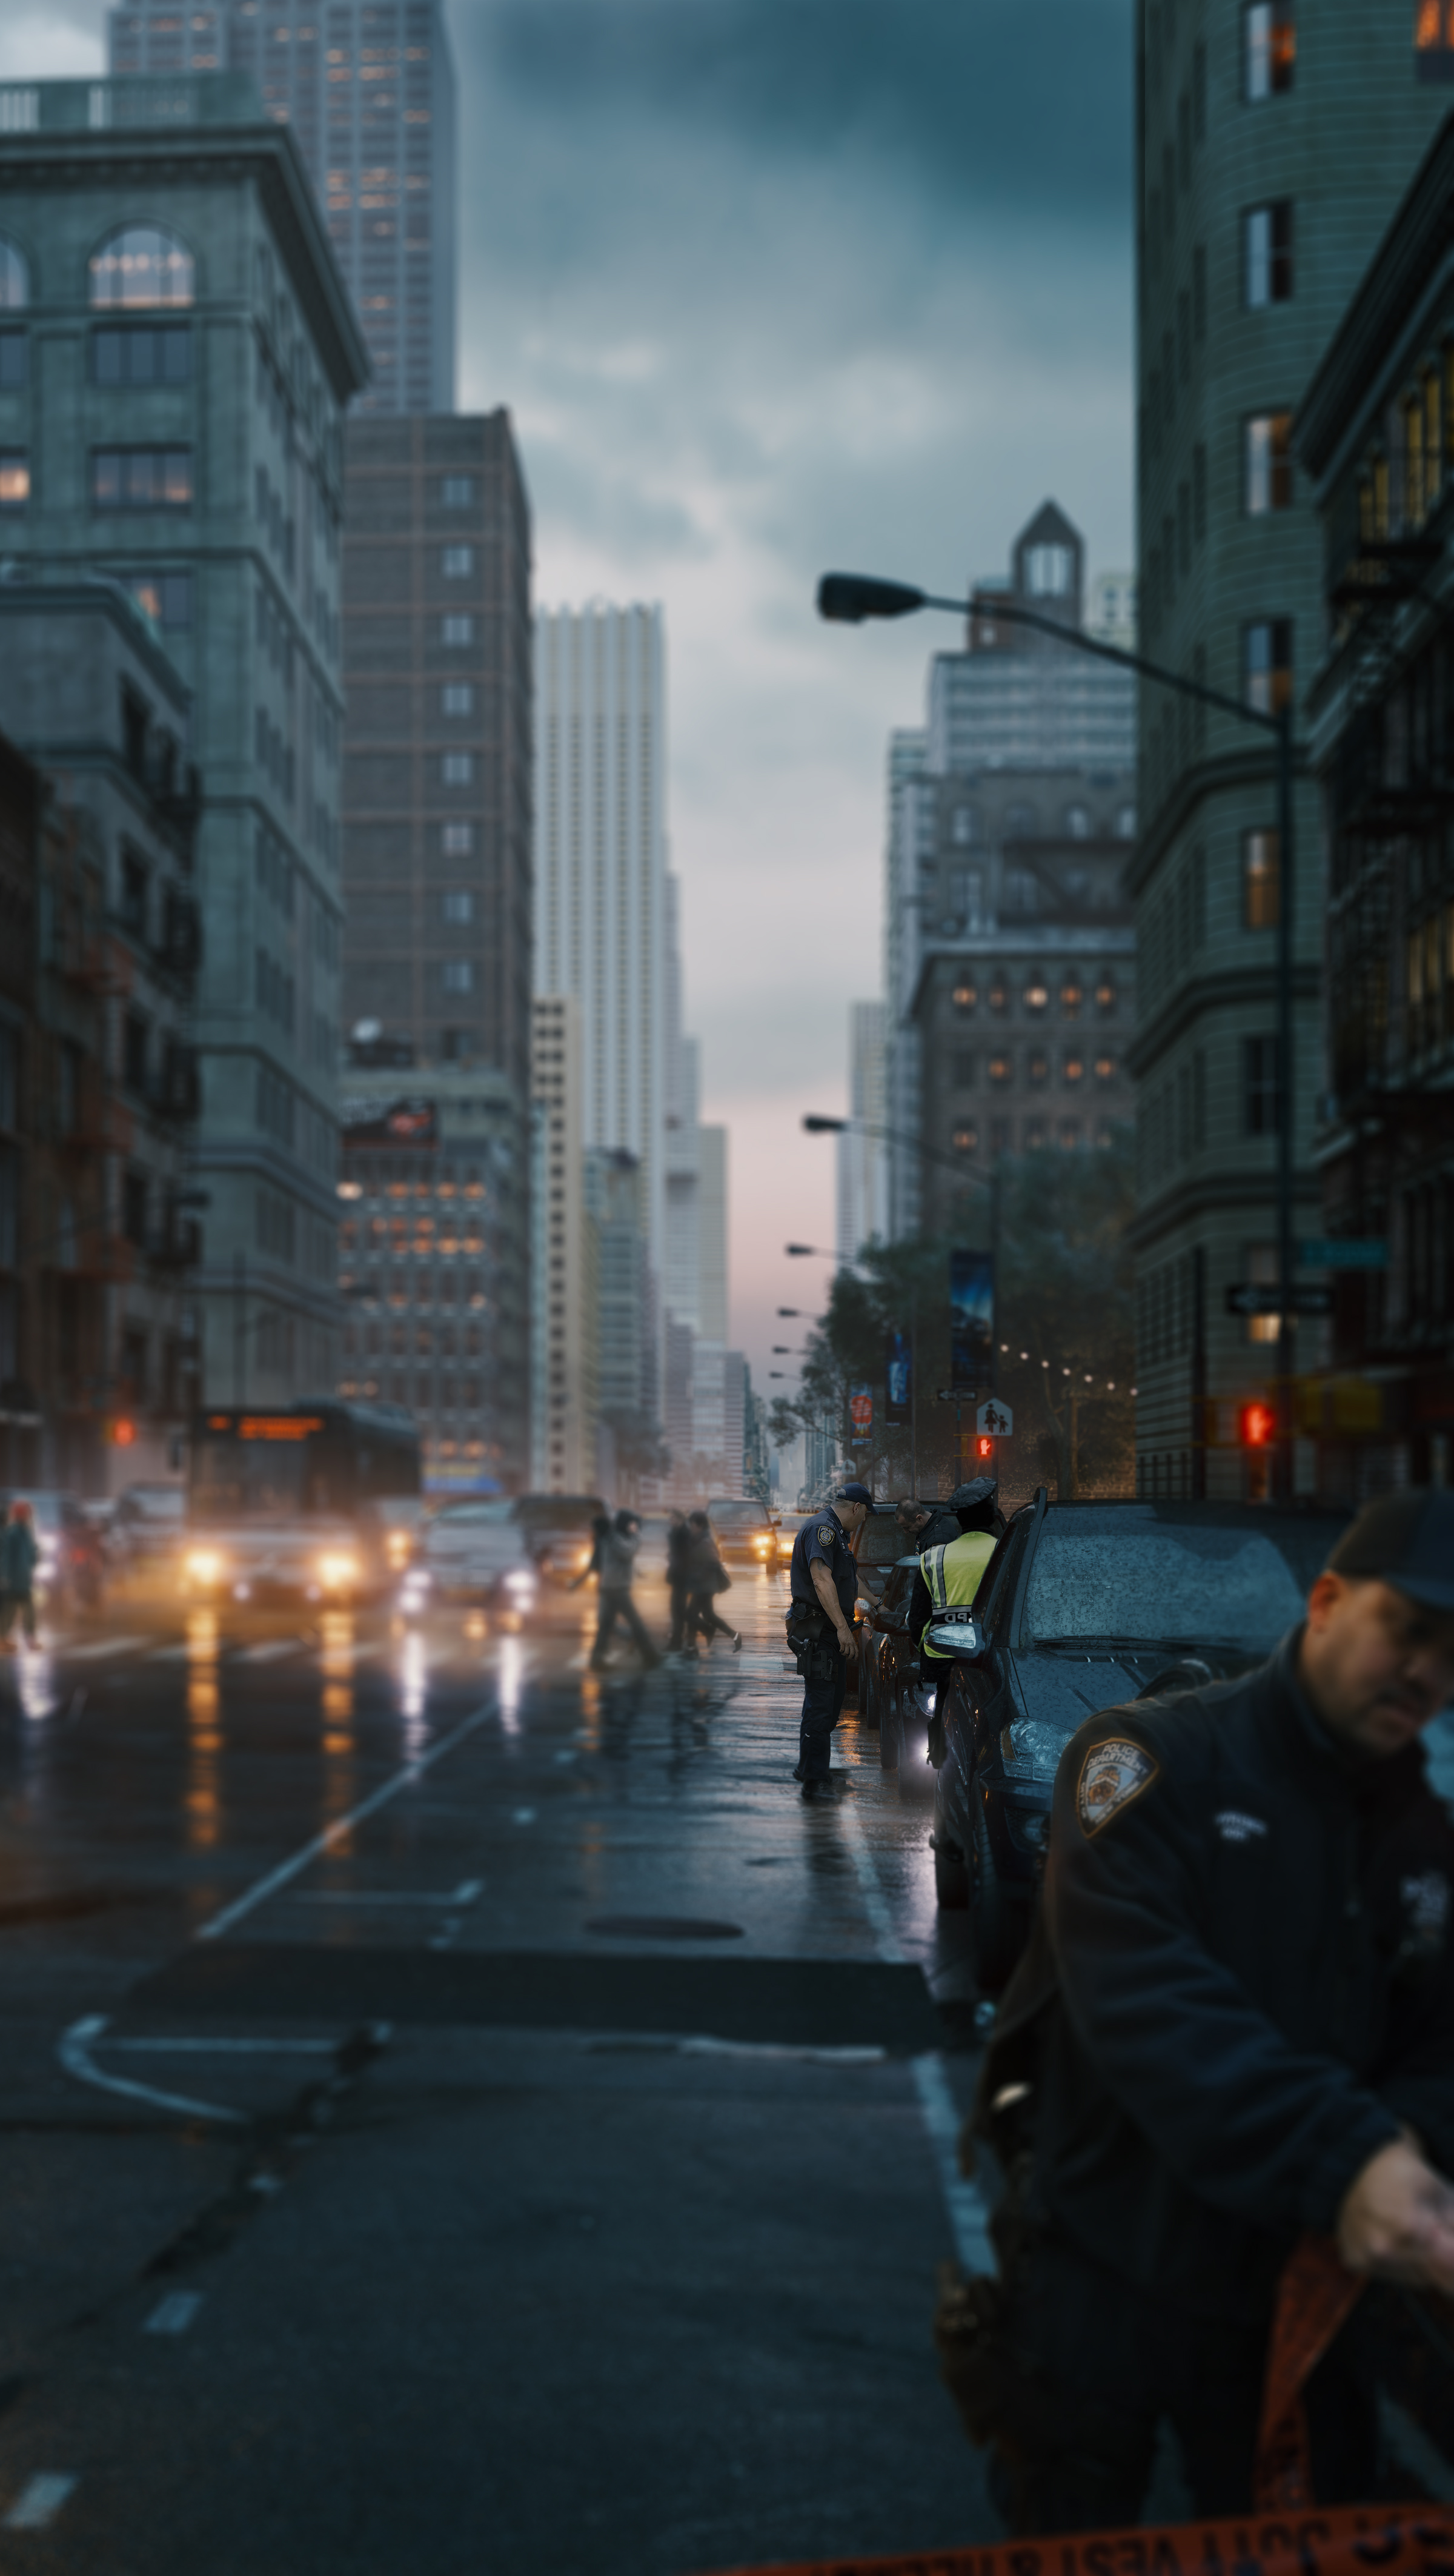
5th Avenue – Witness Of…
The story in this photo is of a journalist who is moved away by cops while they are taking a picture of a crime scene. It is exactly this aspect that gives the image this mysterious name. “WITNESS OF“, where we do not know exactly what crime has been witnessed.
I’ll share some of what went into creating the final image.
Lighting
Regarding the lighting, it is very simple (and this is something that I like about Corona Renderer; I personally find lighting faster and easier to set up ).
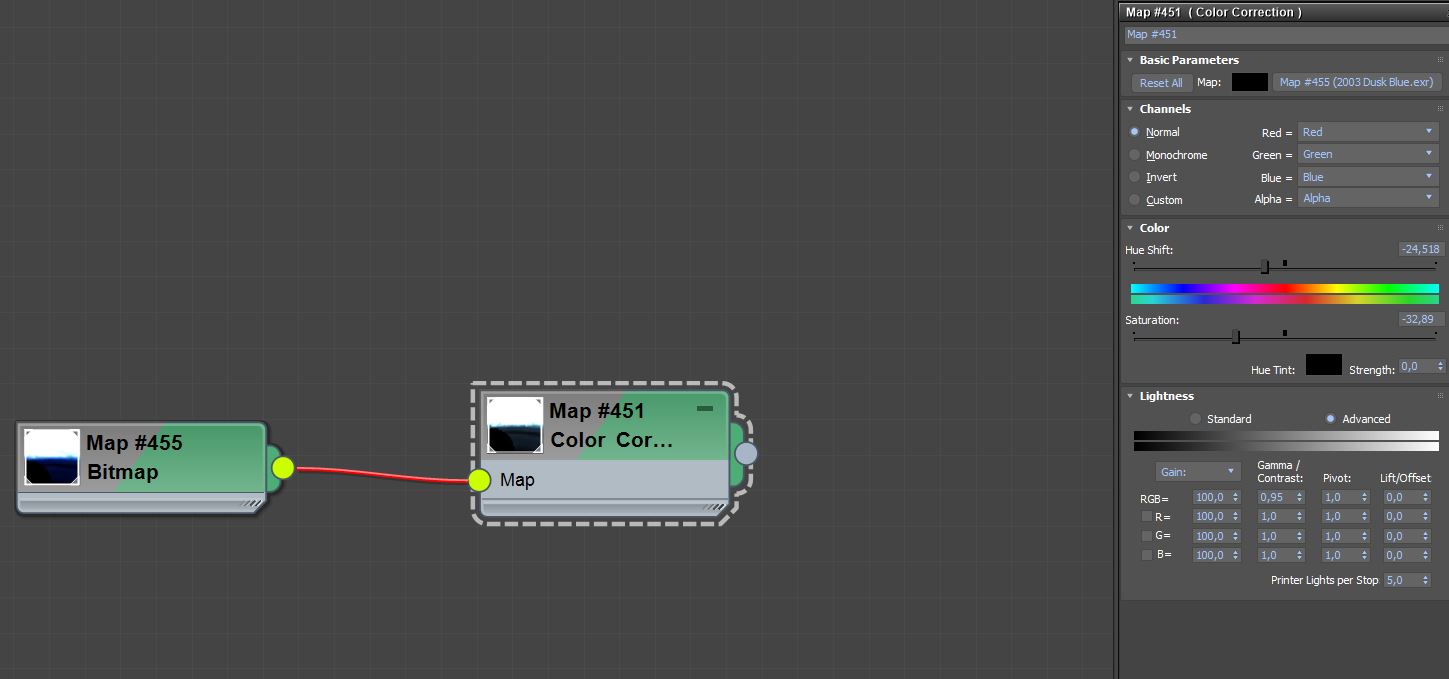
In this case, to achieve this after-rain mood, I wanted to have a sky tending to blue, using an HDRI, “2003 Dusk Blue” from Peter Guthrie, with some color mapping just to desaturate it:

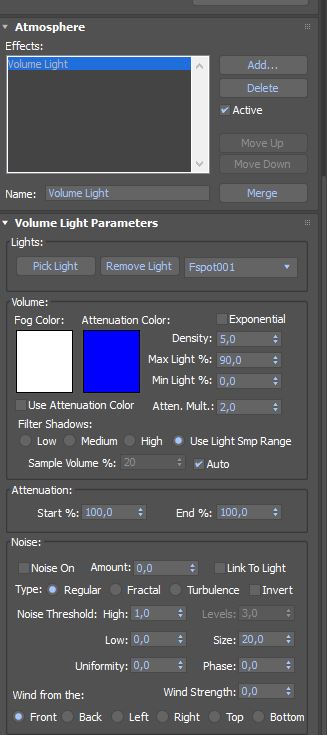
Next, I added the volume fog, in order to get more depth on the images, the settings are below:
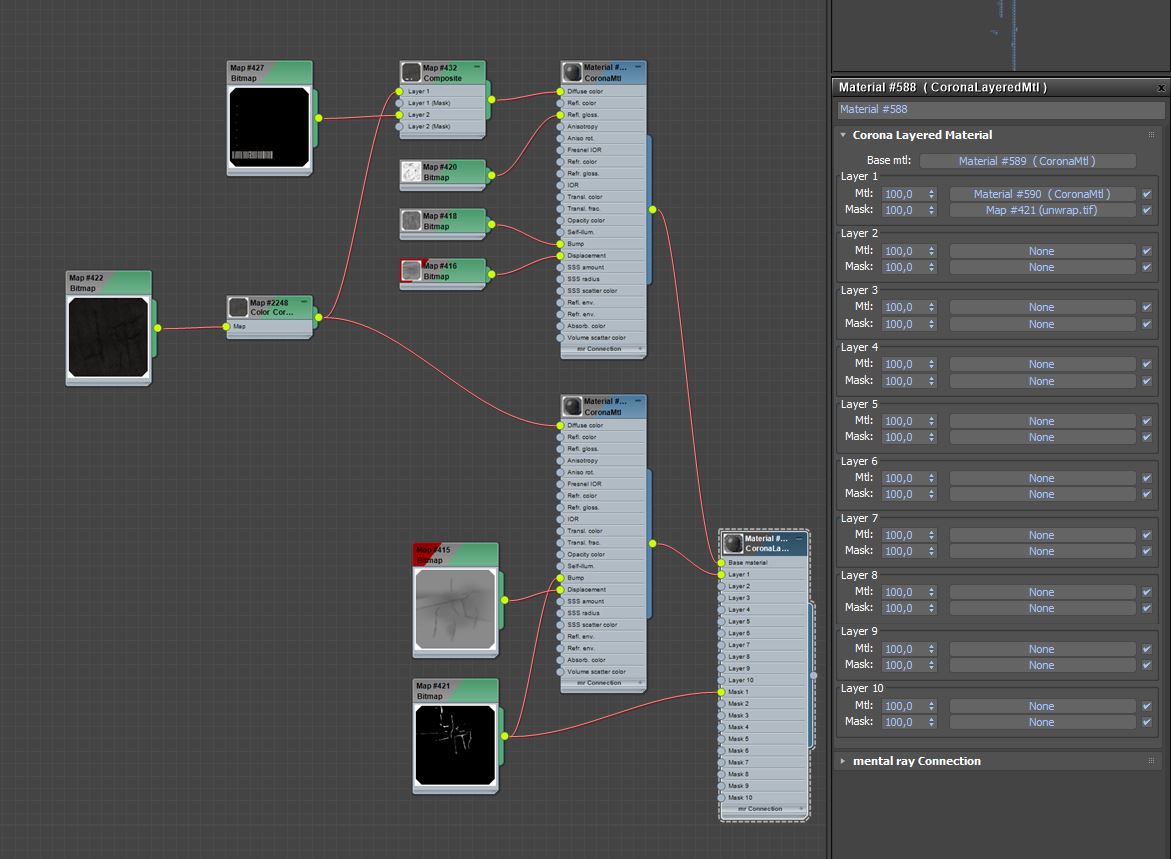
Road Textures:
The road is just a plane. For the maps, I used a Corona Layered Mtl using one road and one water material; all the details are within the textures I painted and used as layer maps on the surface.
In this case I used a texture from Poliigon for the road markings, adapting them to my needs to recreate the original design of the road:

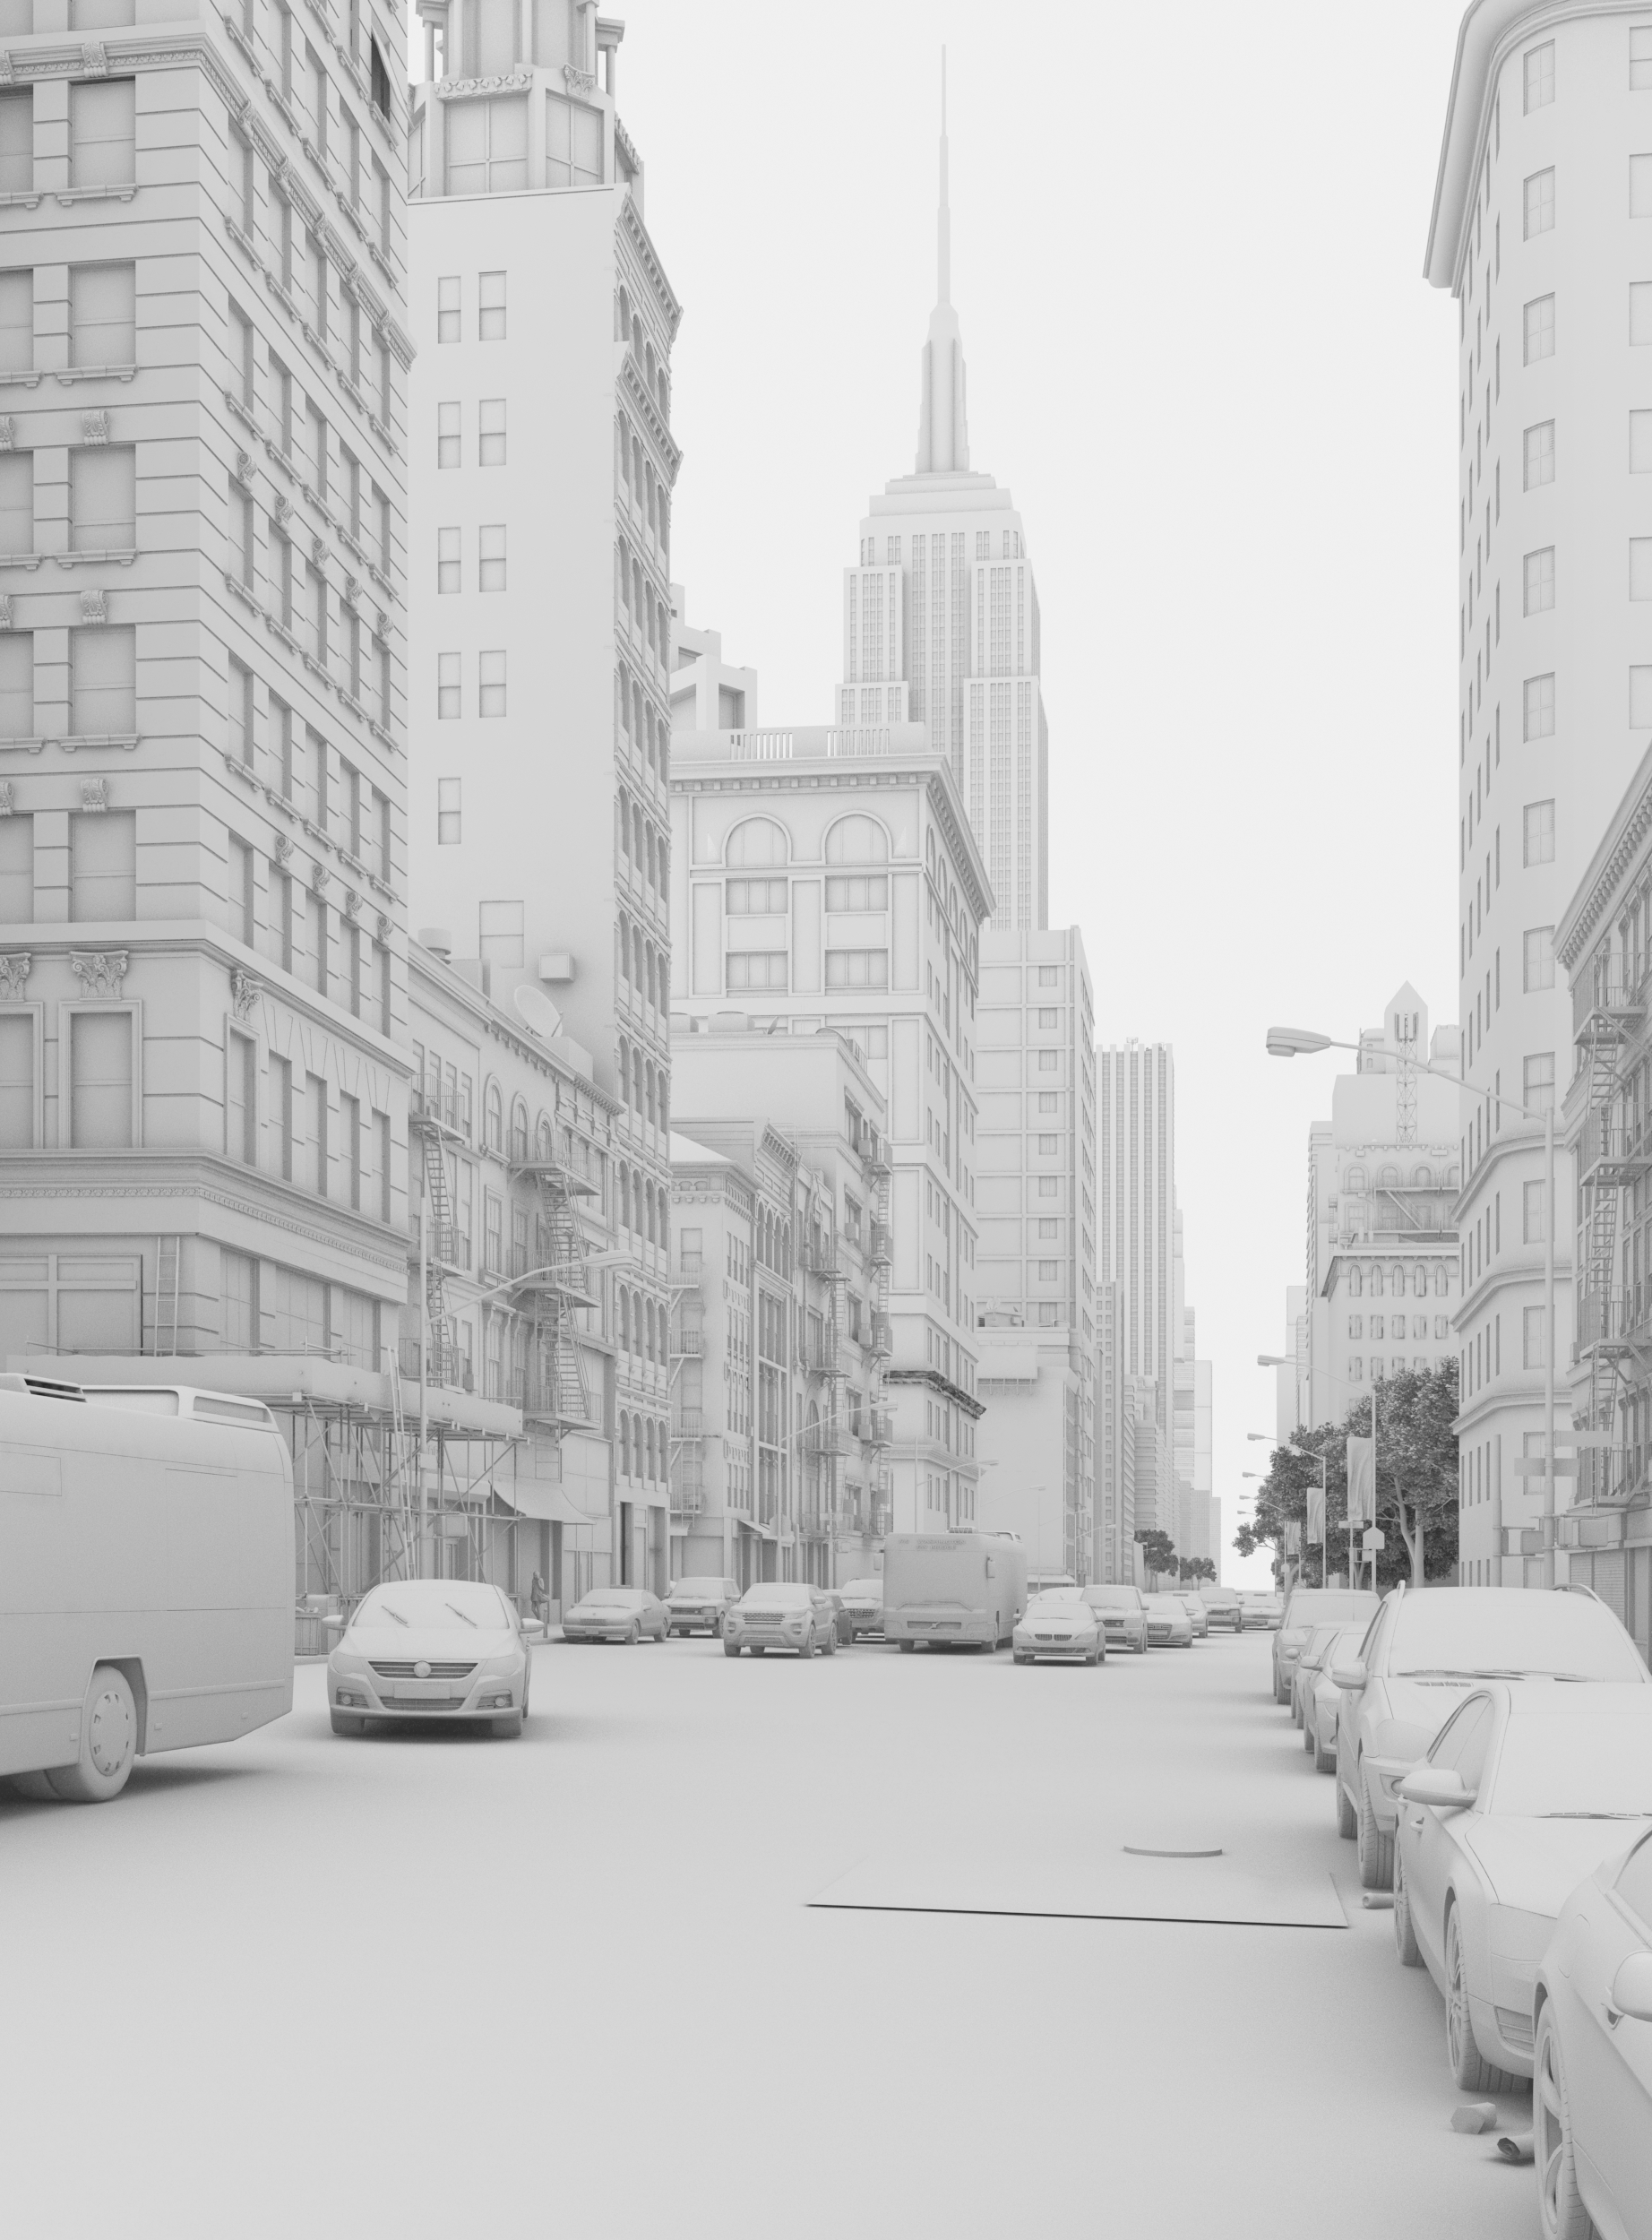
Buildings:
I have designed the whole scene like the reference photos, trying to respect as much as I could the original shape of the buildings and the environment, modeling only the things that will be displayed, optimizing the type of mesh, reducing vertices and using different material ids, and obviously making use of proxies as much as possible 🙂

To be able to work faster, I downloaded a few props to use in my scene, found thanks to several well-known sites of free 3D objects. I later improved the textures on these, but only where it was necessary. All the cars came from Archmodels and VizPeople.

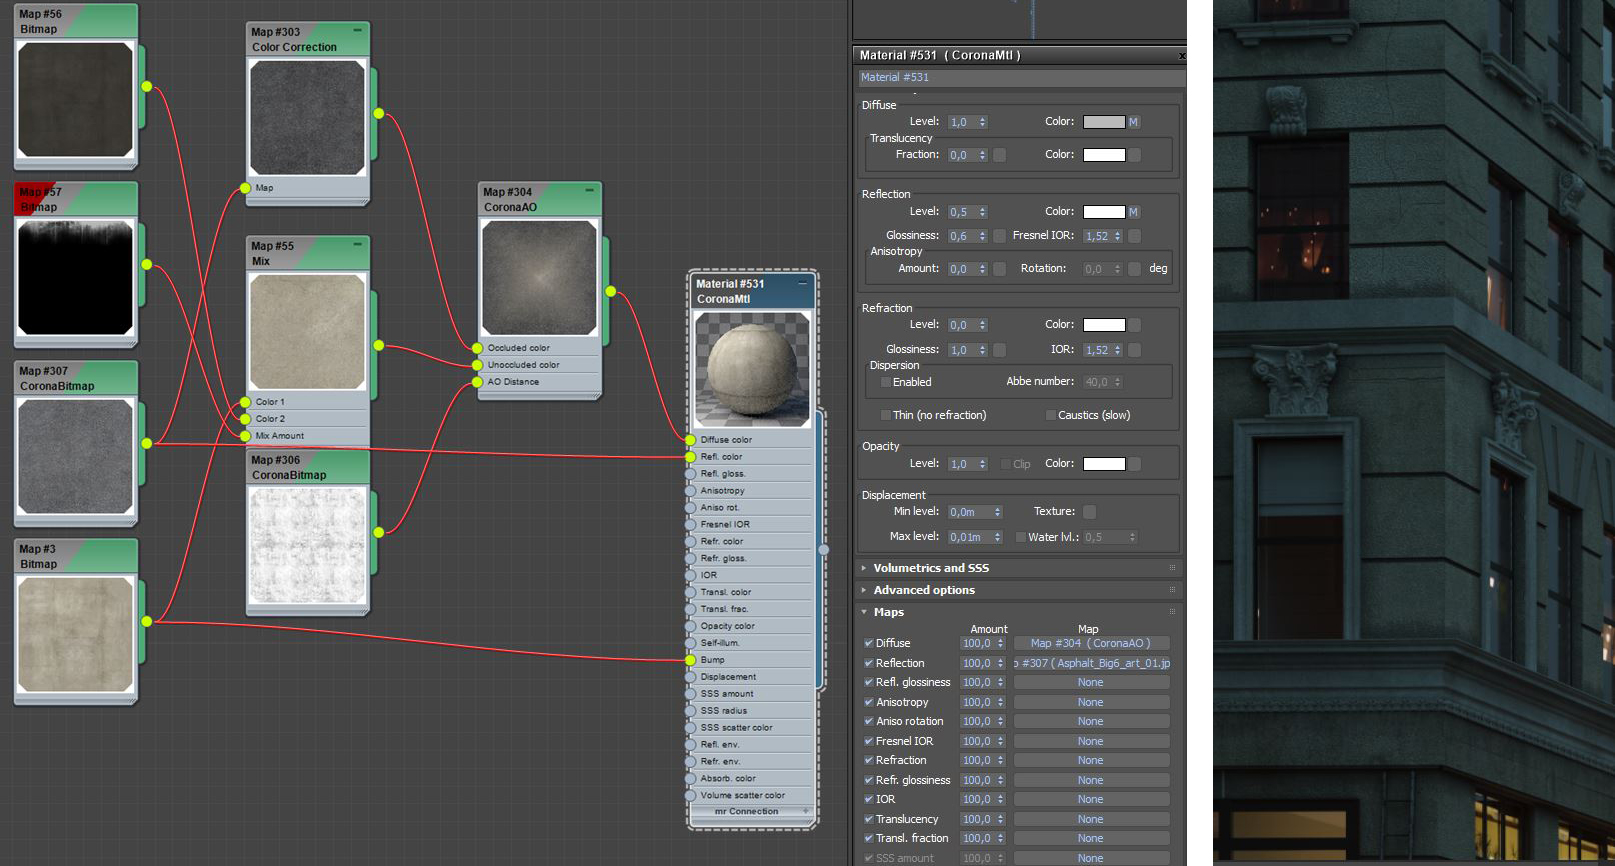
Texturing and Materials:
Since all the buildings in this scene are not new constructions, in most of the cases for this scene I had fun using the Corona AO texture map a lot 🙂 I used this to add some dirt effects on the material texture. Below you can see one example of the material, used for the building on the left side of the images:
For the raindrops on the cars, I did it in a very fast and dirty way 🙂 The result was enough for my needs: I copied the car on top of the original model, and on this copy I assigned this material that I made, just to have only the rain drops on all the surfaces of the cars without having to touch the original material of the cars – and of course without having double object! The drops texture is one that I got from Poliigon.

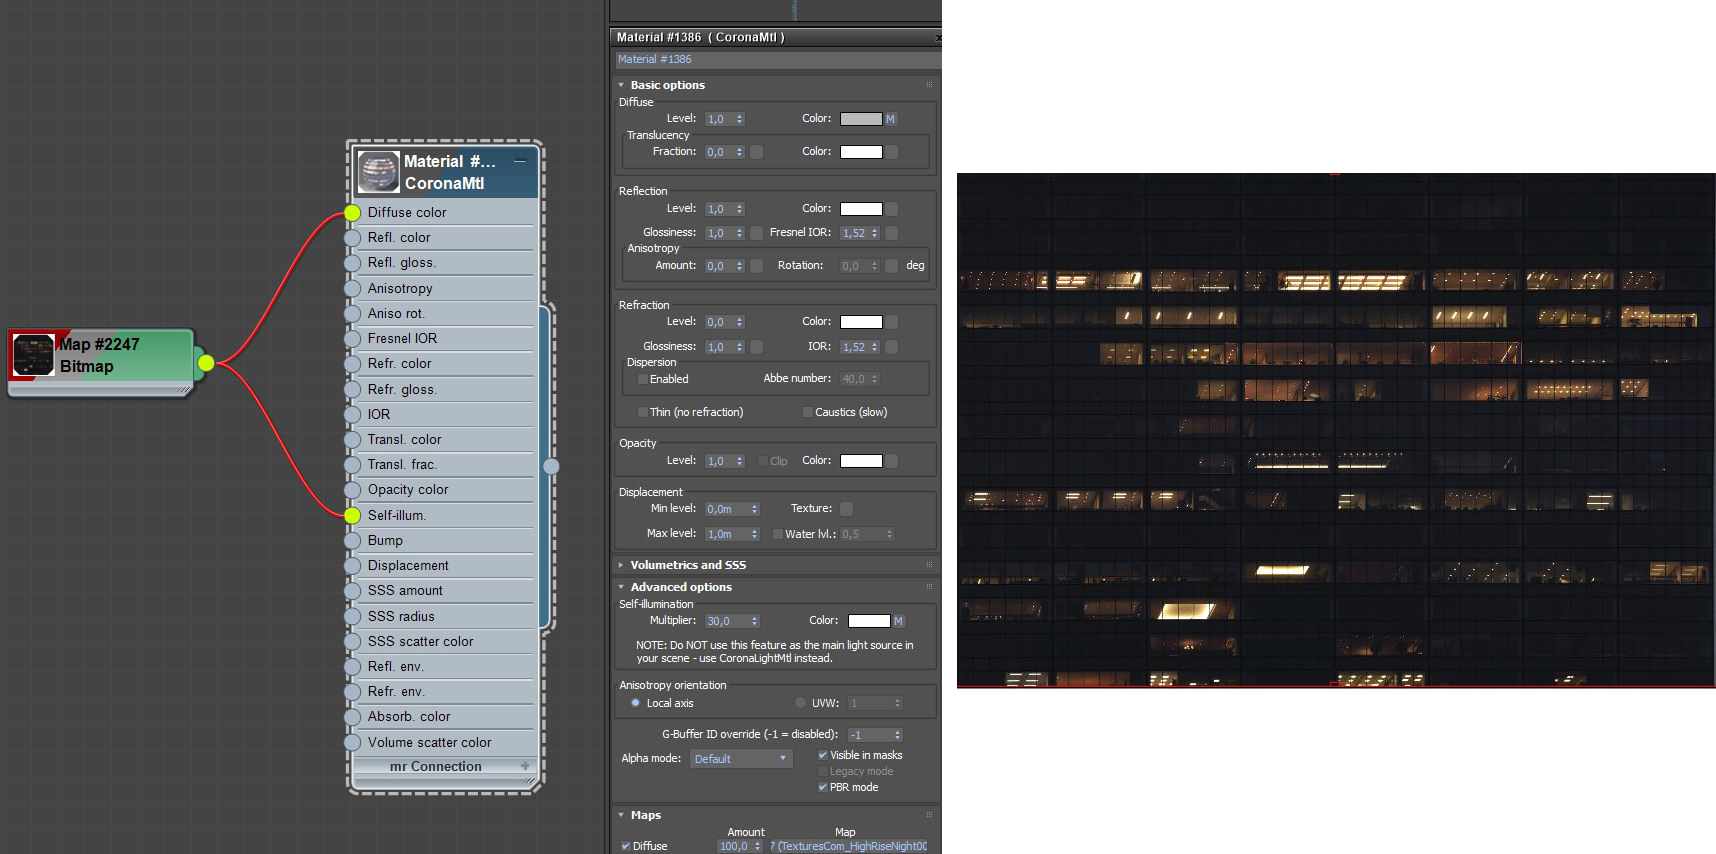
For the interior lighting in the buildings I used different HighRise maps with Self Illumination enabled. For buildings in the background it works pretty good. In some parts, I have used a Corona Light positioned inside the building.
Substance Painter
In this image, I wanted to use Substance Painter, and adding textures to the bus was the right place so that I could improve my skills with it. I love to play with Substance Painter and Designer, they give you freedom and creativity, with immediate feedback on what the material looks like.
I have unwrapped only the components of the bus that were needed for me to paint them. Once in Substance, I started by applying a smart material as a base, then I started to add layers to add detail to it, adding scratches, dirt, and pictures as advertisements:
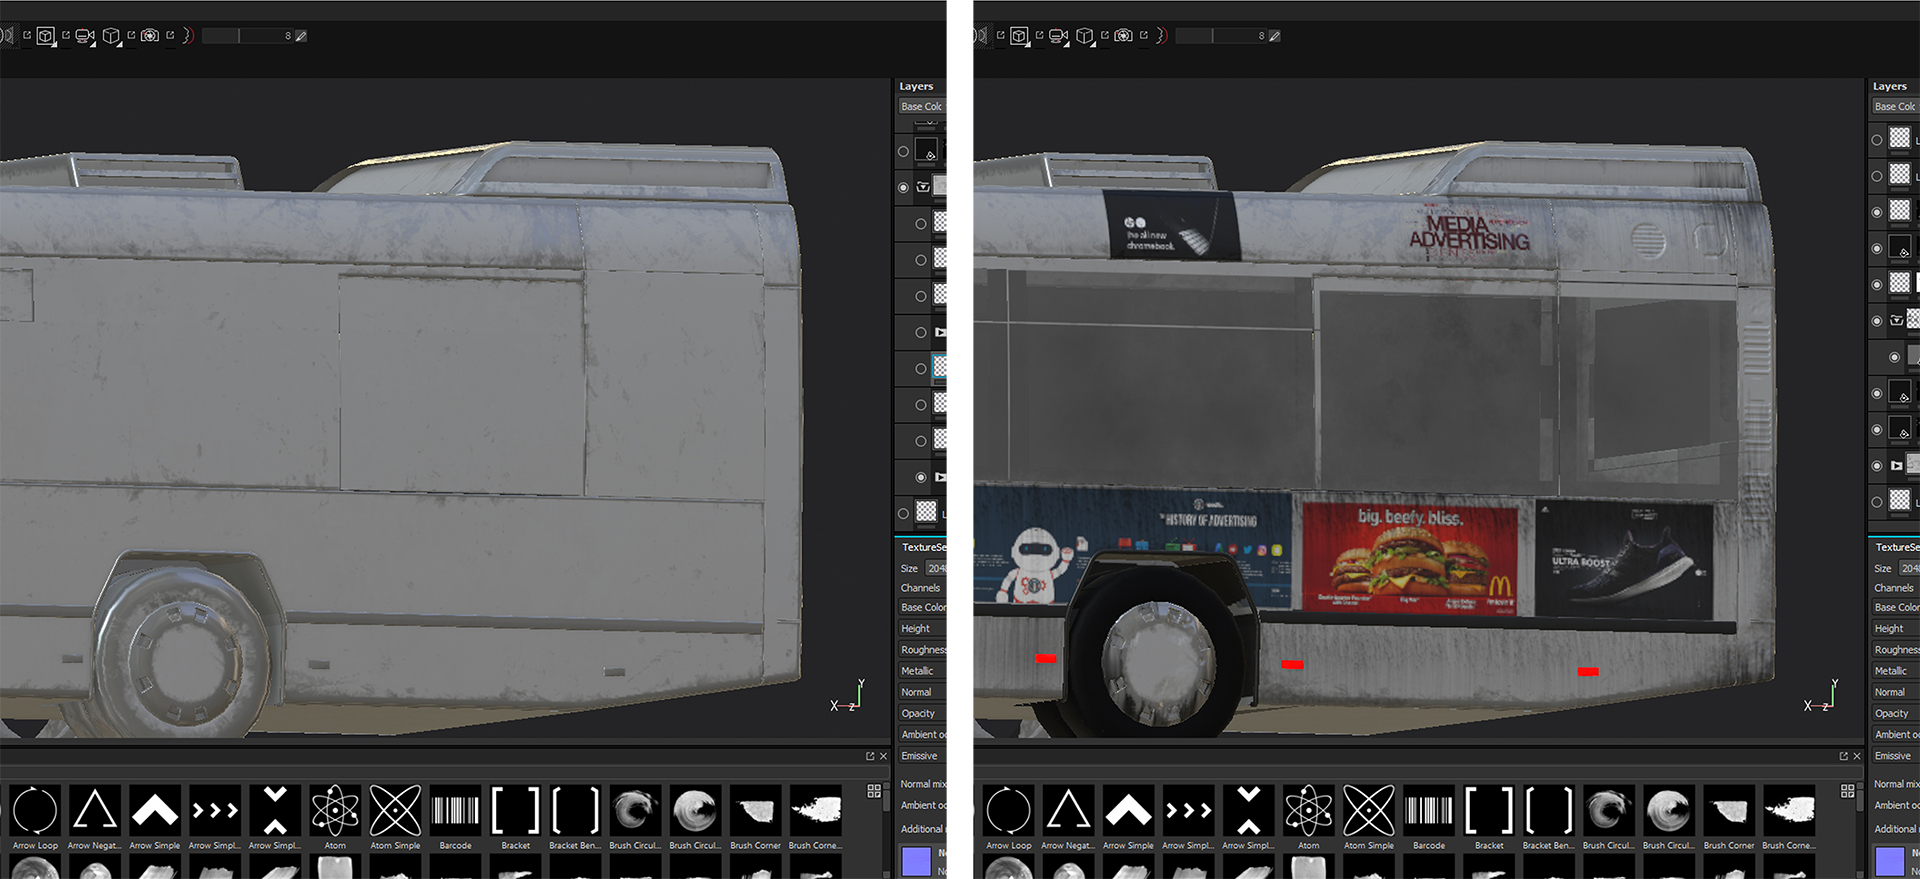
I found the “polygon fill “ option really helpful, to simplify the work of creating a selection for making a mask on each layer; of course, you can make different id’s before exporting to 3ds Max, but in case you miss something this option can be really helpful.
Post Production
This is the time to give the image a story!
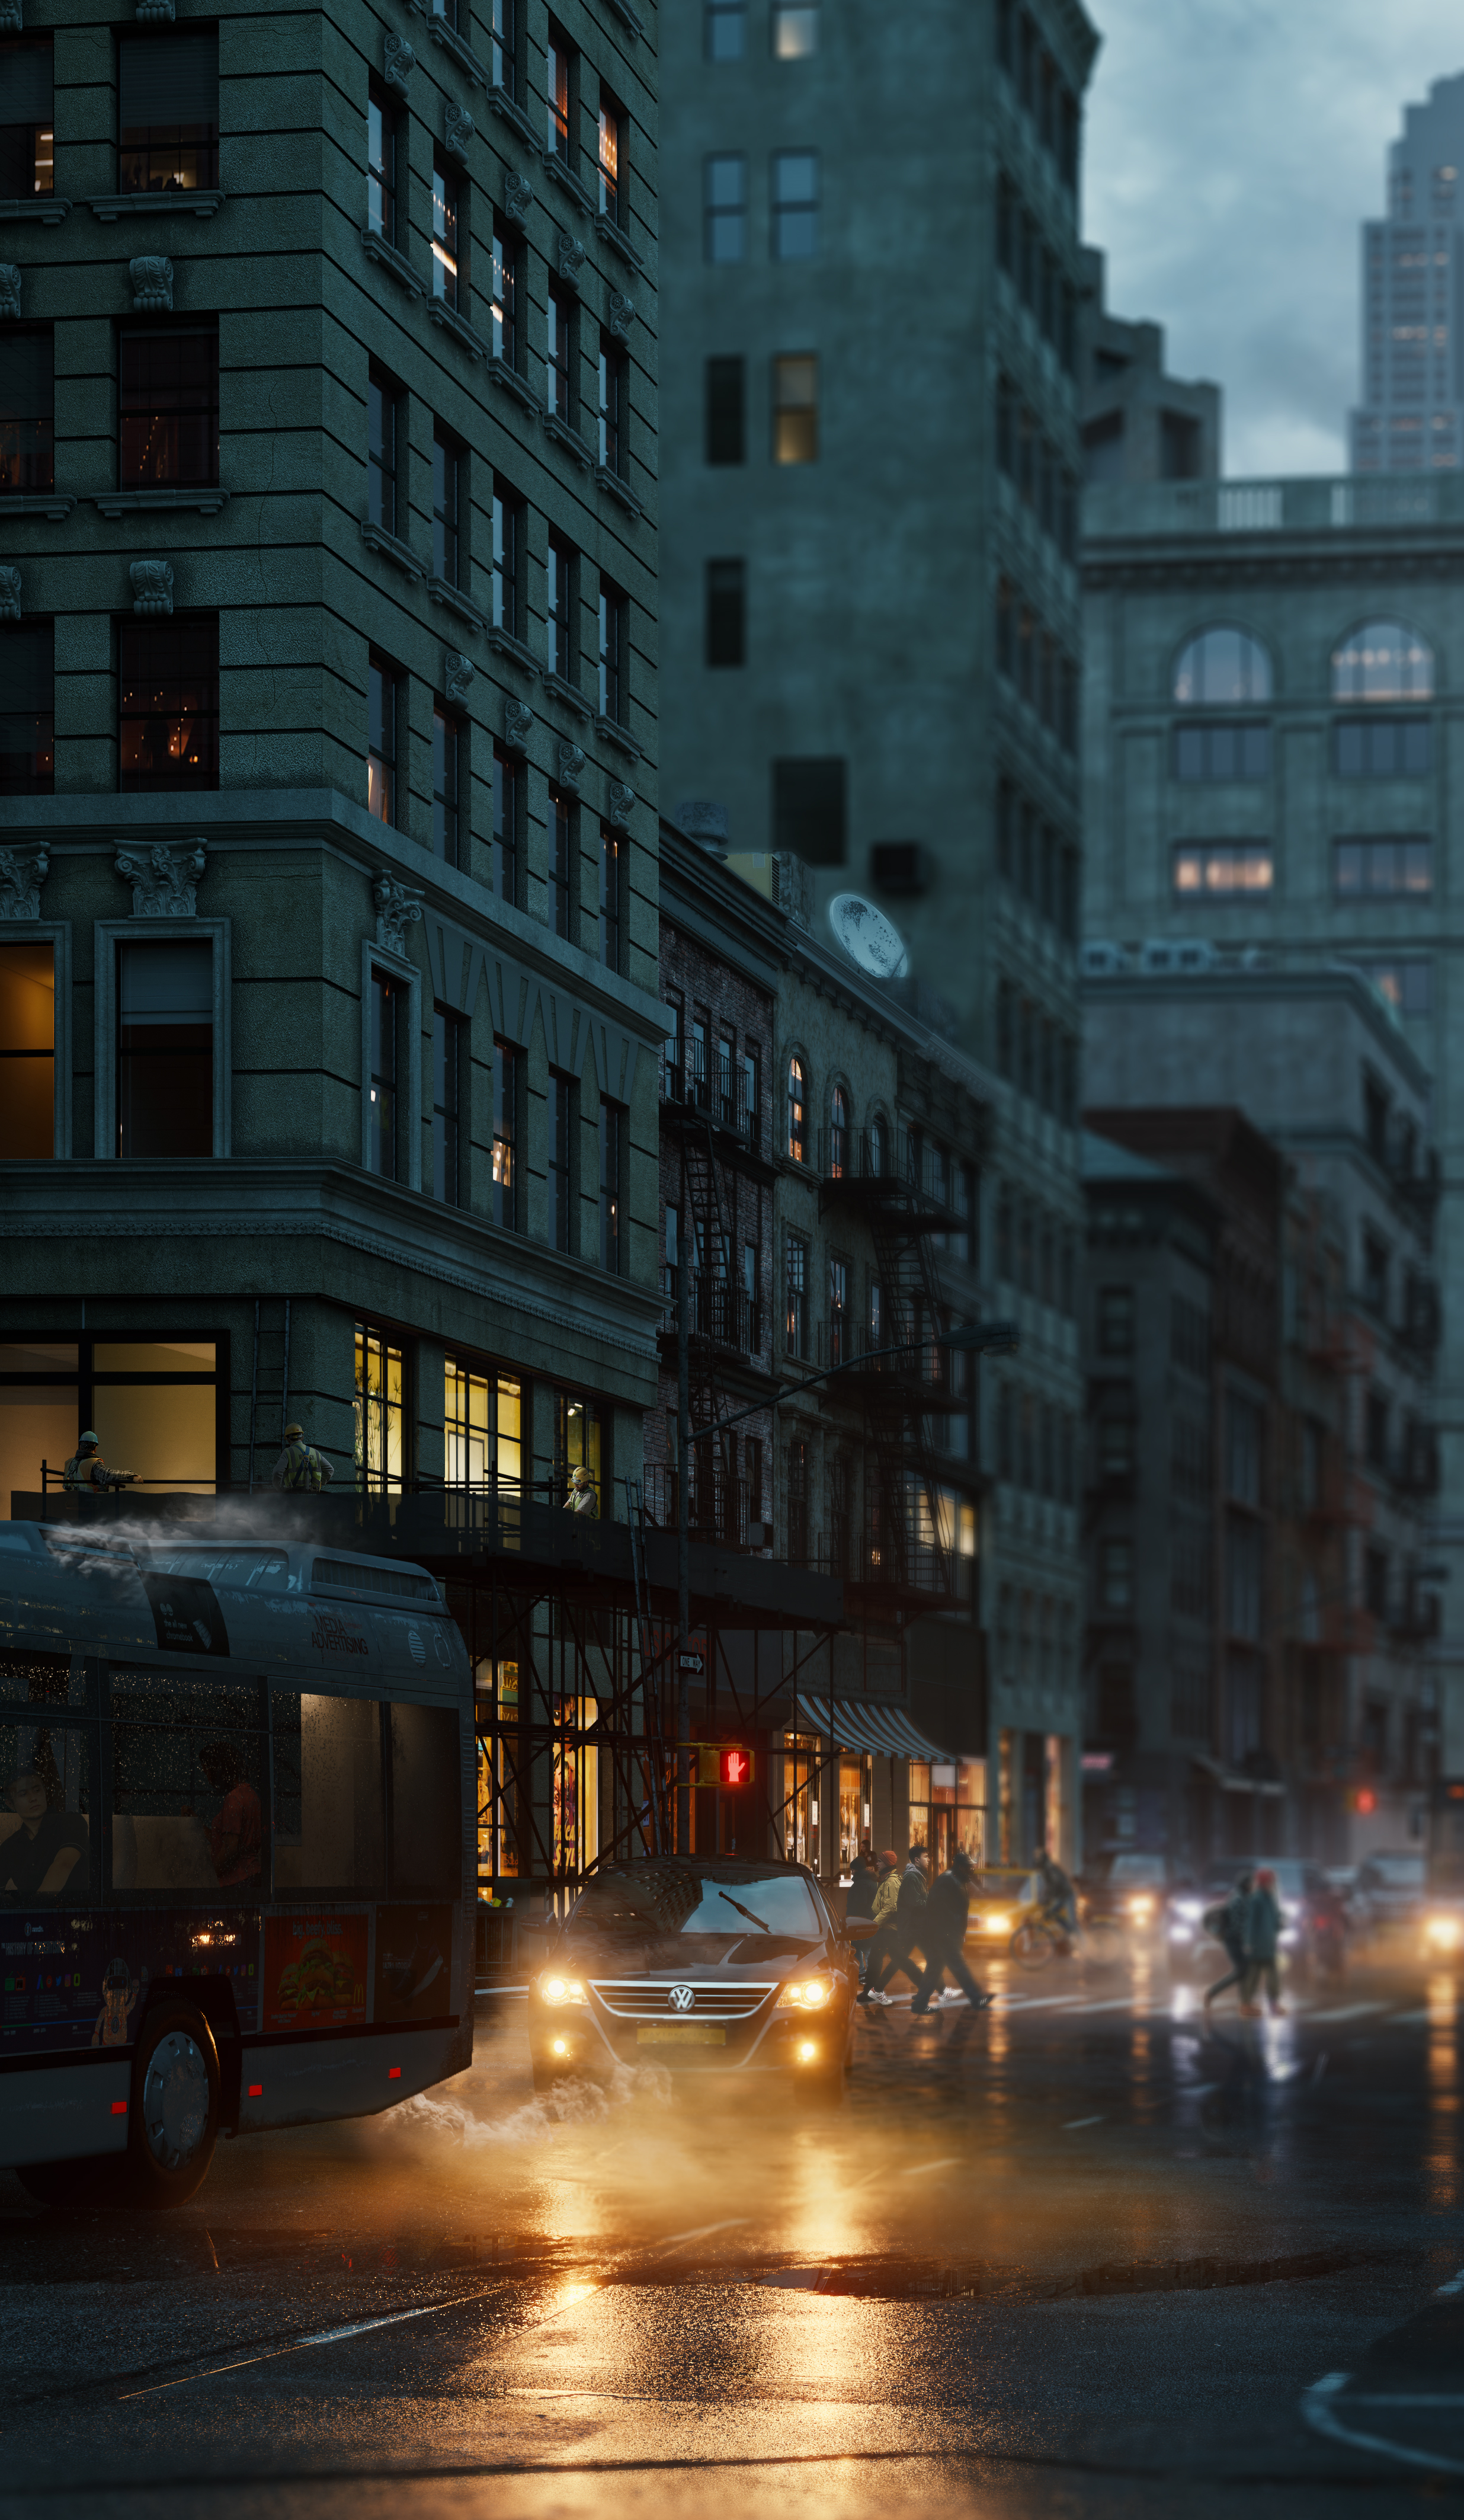
Before starting post production, I already had in mind what will be happening. The choice of people was very carefully chosen, in order to give the impression of living inside a giant metropolis where they continue their way without realizing what is happening a few meters away.
The hypothetical photo was taken at late afternoon while workers on the building are working, and NY is in full movement, stressed by this storm that obscures their way.
In addition, the policeman in front of the camera creates dynamism in the image itself, making it even more dramatic and important.
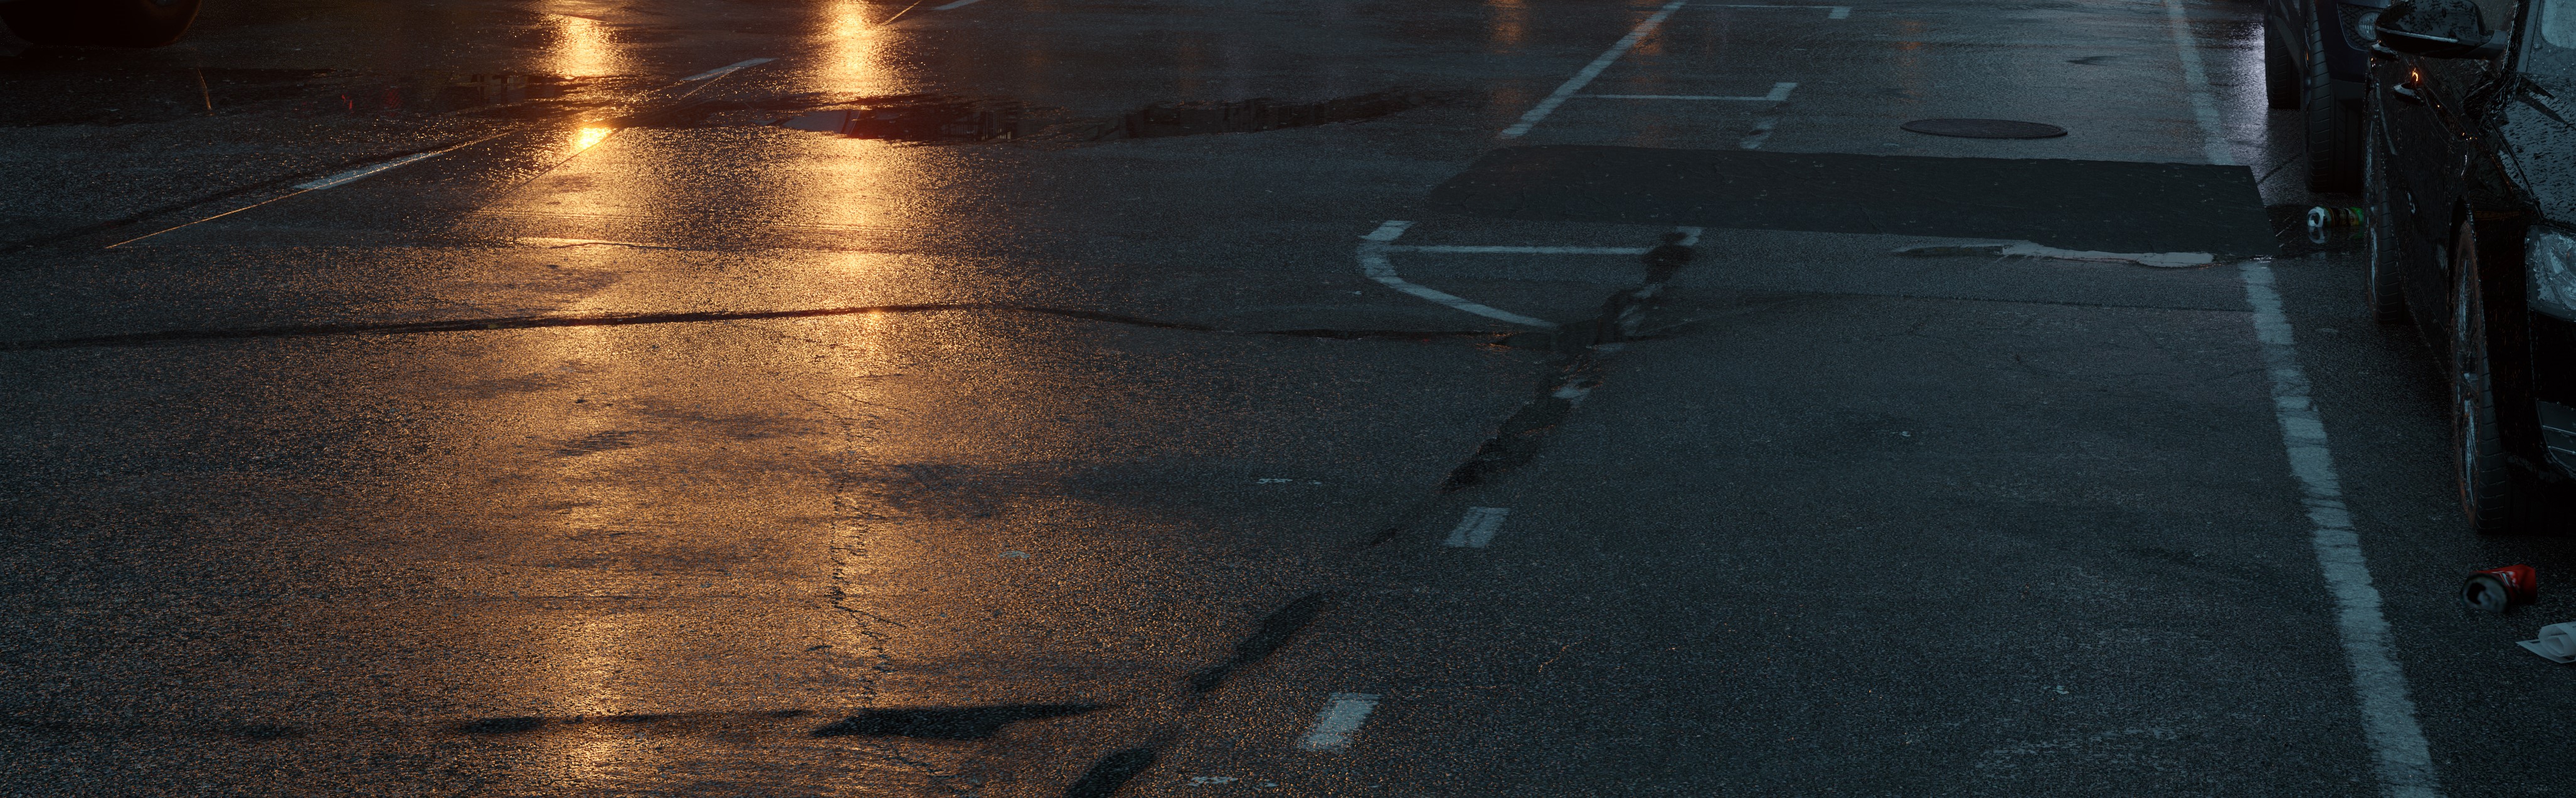
I chose to create a wet tarmac so that there would be reflections on the tarmac, giving feeling and complexity to the image; I also emphasized this by increasing strong colors and contrasts in post production.
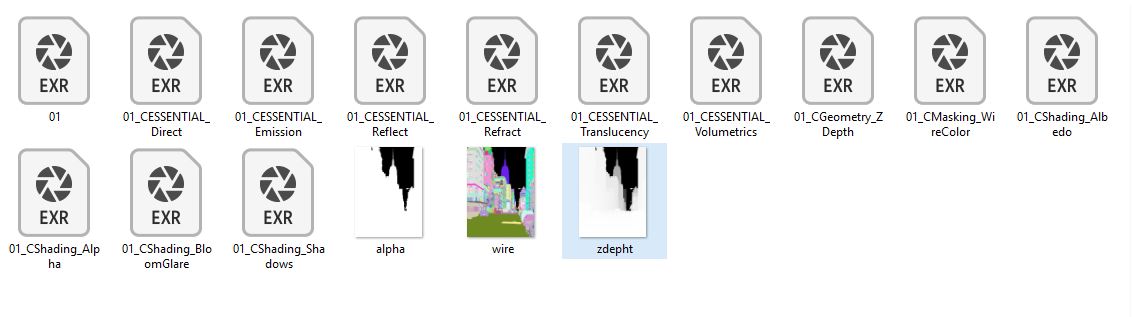
On my personal projects, I always prefer to work in a linear workflow, saving out the raw file as EXR files. With these files, you’ll also have the most control for further color corrections or compositing. The workflow that often I use is Camera Raw and smart object on the raw file with the color adjustment inside the smart object. PS, make sure that you are working in 16-bit outside the 32-bit smart object.
Below you can see the render elements that I used for this image:
As always, I went with the help of the RenderMask, for creating masks in Photoshop. Below you can see the raw render and the the final result with the post production:
Regarding the workflow of color adjustment in Photoshop: I use this process for all 2d elements that I want to add to an image, (especially adding people), as it makes life better, helping me to correctly match the 2d element inside the scene.
To check the contrast is right, I used a Black & White Adjustment Layer set to color mode, and with the levels Adjustment I can change the contrast:

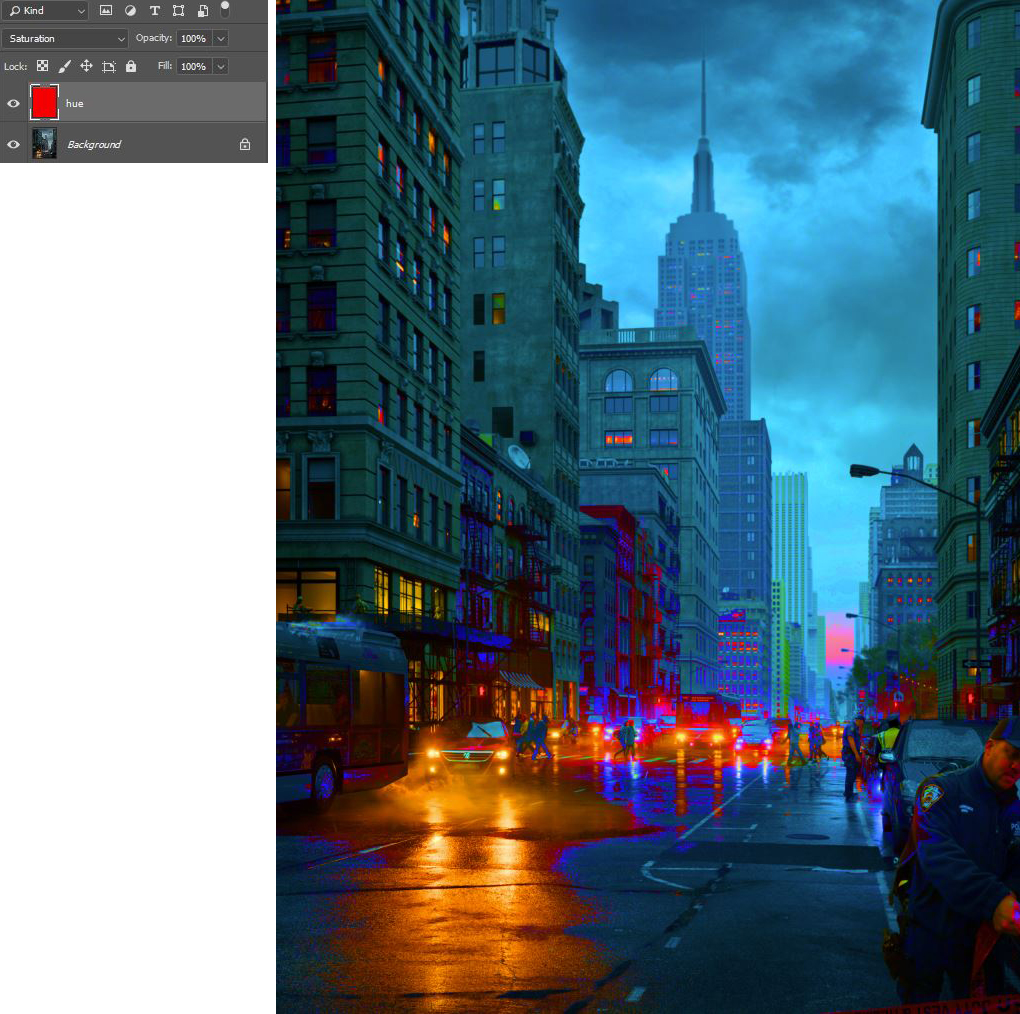
To check for the right balance of the saturation, I use a new layer with a random color, in Hue mode:
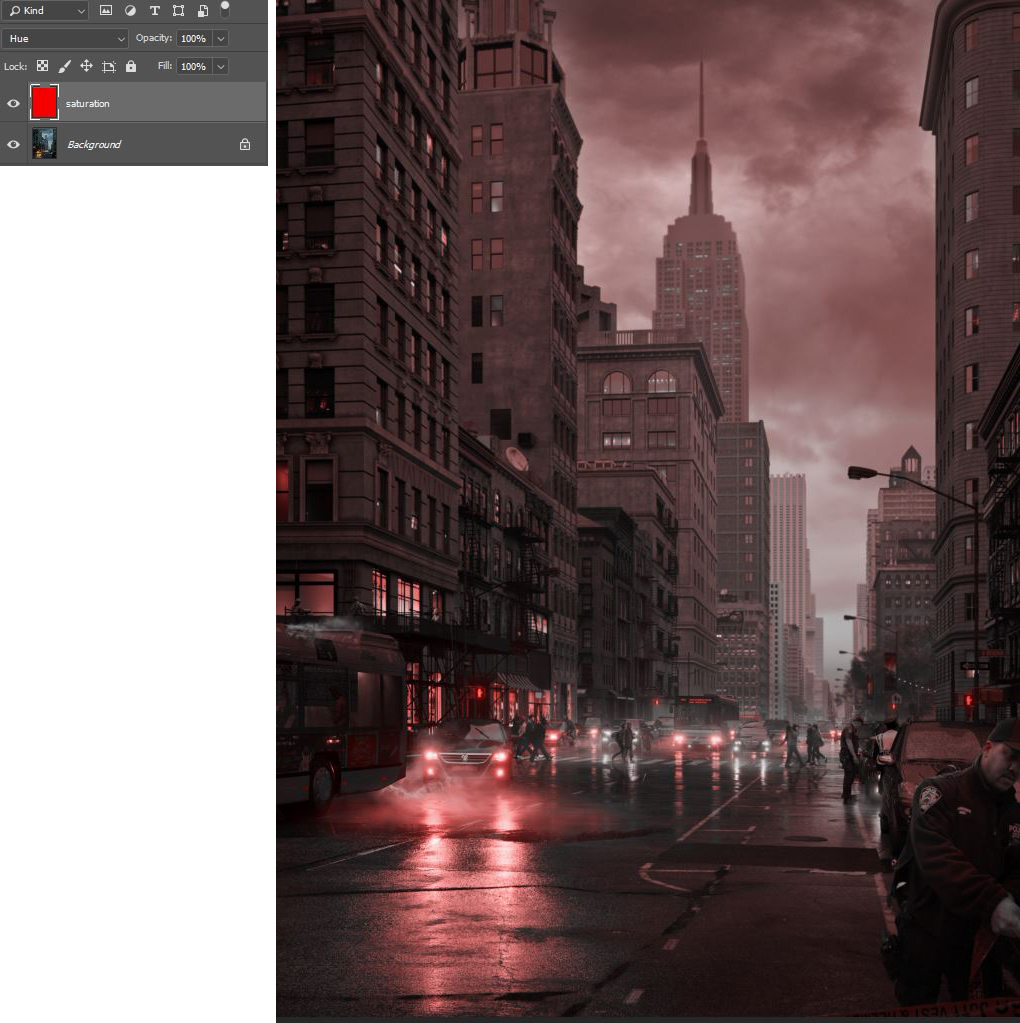
To check and control the Hue on the image, I again use a random color layer but this time set to Saturation mode:
To complete this article, I made a breakdown video of the post production steps, with an audio track specially created for this video (I made the soundtrack in Ableton in approximately 2 hours, so it is not precisely synchronized 🙂 … yes exactly…. producing music and being a DJ are more of my hobbies!)
Now that you know more about everything that went into make this image, enjoy the breakdown video 🙂
You can find more about me and some of my projects at the links below. Thanks for reading, and I hope you find something useful here for your own projects!
See you around!
Davide
Hello Davide,
congrats for the really good job.
Can I ask you where to find the asphalt texture (diffuse, bump, displacement ecc..)?
And what about the water layer of the layered material ?
Thank you so much and keep it up!
Alessandro
You may want to message Davide through Behance or LinkedIn (links at the end of the article), as he may not see the questions here 🙂