Francesco Legrenzi of Legrenzi Studio prepared a ‘making-of’ for a project created in Corona 1.3, where he reveals some of his workflow secrets which eventually led to the creation of an amazing, photoreal interior.
1. Introduction
First, I would like to personally thank Ondra Karlík and the whole Corona team for the enormous effort that has eventually resulted in what I believe is currently the best 3ds Max rendering engine for architecture and design. Many users around the world, from inexperienced students to skilled professionals, are now migrating to this wonderful program.
It’s been three years now that I have been using Corona in all of my projects. Our studio is relatively small, so we cannot use two different rendering engines. At one point, we had to make a choice. Three years ago it might have seemed risky. But it quickly turned out to be a very smart decision.
1.1. Goals
In this short article I will describe a project which we have finished last summer. The aim was to deliver a number of interior renders of a house in the mountains. My client, an Italian architect, needed photographic-quality pictures to show to his client as quickly as possible. We had a very tight deadline (6 days), but thanks to Corona we managed to finish the project in this extremely short time.
1.2. Base elements
We received several components as the base for the realization of the entire project. In fact, we were pretty lucky as these included:
- CAD drawings (plans, sections)
- Real photos
- Handmade drawings
- Photo samples
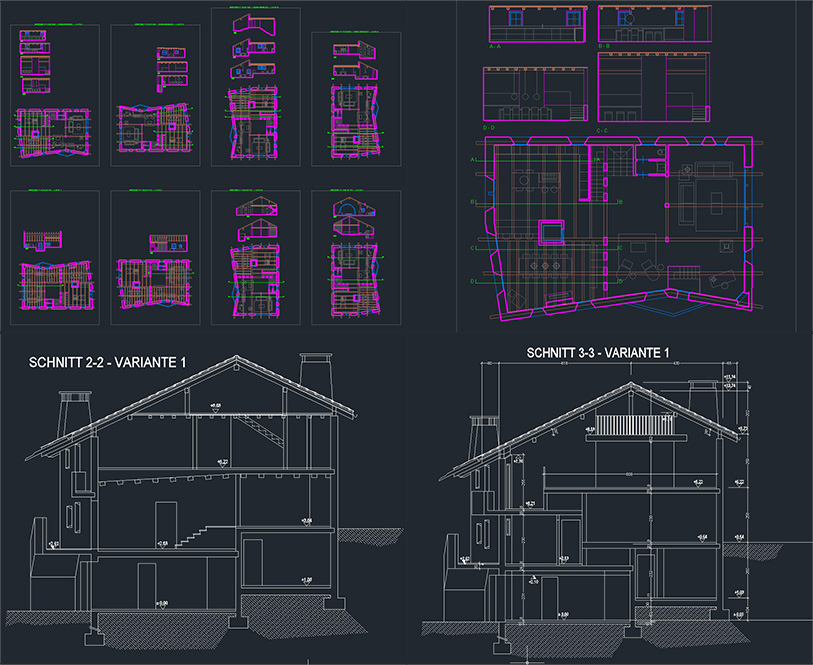
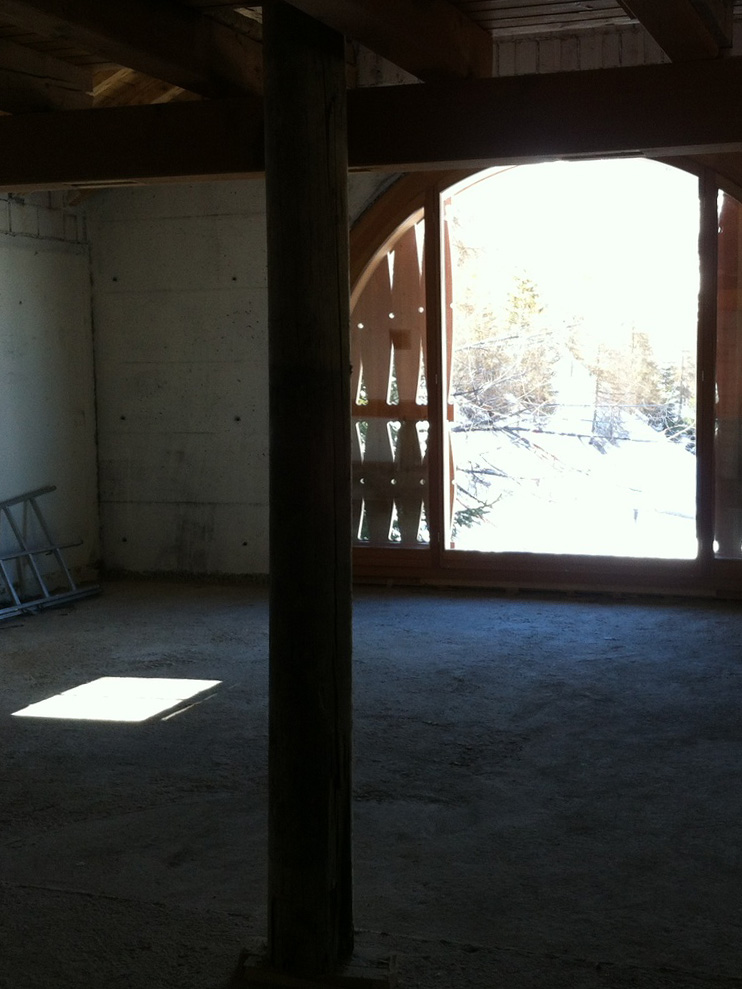
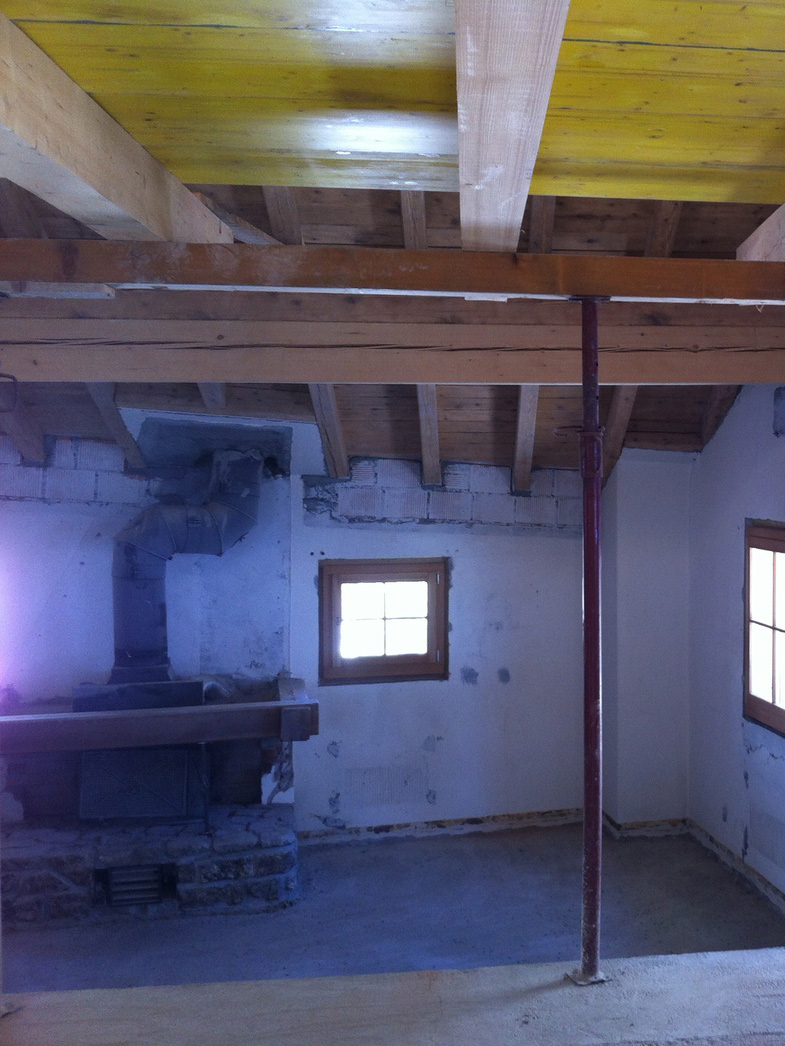
1.3. The project
CAD drawings:
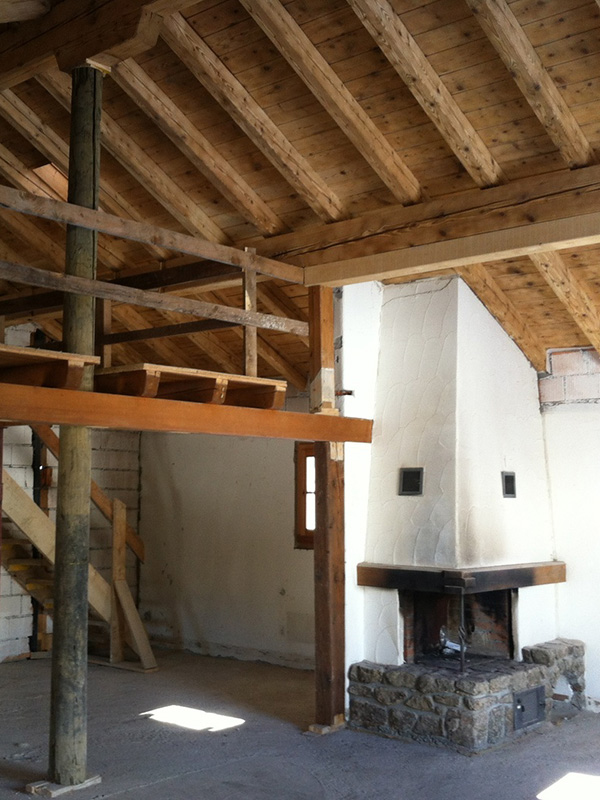
Real photos:
Handmade drawings:
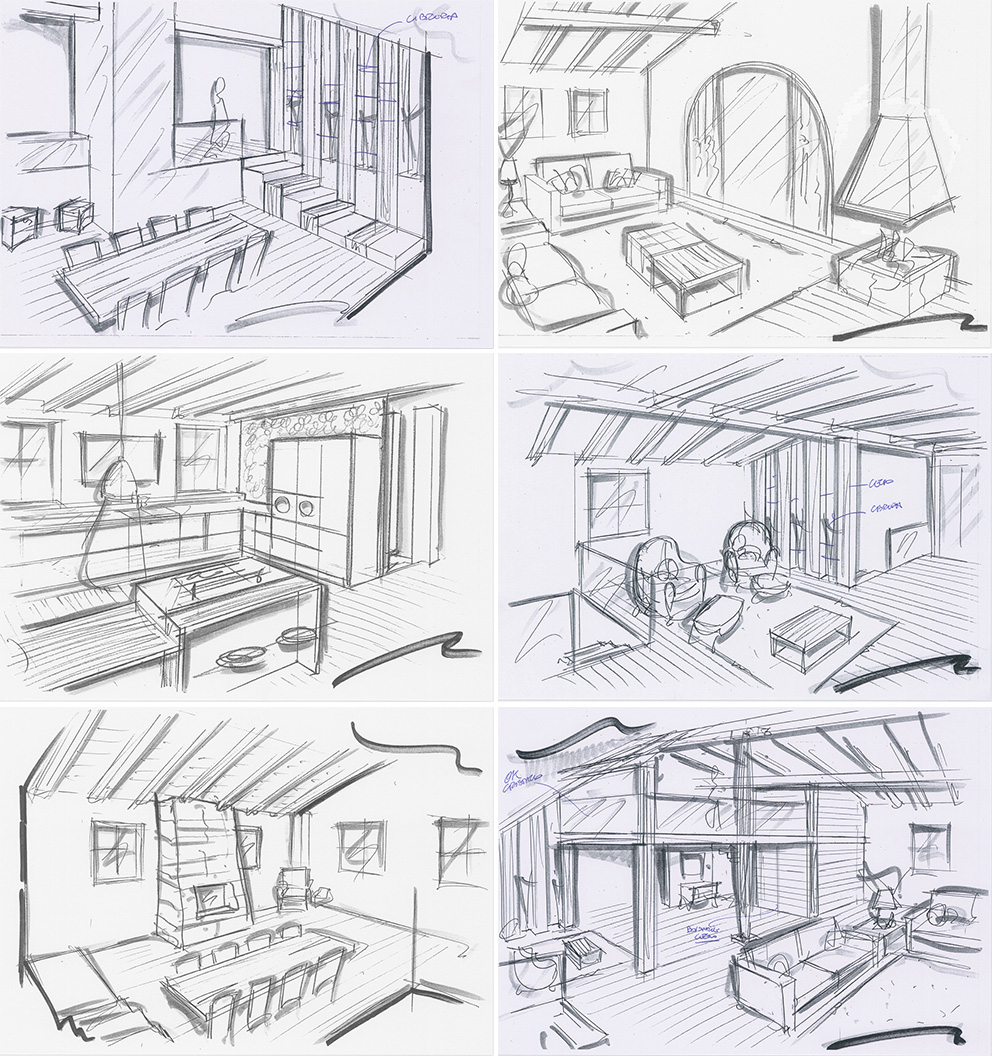
Photo samples:

2. How it was done
2.1. Architectural modeling
2.1.1 Cleaning and CAD file import
The very first step was the analysis of what we have received. In this case, it was a massive amount of information, but it has made the work easier for us. We never start any work without sufficient information. We believe it is better to spend a day or two on the preparation of models, materials, and lighting, rather than start architectural modeling straight away without the necessary resources.
In this case, we cleaned the CAD files from any unnecessary elements, leaving only the bare minimum. In AutoCAD, each of the elements of the plan has been exploded and moved onto a separate layer. This way, everything that gets imported into 3ds Max will be recognized as a single spline, which makes the .max file lightweight and easy to manage.
 CAD file imported into 3ds Max
Treat layers with extra care! They are the key to success in any architectural project, especially in complex ones. Once the CAD file was imported, we aligned the layers according to the plans, and then changed the positions of pivots to make the work more convenient.
 Pivot placement
Subsequently, walls, floor, ceiling, roof, and window holes were created using extrusion and Boolean operations.
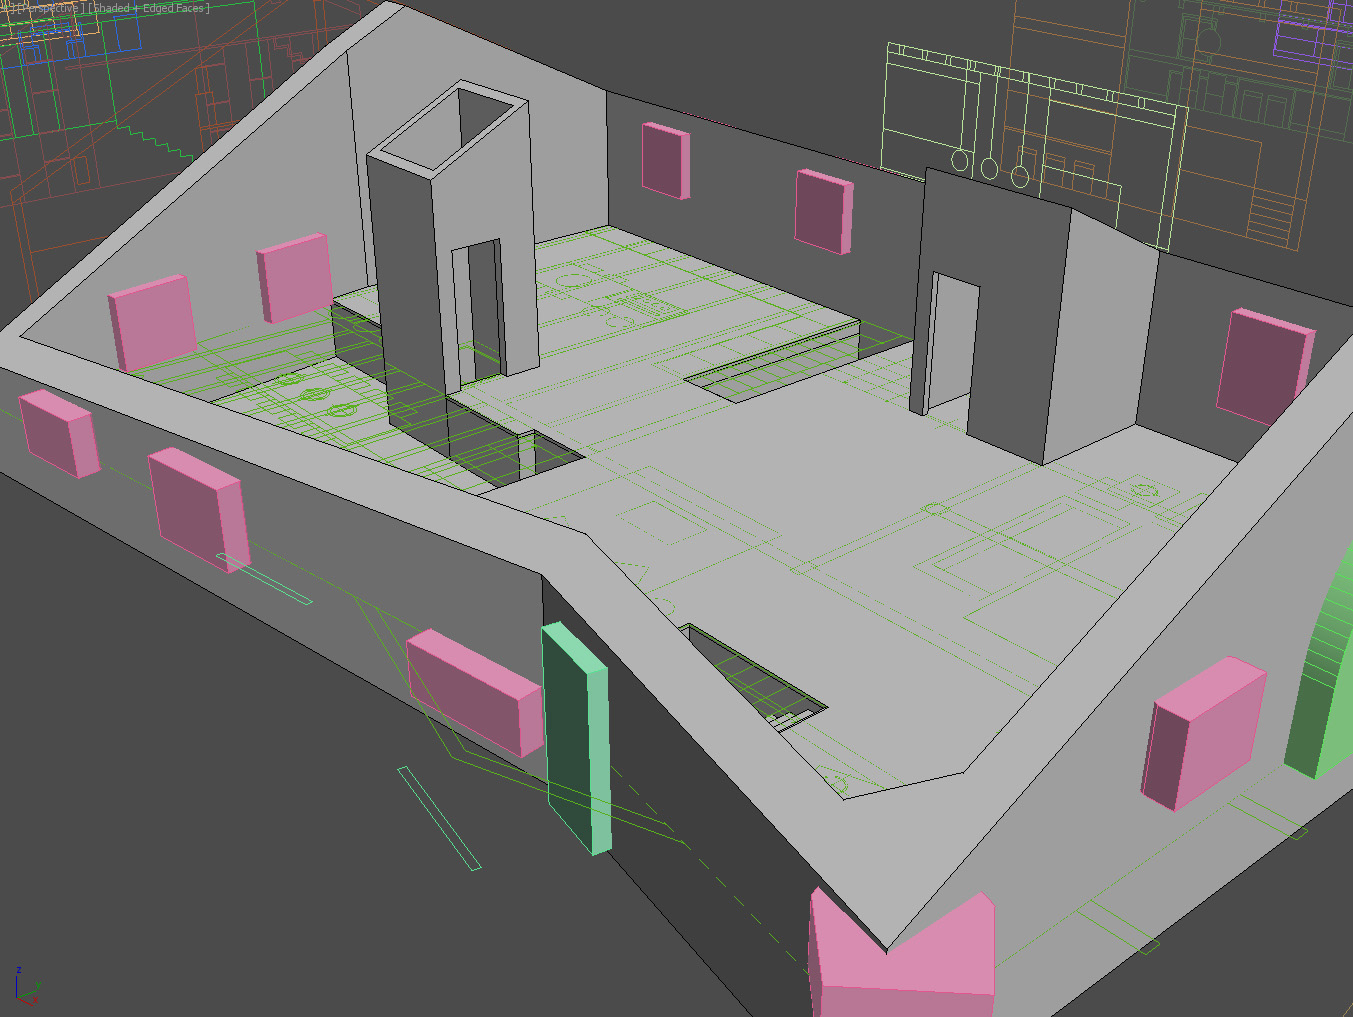 Right before the modeling phase. Note that the boxes, once subtracted using Boolean operations, will create the holes for fixtures.
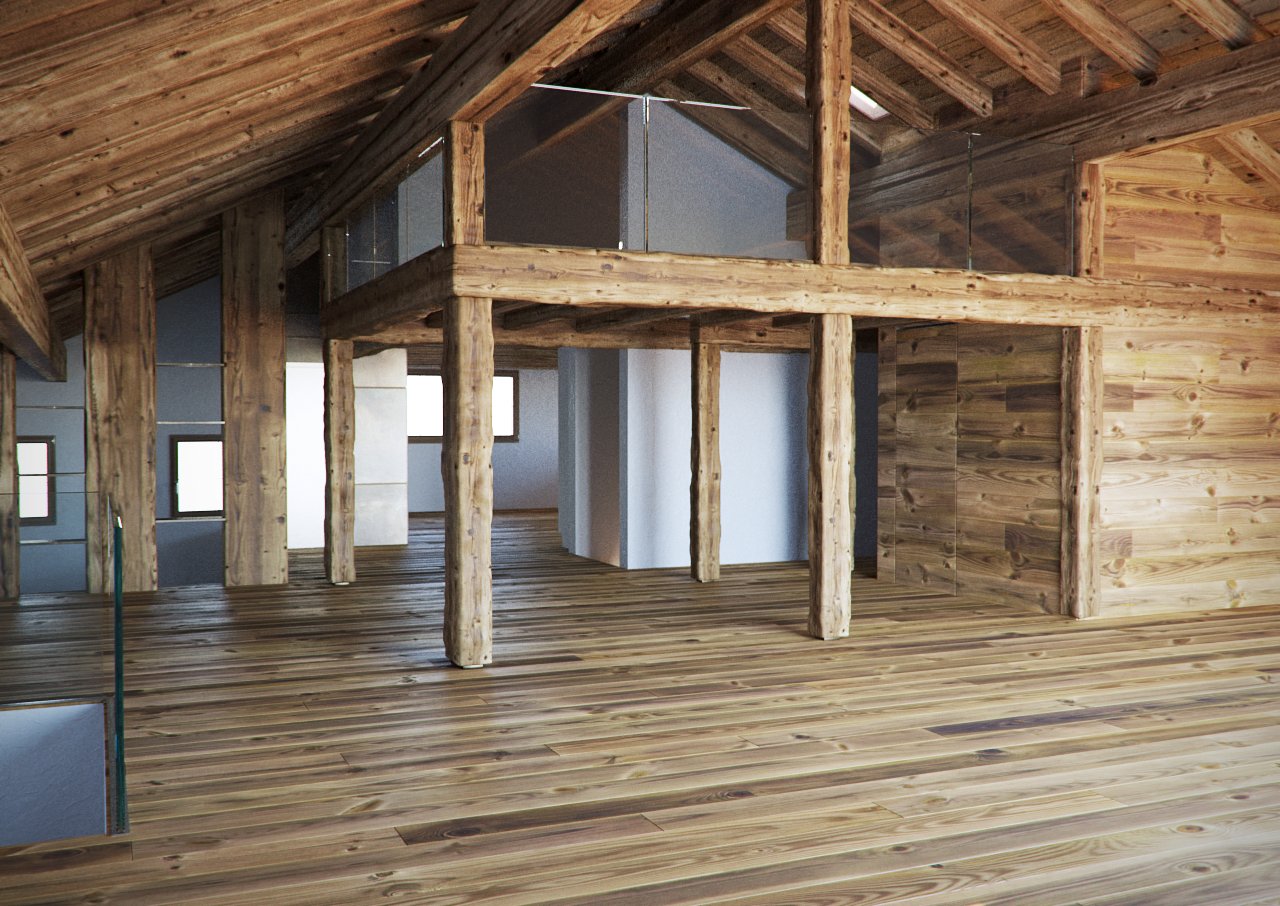
2.1.2 Modeling flooring, beams, columns, and windows
The next step was modeling floors, beams, and columns. For the wooden floor we used the famous Floor Generator. This simple, yet powerful script needs no additional commentary. As can be seen in the photos, CAD files and sketches – the project contained many wooden beams. In addition to good texturing, it was necessary to find a quick and easy way to ensure that beams would not appear as simple “chamfer boxes”, but more realistic, uneven objects. We simply used a 3D Perlin noise map as displacement to distort the geometry. You might ask “why use 3ds Max displacement instead of Corona’s native implementation?”. Well, the answer is prosaic – we had to make sure that the scene, although not very complex, would not exceed the RAM limit of 24GB. Moreover, using this way, you end up with real-time feedback of what is going on in the scene, and you can change the appearance of the geometry by changing the parameters of both the displacement modifier, and Perlin map.
 Perlin map was used for the displacement
On the other hand, we used simple chamfer boxes to create kitchen beams. They were intended to appear smooth, uniform, and unworn. We used the excellent RailClone plugin by Itoo Software to place them in the scene. For window profiles we used a ready-made model duplicated among all of the window holes with slightly modified vertices. One of the tricks about the windows was to use simple planes as glass geometry instead of solid boxes. This solution ensured us that the rendering would be fast and noise-free.
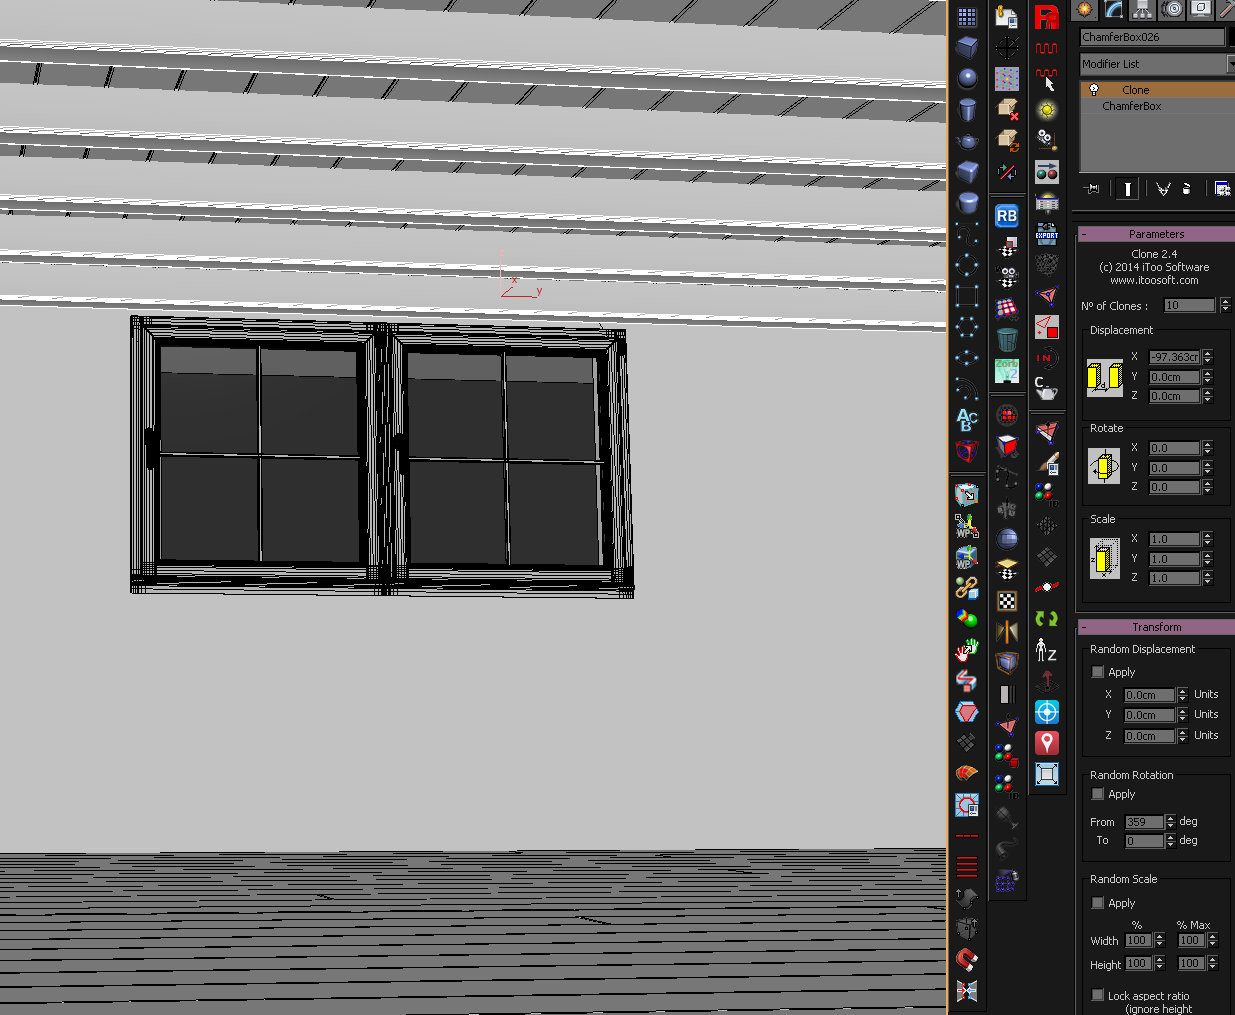 Placing beams with the Clone plugin
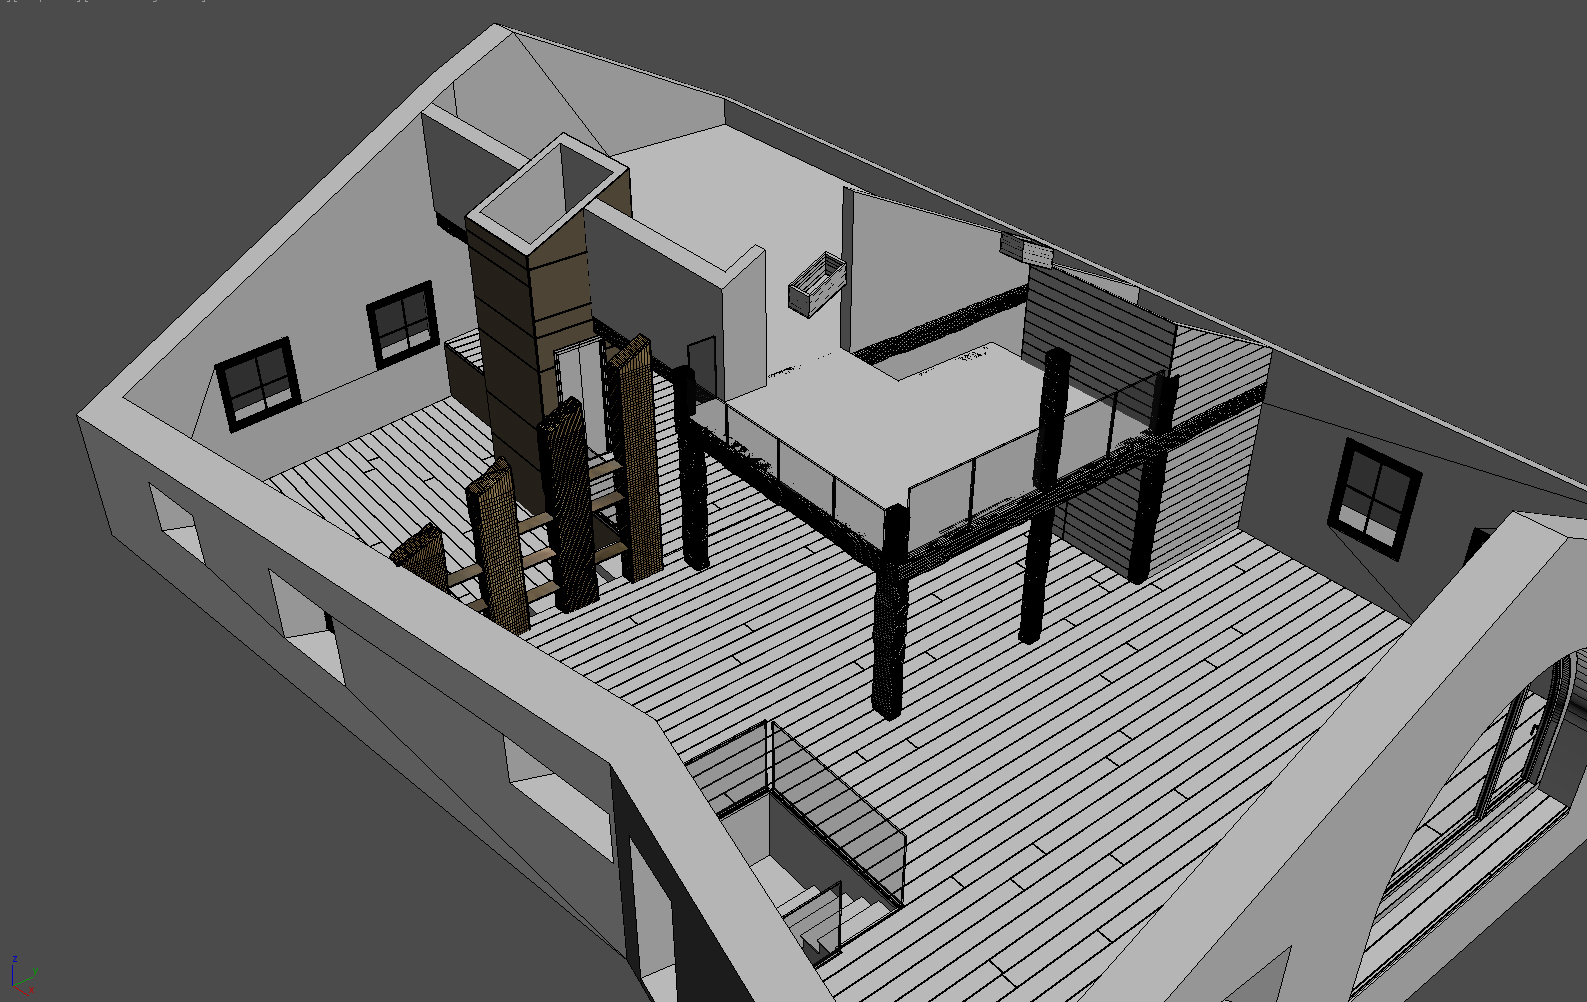 As you can see Floor Generator can be as well used to create boarded walls!
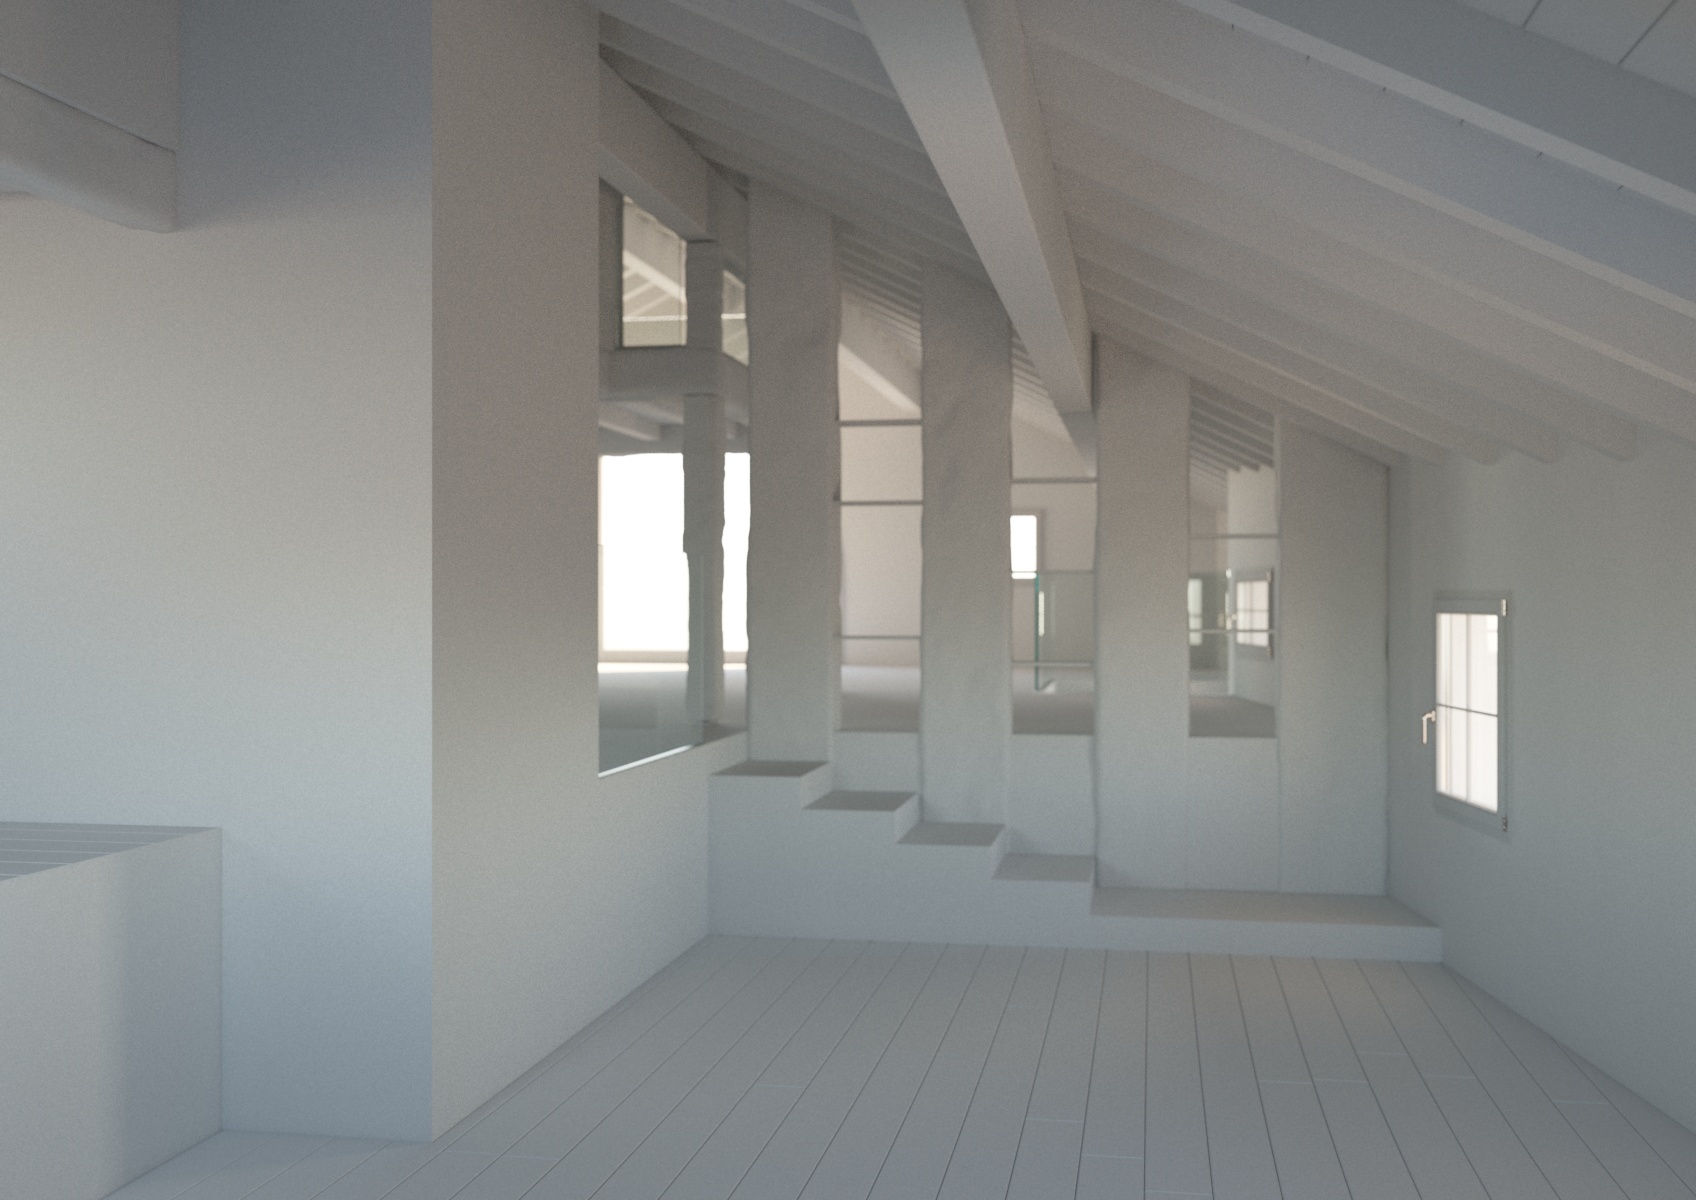
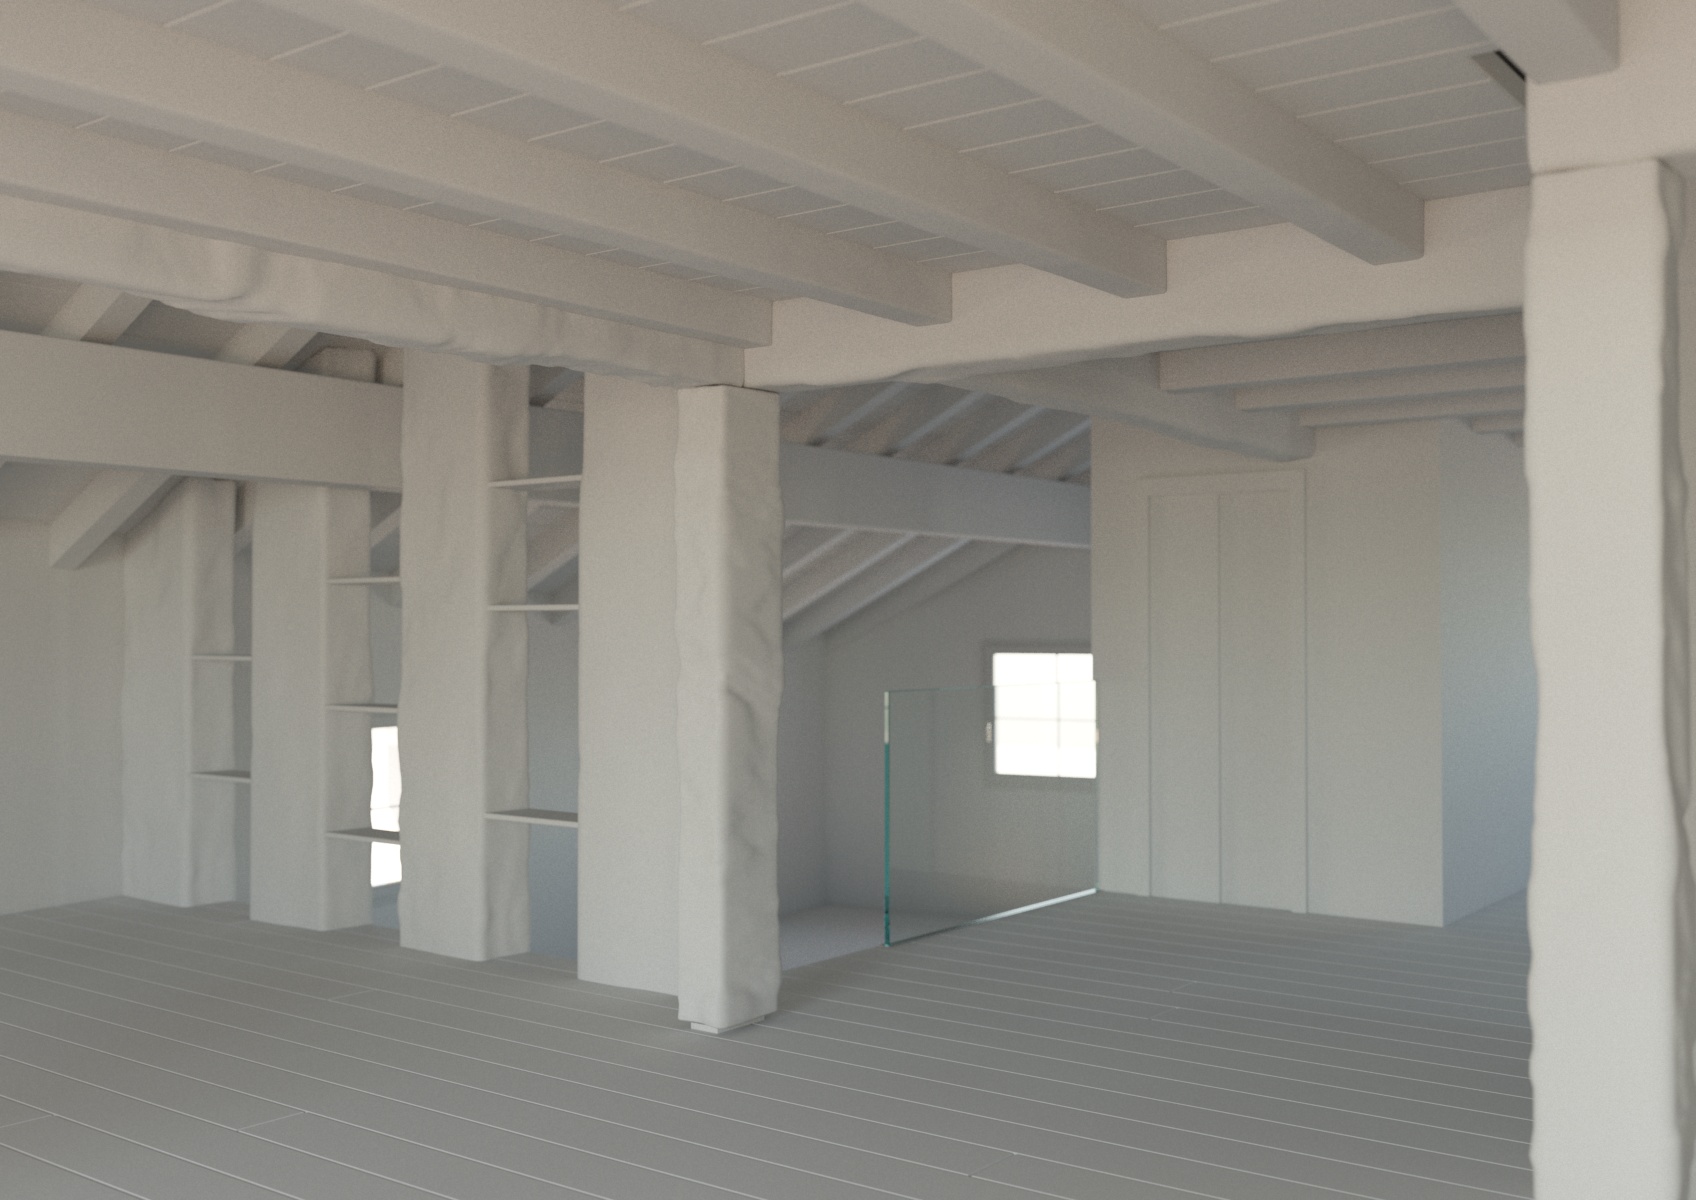
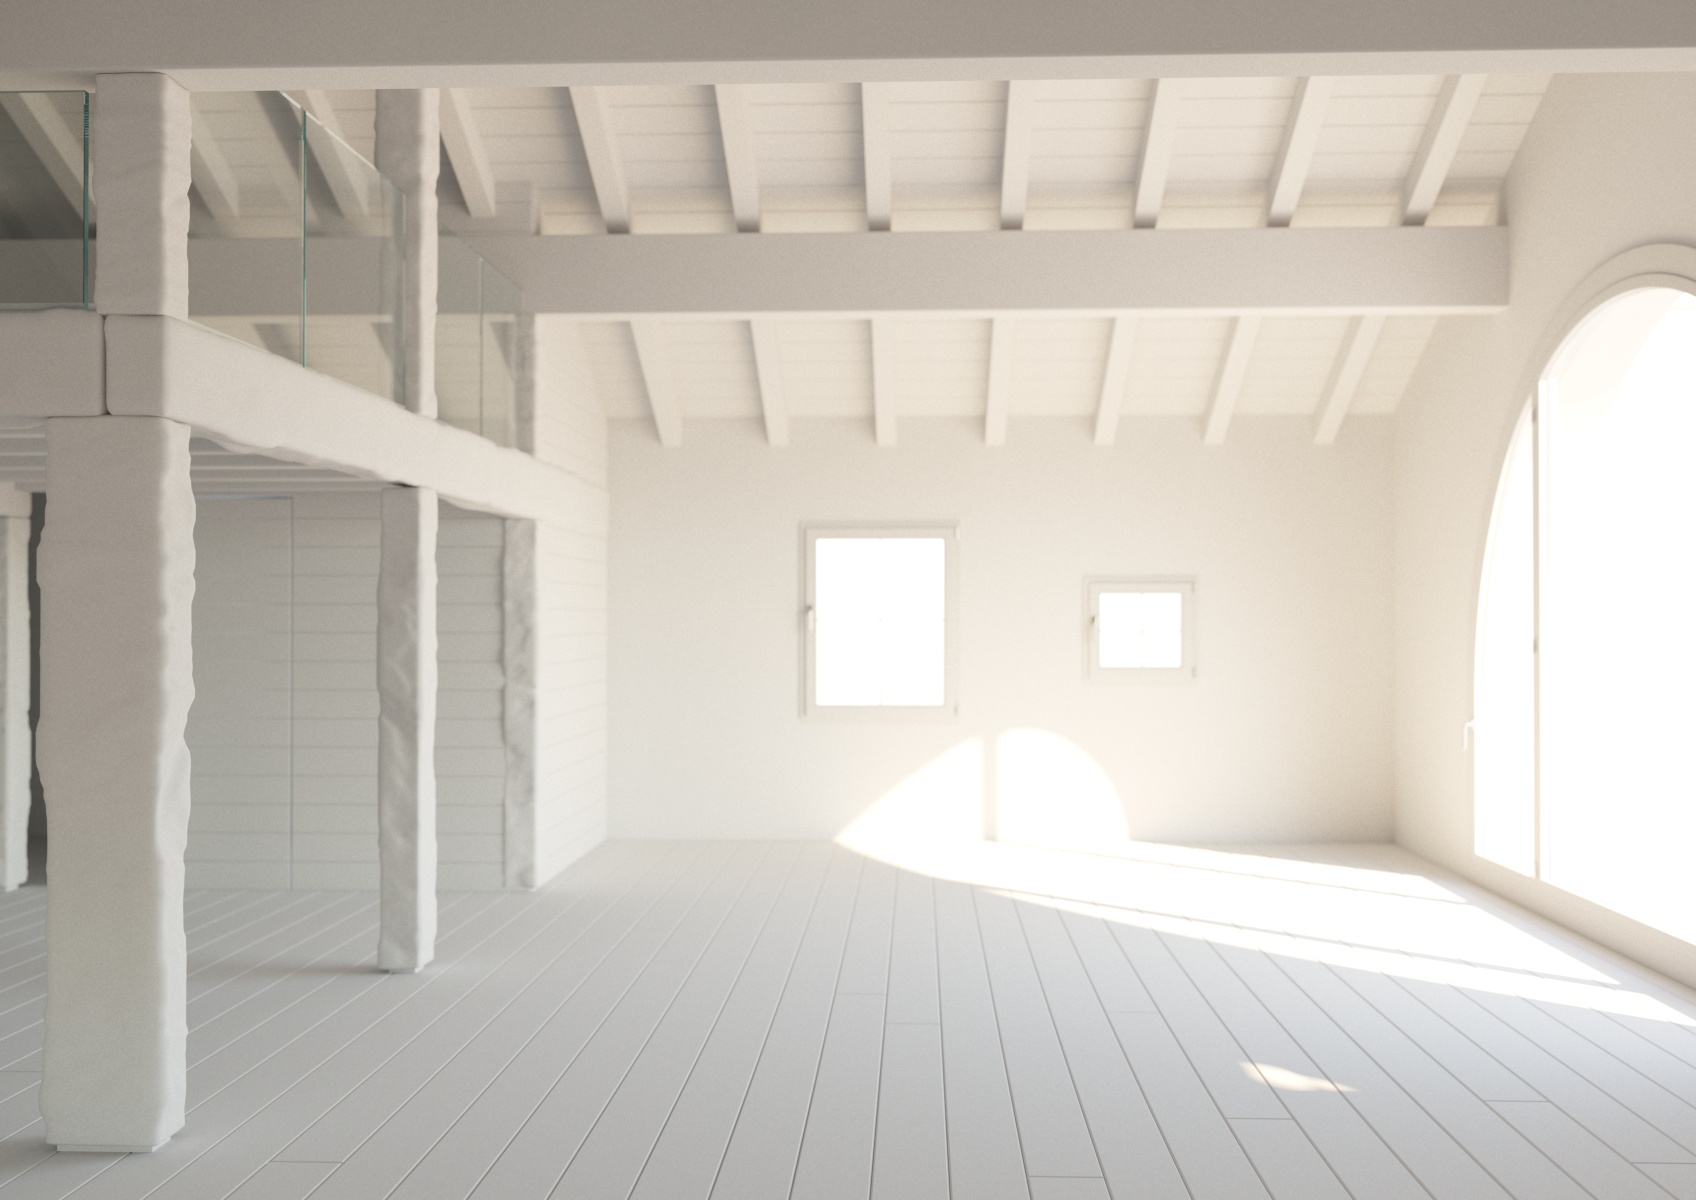
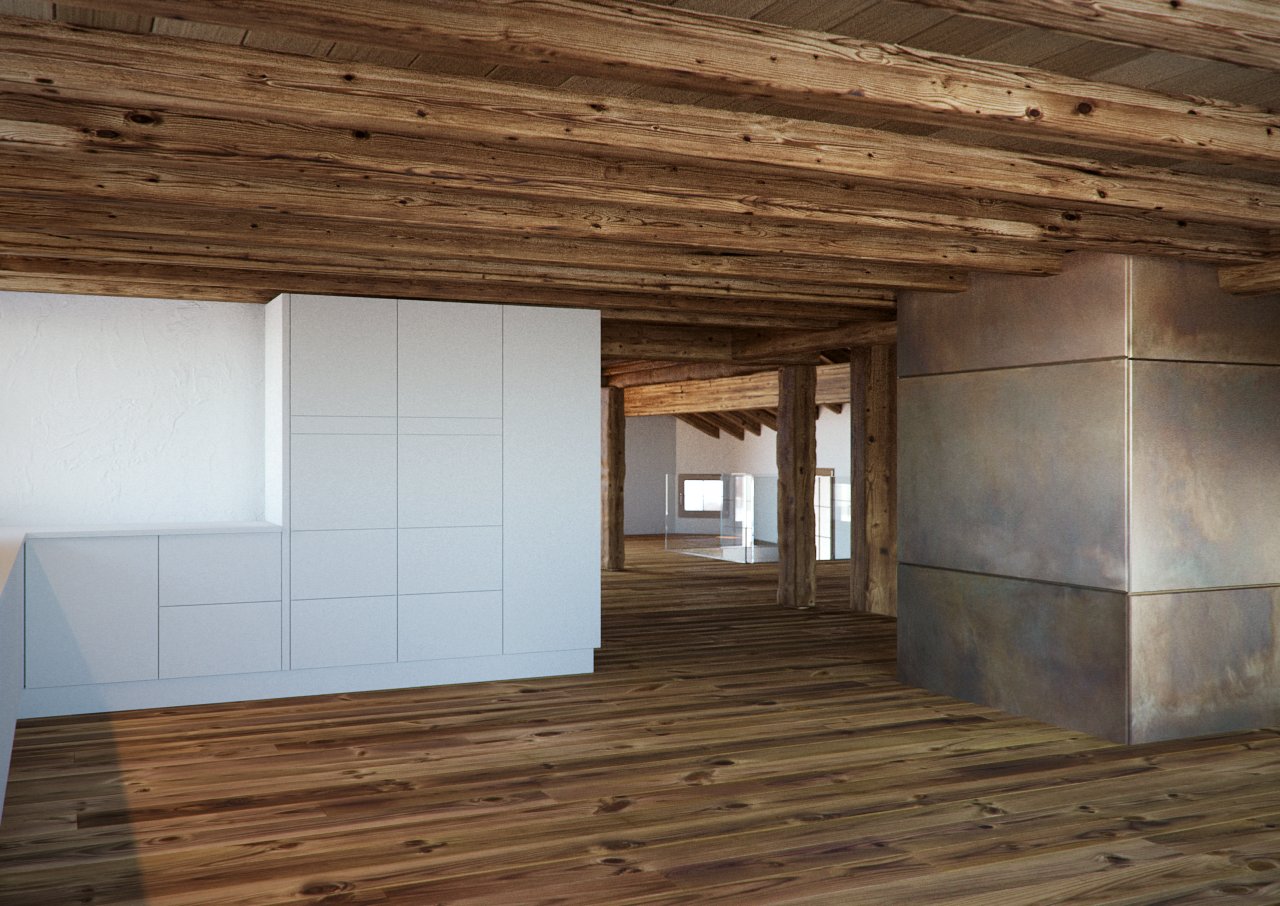
2.1.3 Lighting setup
At this stage, we started adding portals to the window holes, assigned clay material to the geometry, and experimented with basic lighting. Eventually the lighting setup was very simple – Corona Sun and Corona Sky produced soft, natural shading. The clay material was a simple CoronaMtl with RGB150 value. Personally, I never use diffuse level of 180-190. I choose RGB150 to speed up rendering and minimize noise level. At the end I added a ground plane to make the interior lighting even more realistic. In real world all buildings are surrounded by ground which affects light in some way.
Most of the render settings were left at default values, which resulted in great quality. The only exception was Light Samples Multiplier which was increased to refine noisy areas produced by small window openings.
2.2. Shaders
At this point, things started getting more interesting. Usually, in our studio we apply the following workflow: once the structure is modeled and basic lighting is applied (usually Corona Sun + Corona Sky) we proceed with creating and assigning the main materials. This way we can quickly get the preview of how the final result will look. In addition to that, at this stage we can already send the first renderings to our customers, and receive feedback from their side. In this project, there were substantially 5 main materials:
- Parquet
- Beams
- Stucco
- Metal
- Glass
Our materials are rarely complex for a number of reasons: first of all – the more complex the shader is, the longer the rendering time… and time is money! Second reason is the customer – we cannot afford to sacrifice hours to manage complex shader networks as the customer changes his mind. Almost every time after seeing the first tests, the customer asks to introduce some changes in color, textures, wants to replace wood with concrete, wallpaper, and so on… Thankfully, Corona handles lighting so perfectly that even with very basic materials the results are truly great!
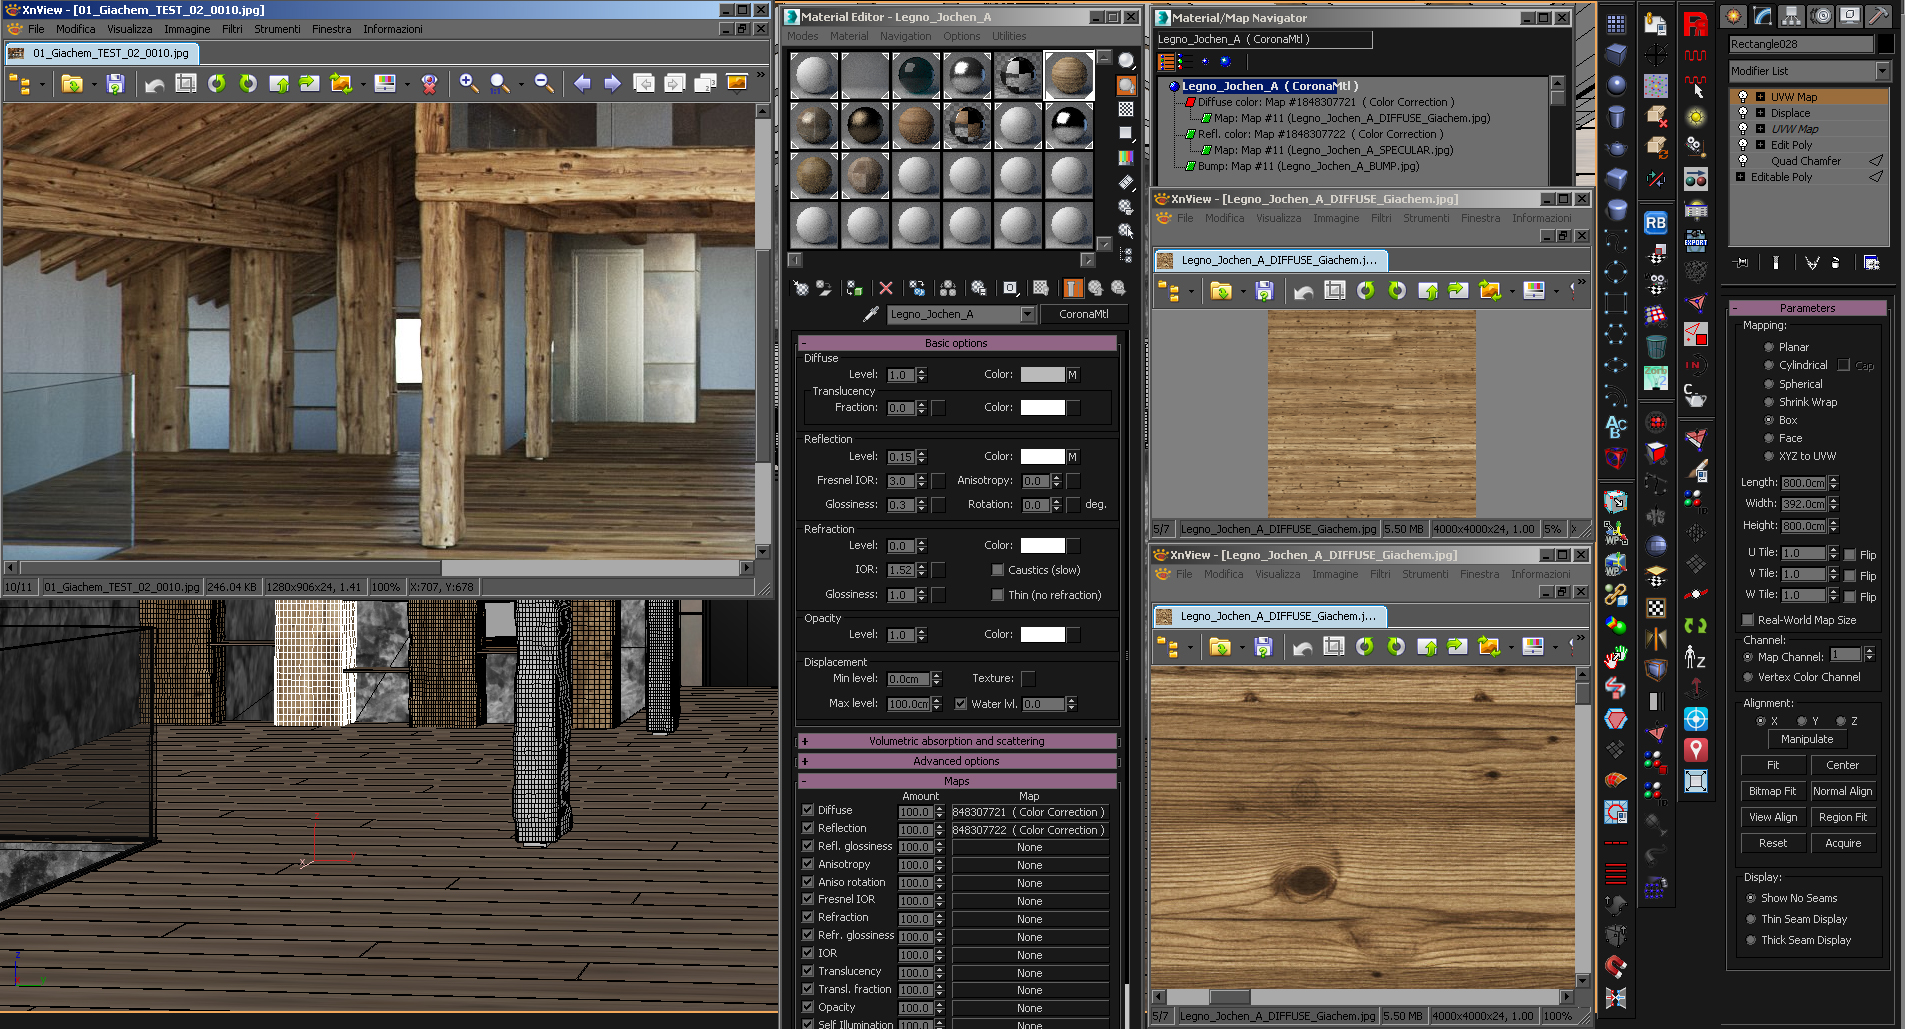


To make the boarded wall we used a basic material combined with the famous Multitexture map. This is another plugin which does not require any further introduction. The glass was a simple refractive material with green tint. For the metal parts we manually unwrapped the geometry and applied textures from various online sources.
 UVW unwrapping
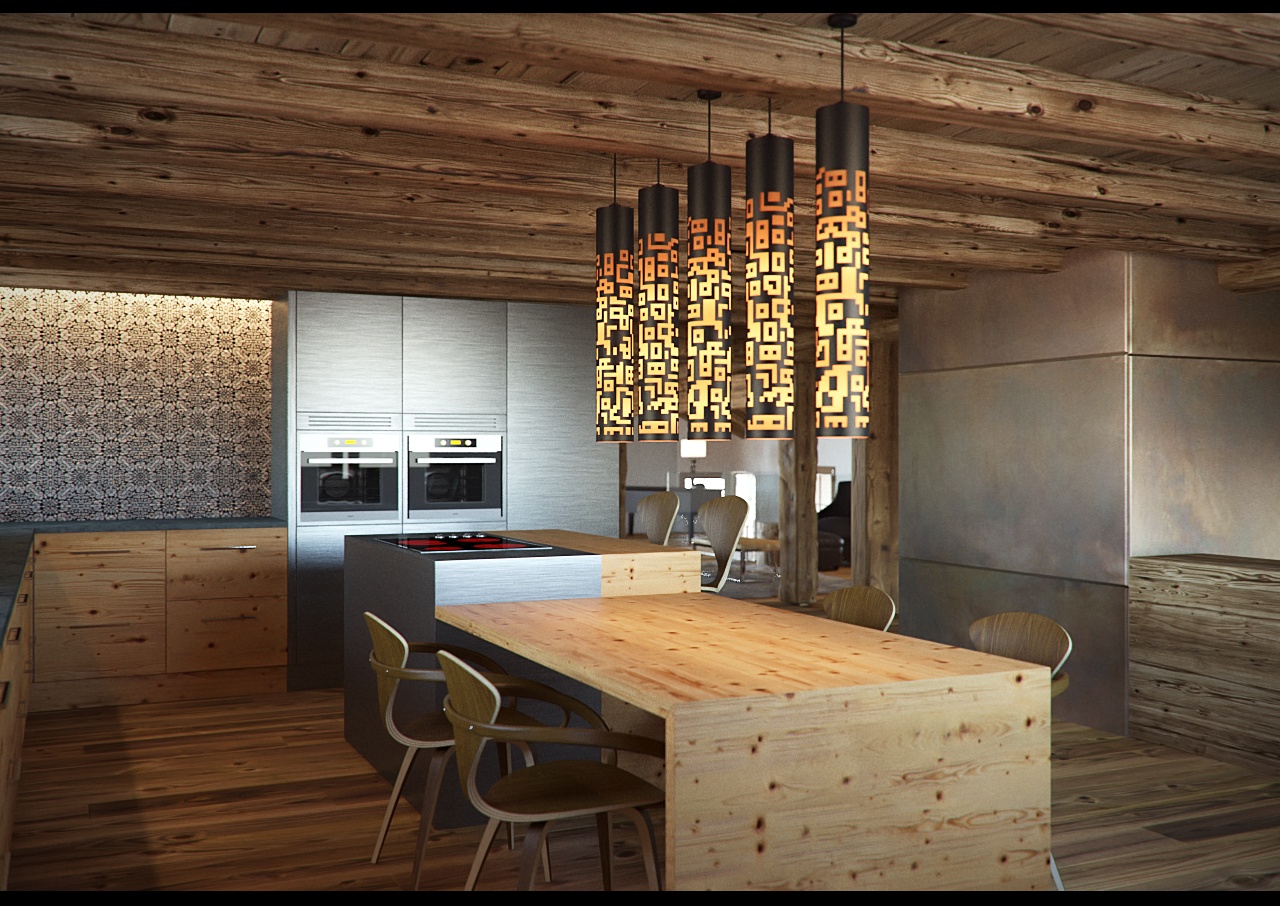
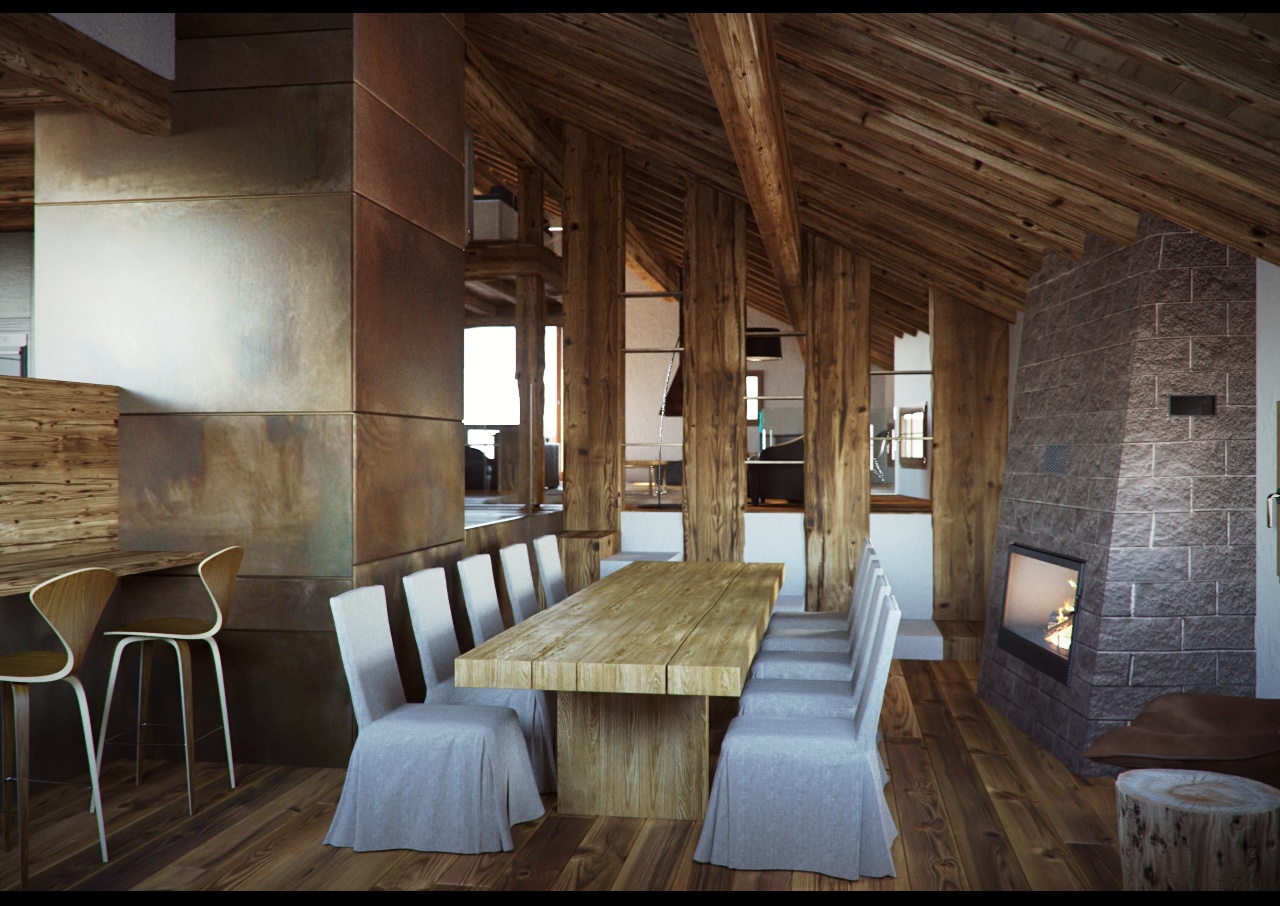
2.3. Adding furnishing
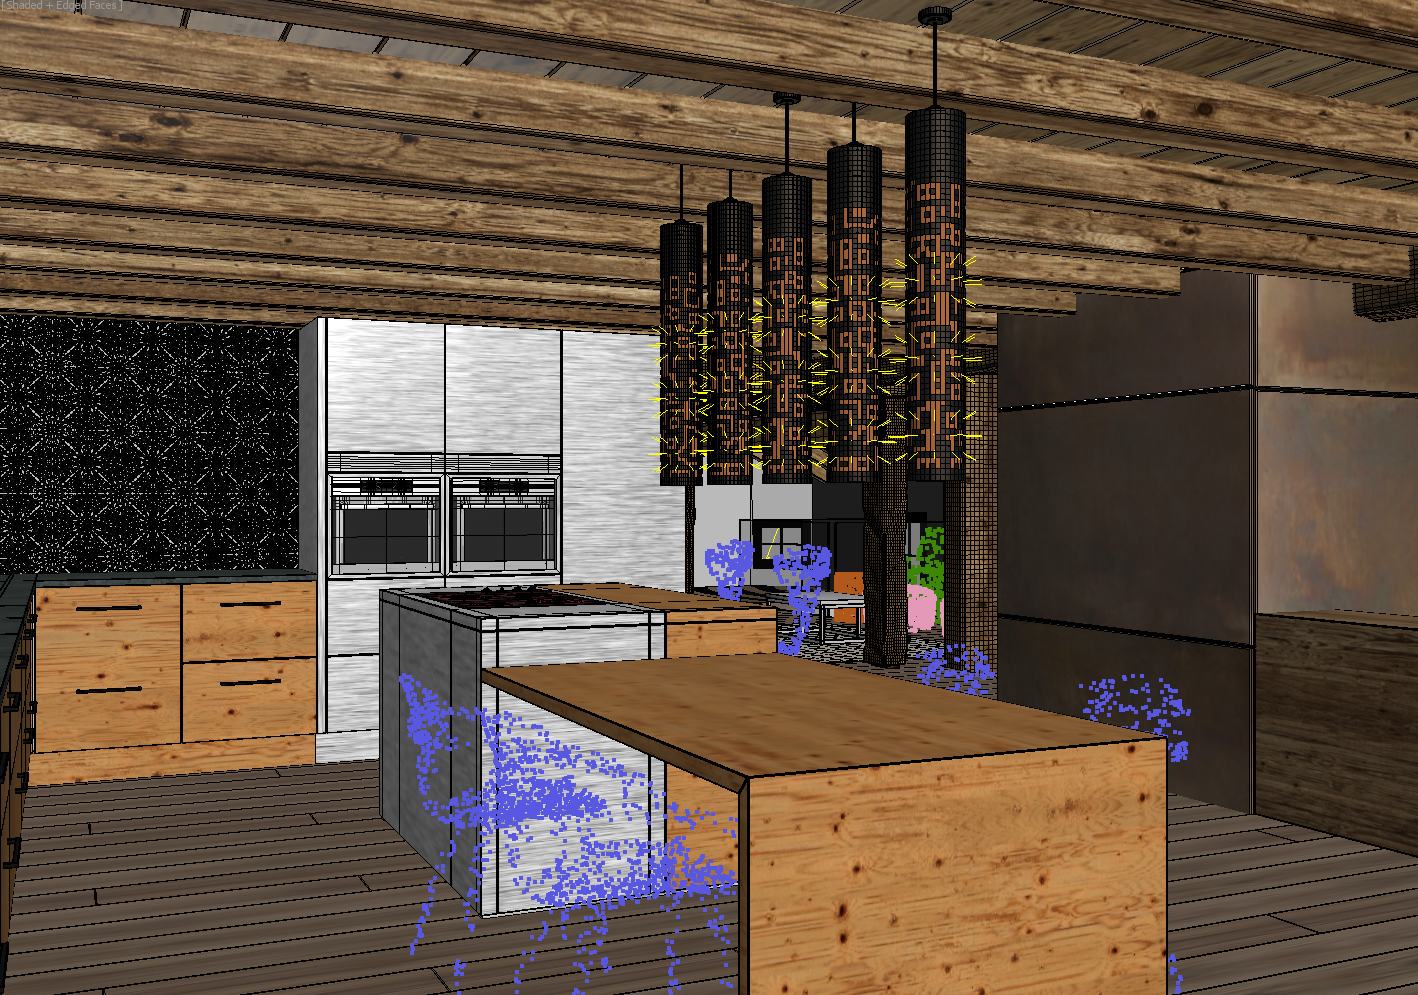
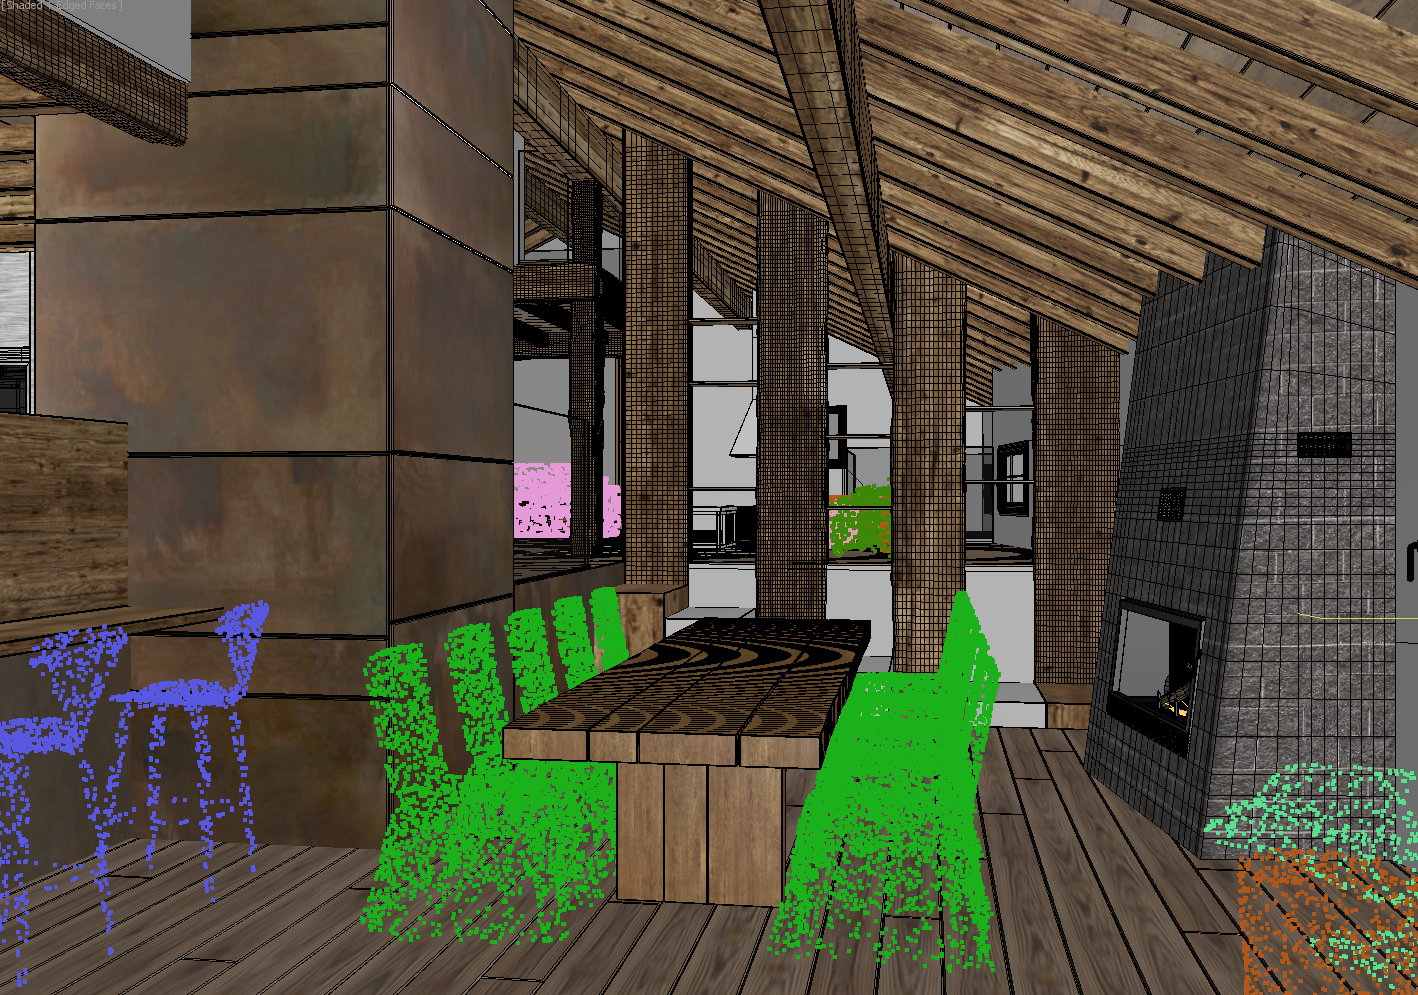
At this point, we started adding what was missing in the project – the furnishing. Following the guidelines of the architect, we began modeling tables, chairs, chandeliers, carpets, and decorative accessories. As in most cases, we saved each item as a separate file – we believe that this workflow is the most flexible. Once all of the models were finished, we sent them to the client for approval. We also created proxy versions of the models and stored them in our library for future use in the final project file. Corona proxies were absolutely necessary for us considering the complexity of the models and the whole scene. They also allowed us to make the .max file as lightweight as possible.
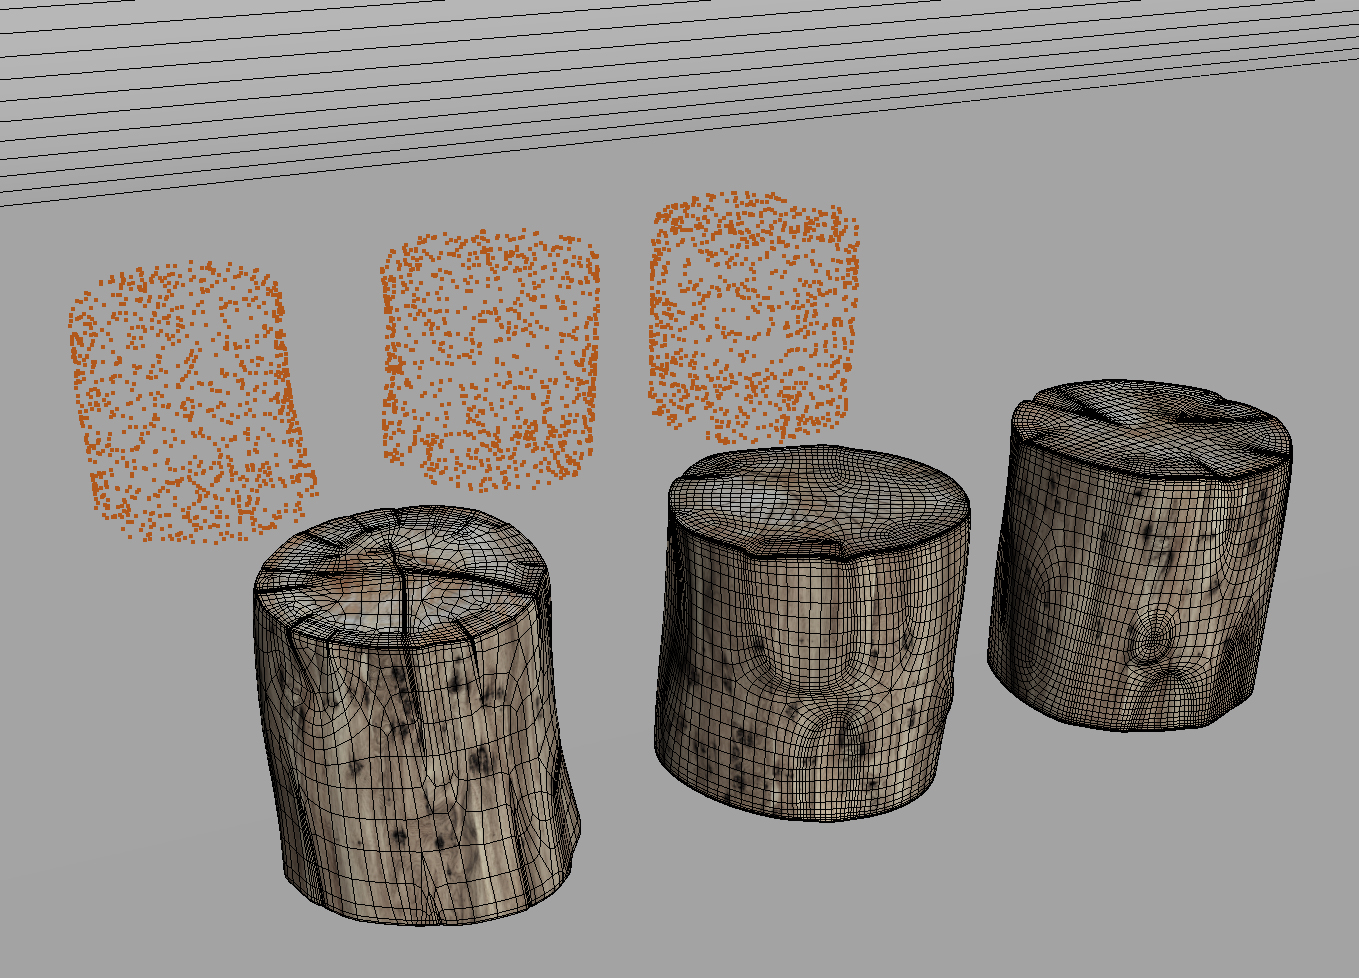
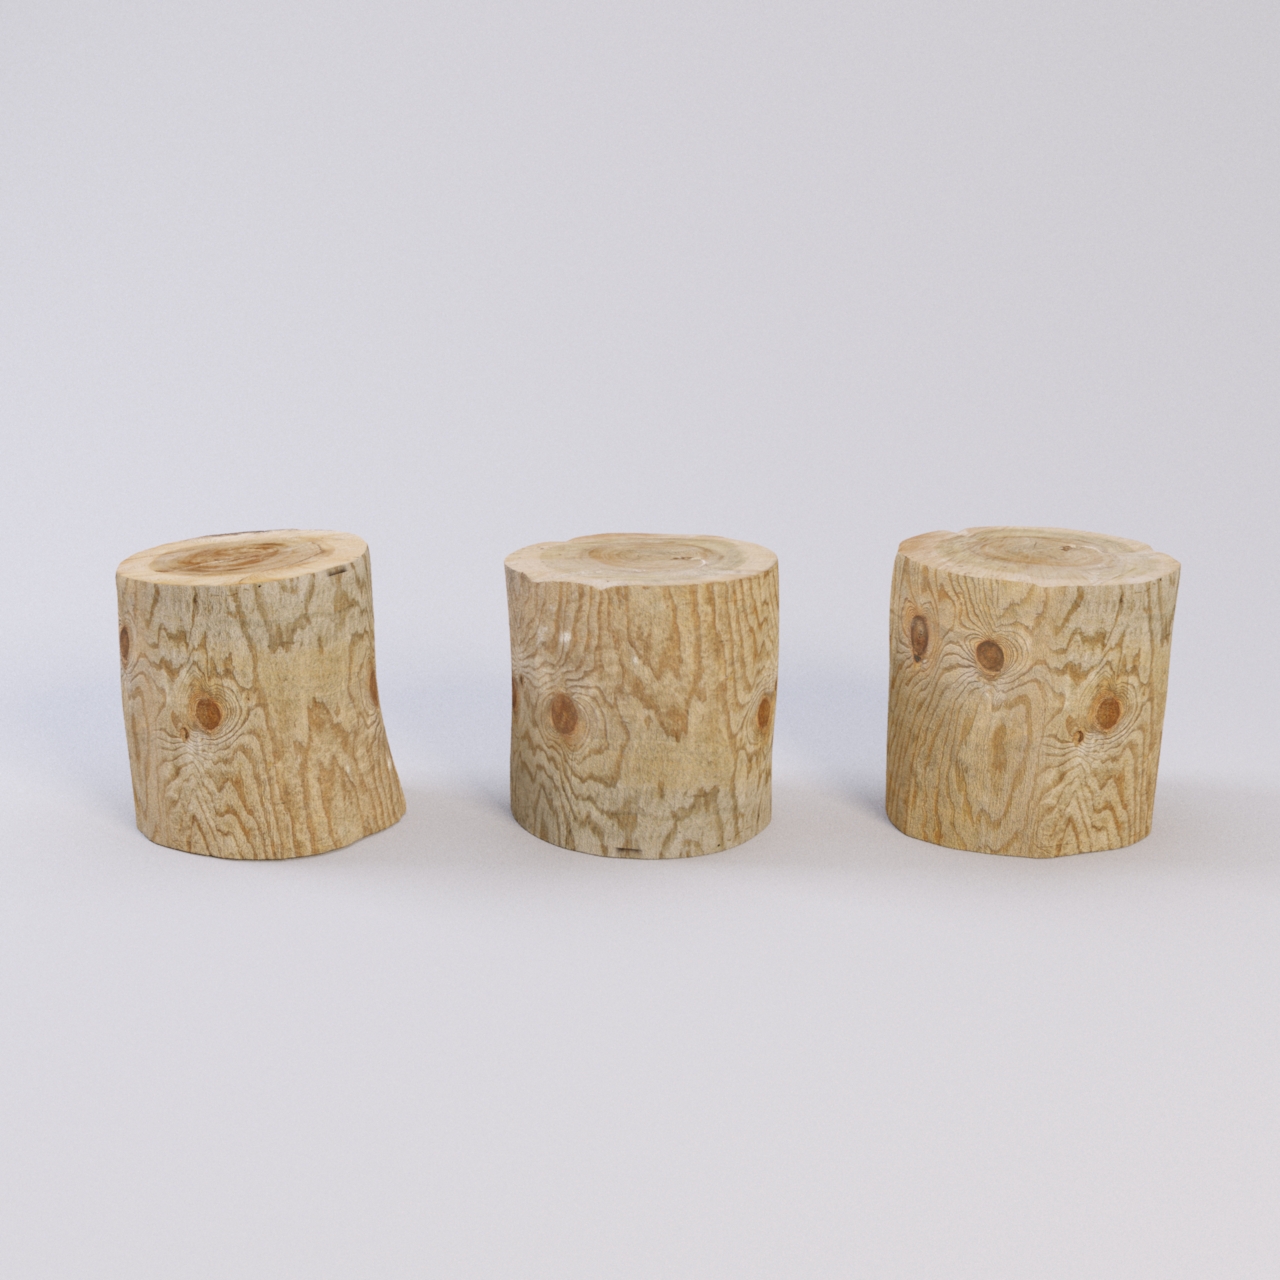
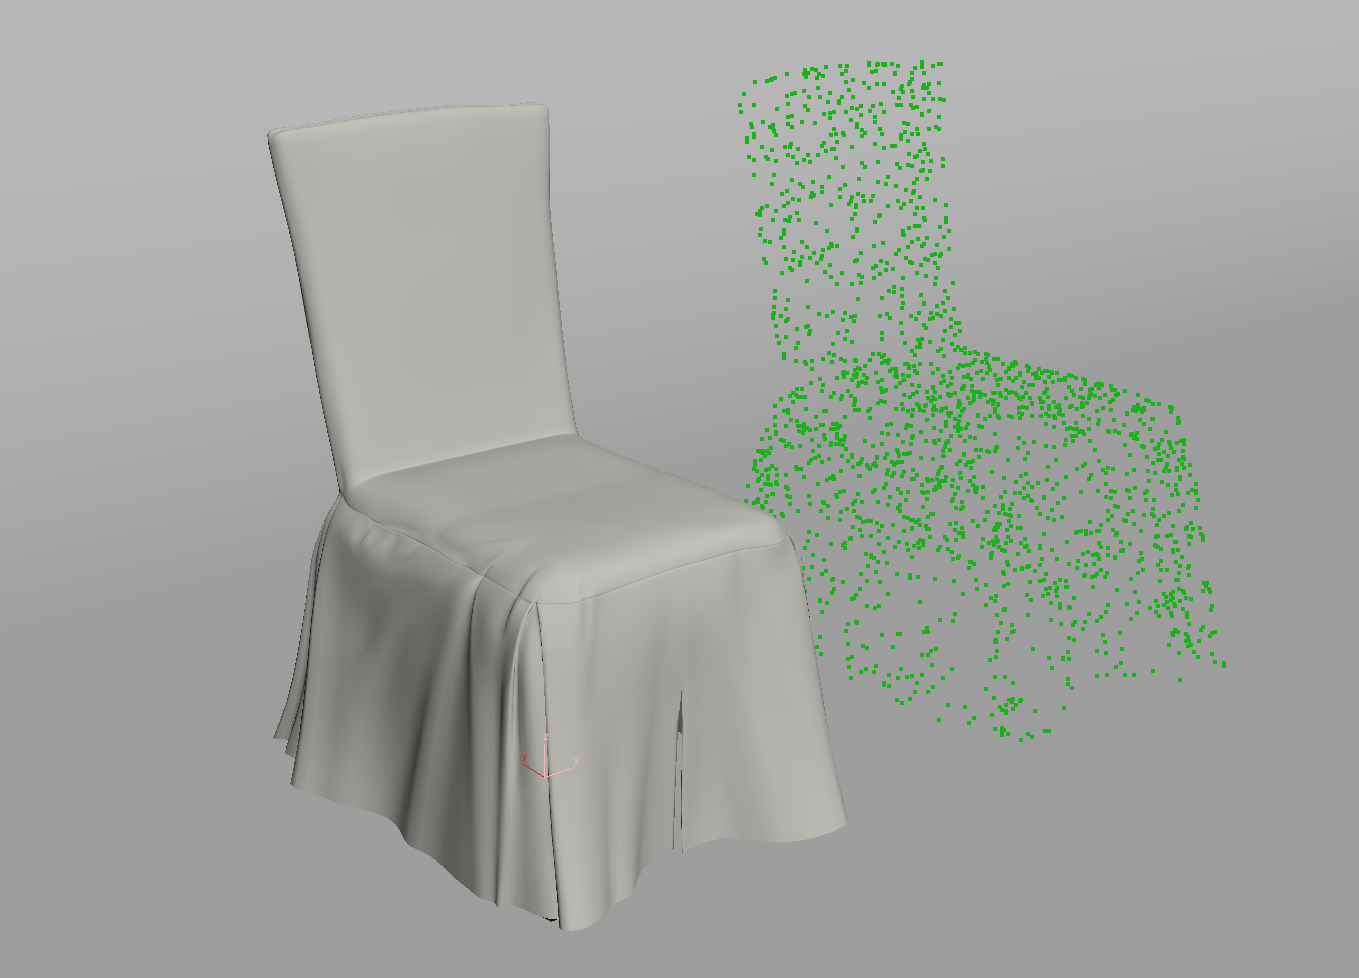
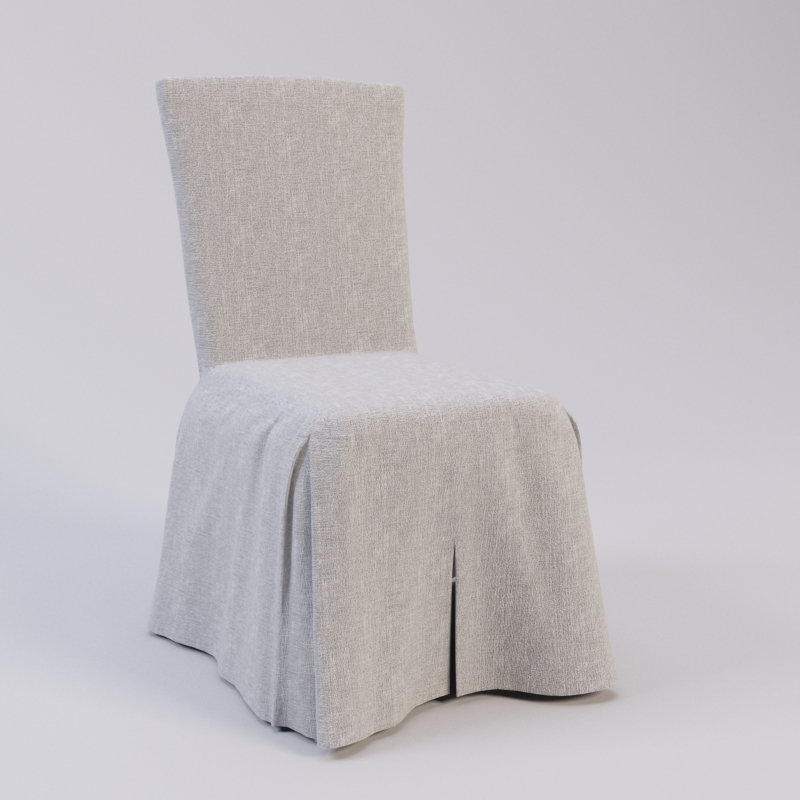
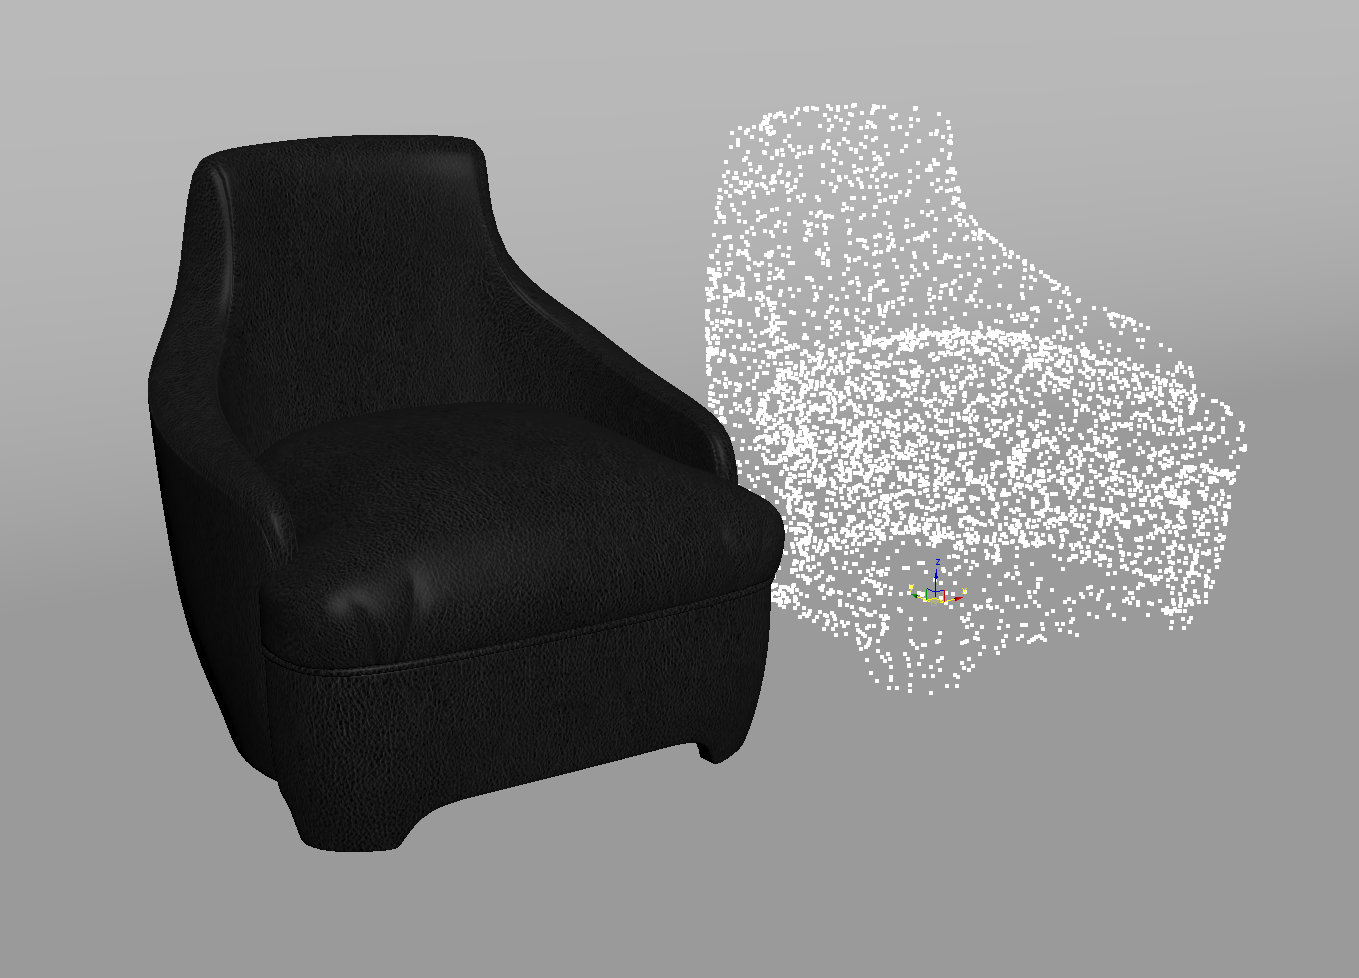
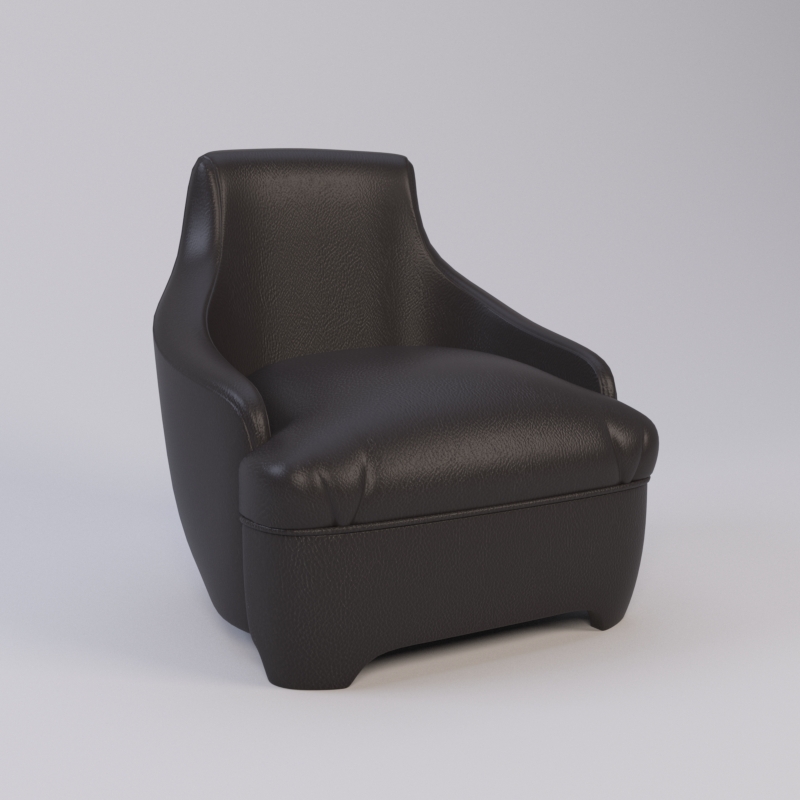
You can see wireframes and the final renders below:

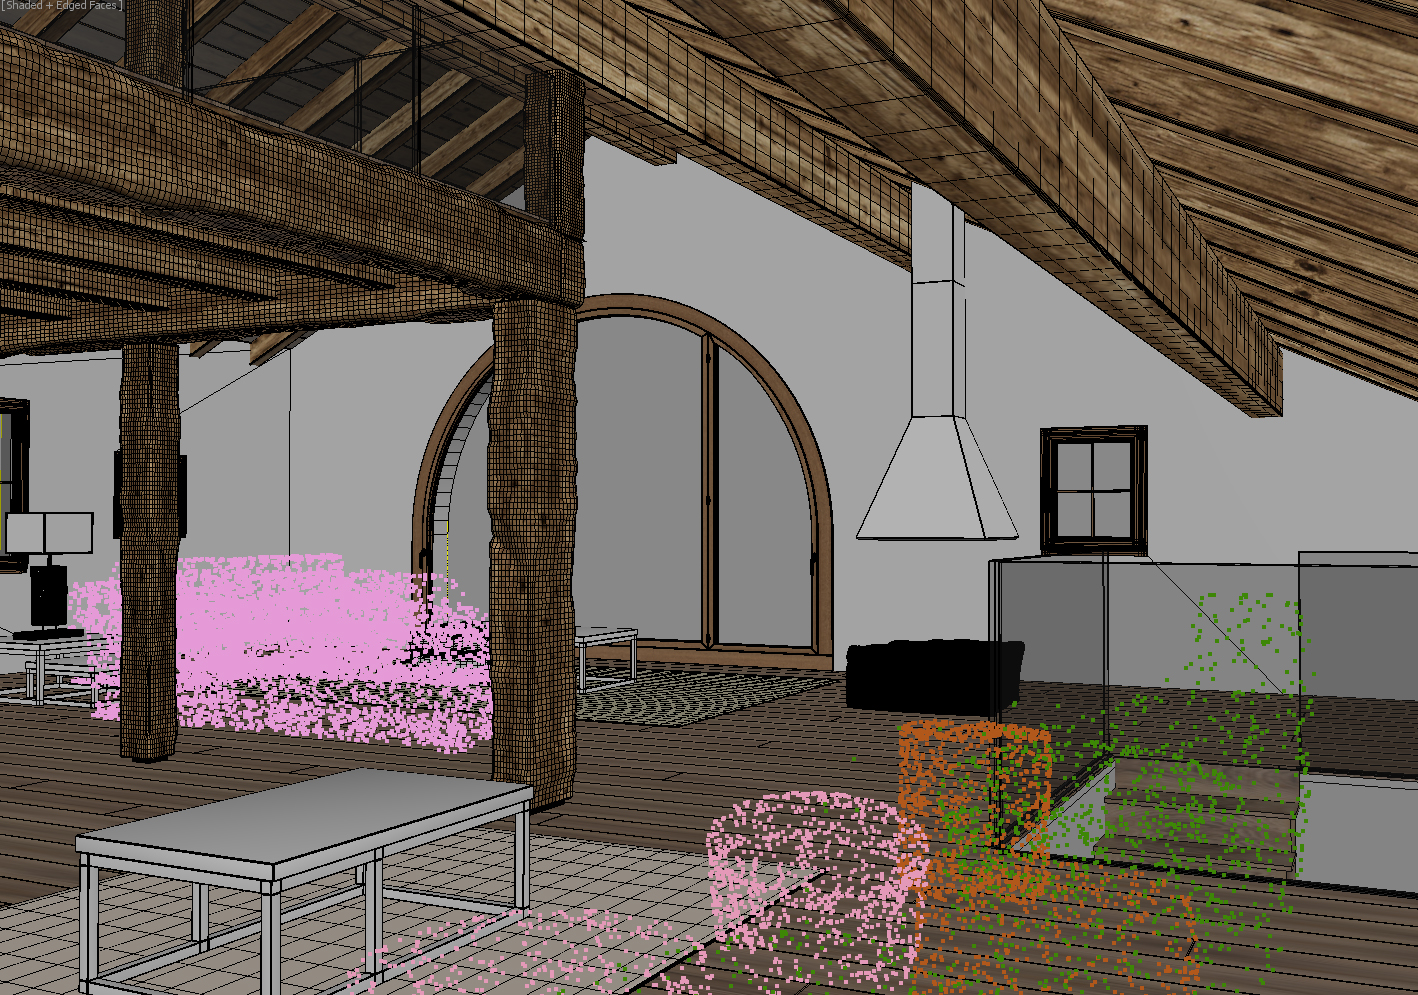
I am not going to describe the process of making of any of the forementioned objects or materials. First of all, it’s because you can find many guides, tutorials, and other resources on the Internet, especially on the Corona Renderer forum. I do not want to repeat the things which have already been said by others, probably in a better way. What I would like to note though, is the extreme simplicity and responsiveness which Corona offers throughout the modeling and rendering process.
2.4. Revisions
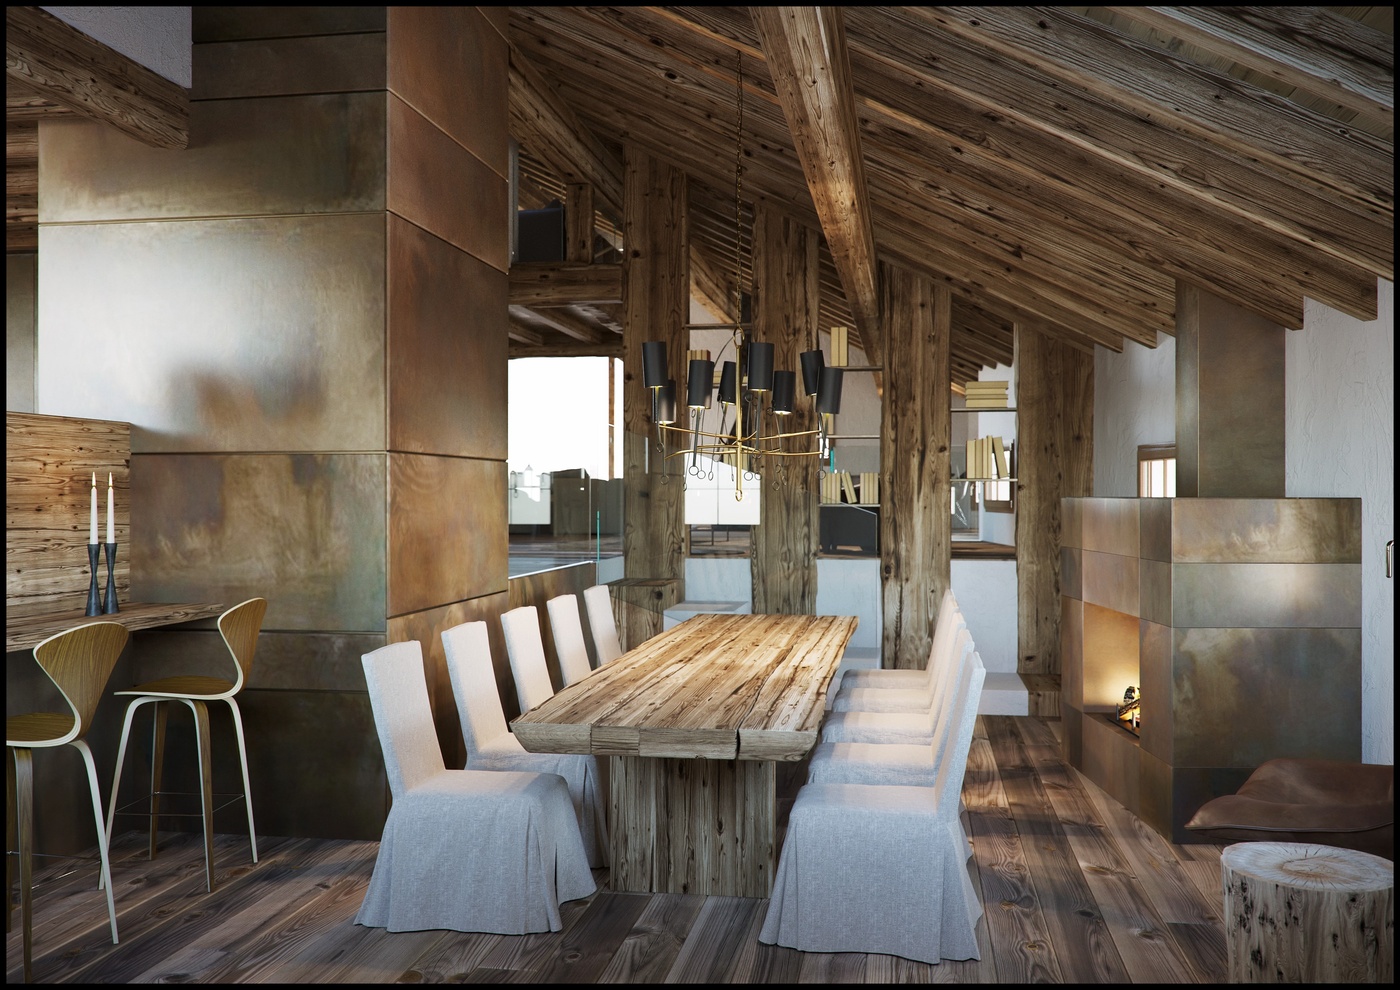
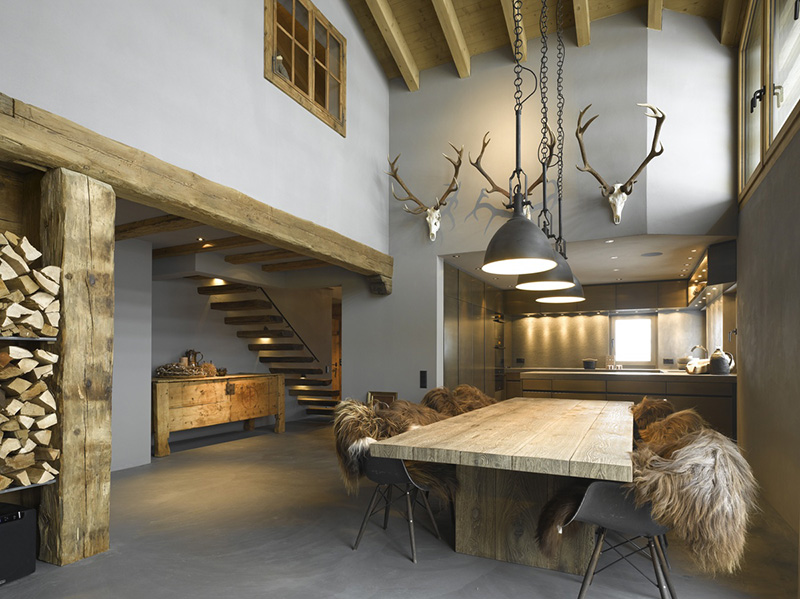
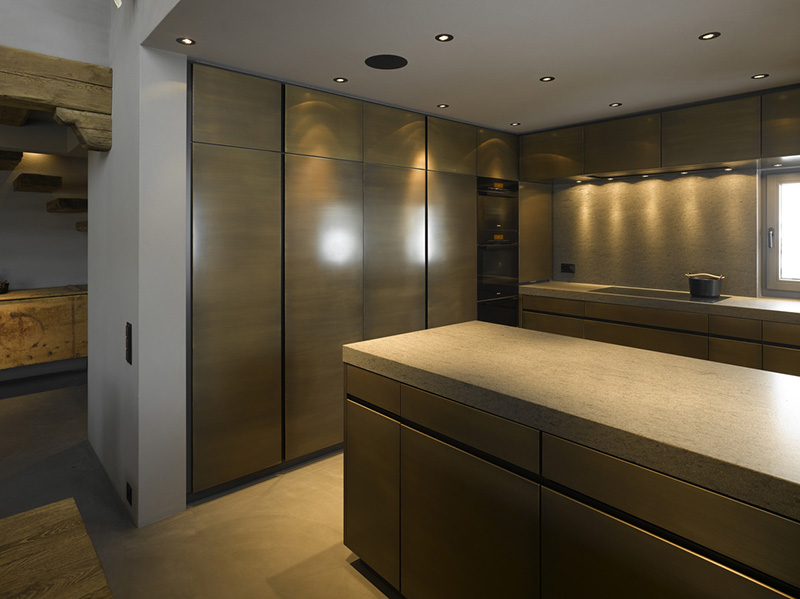
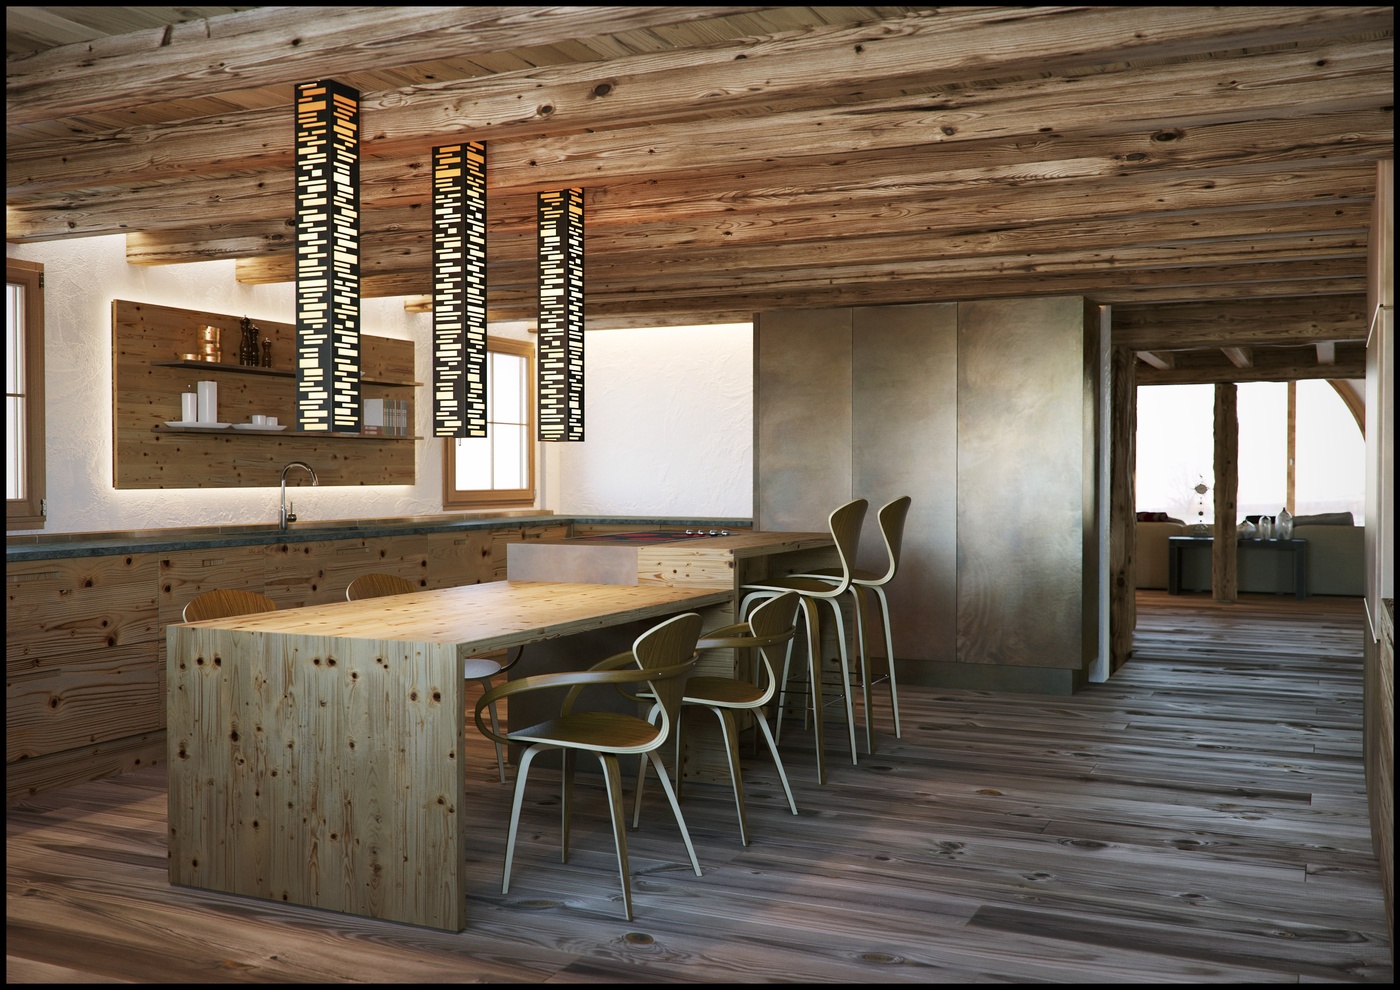
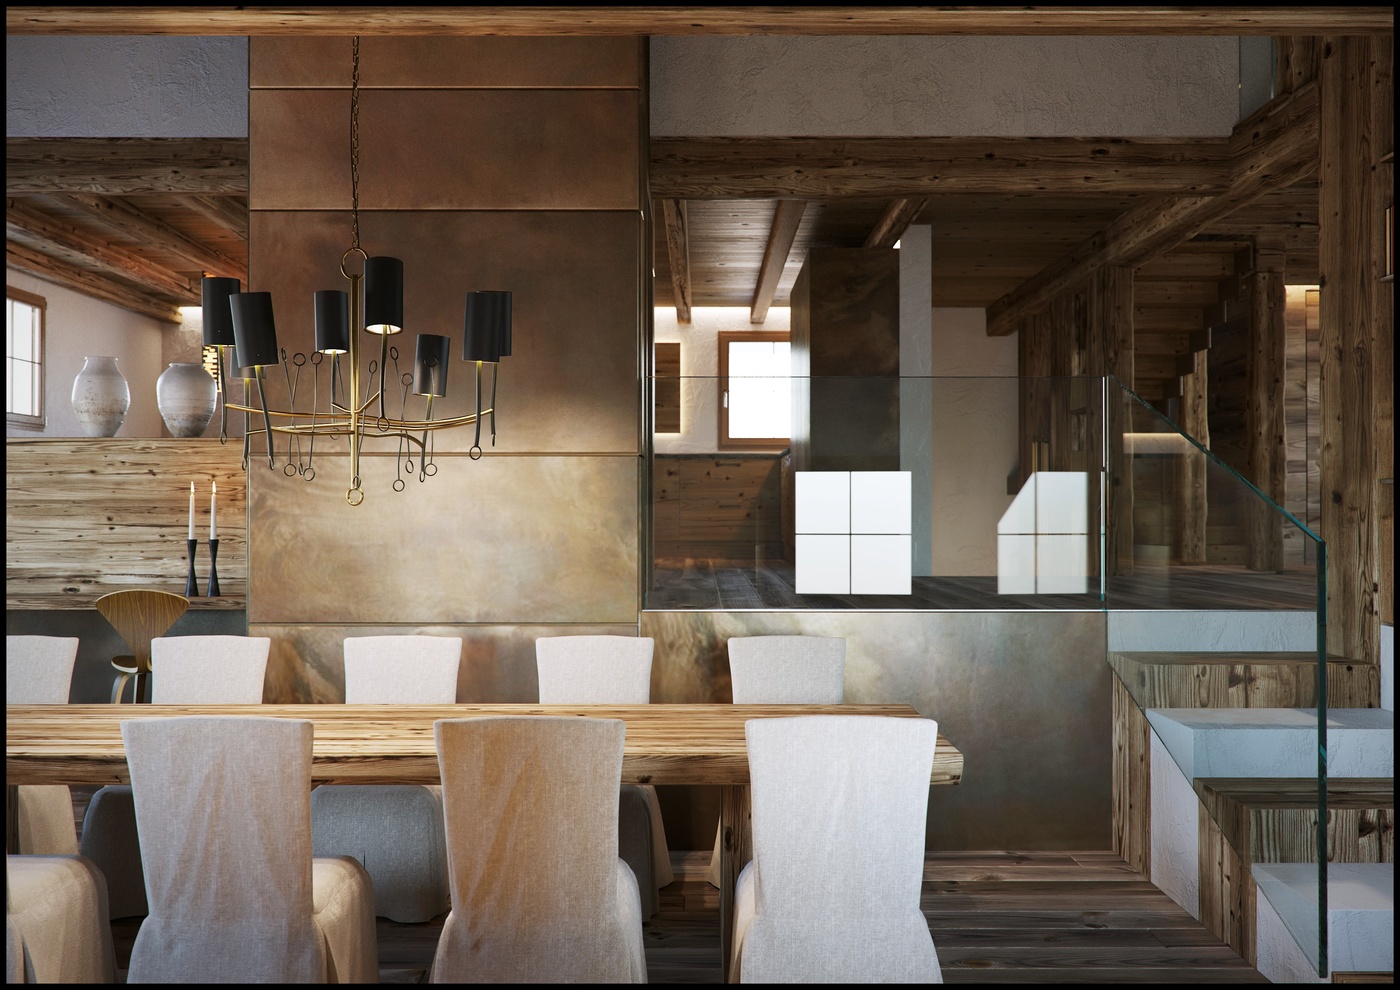
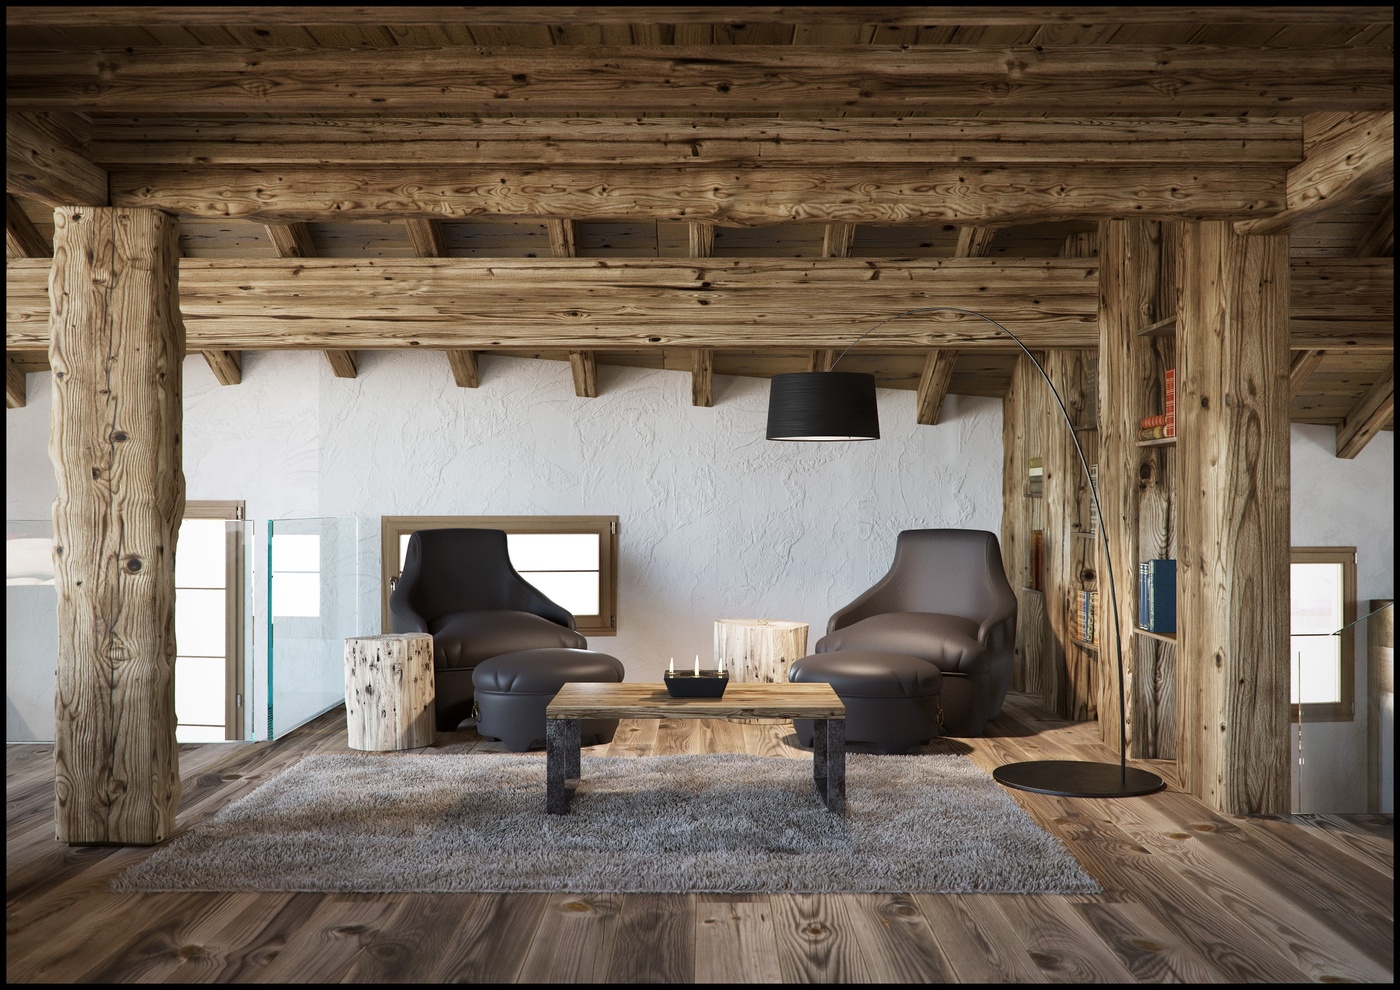
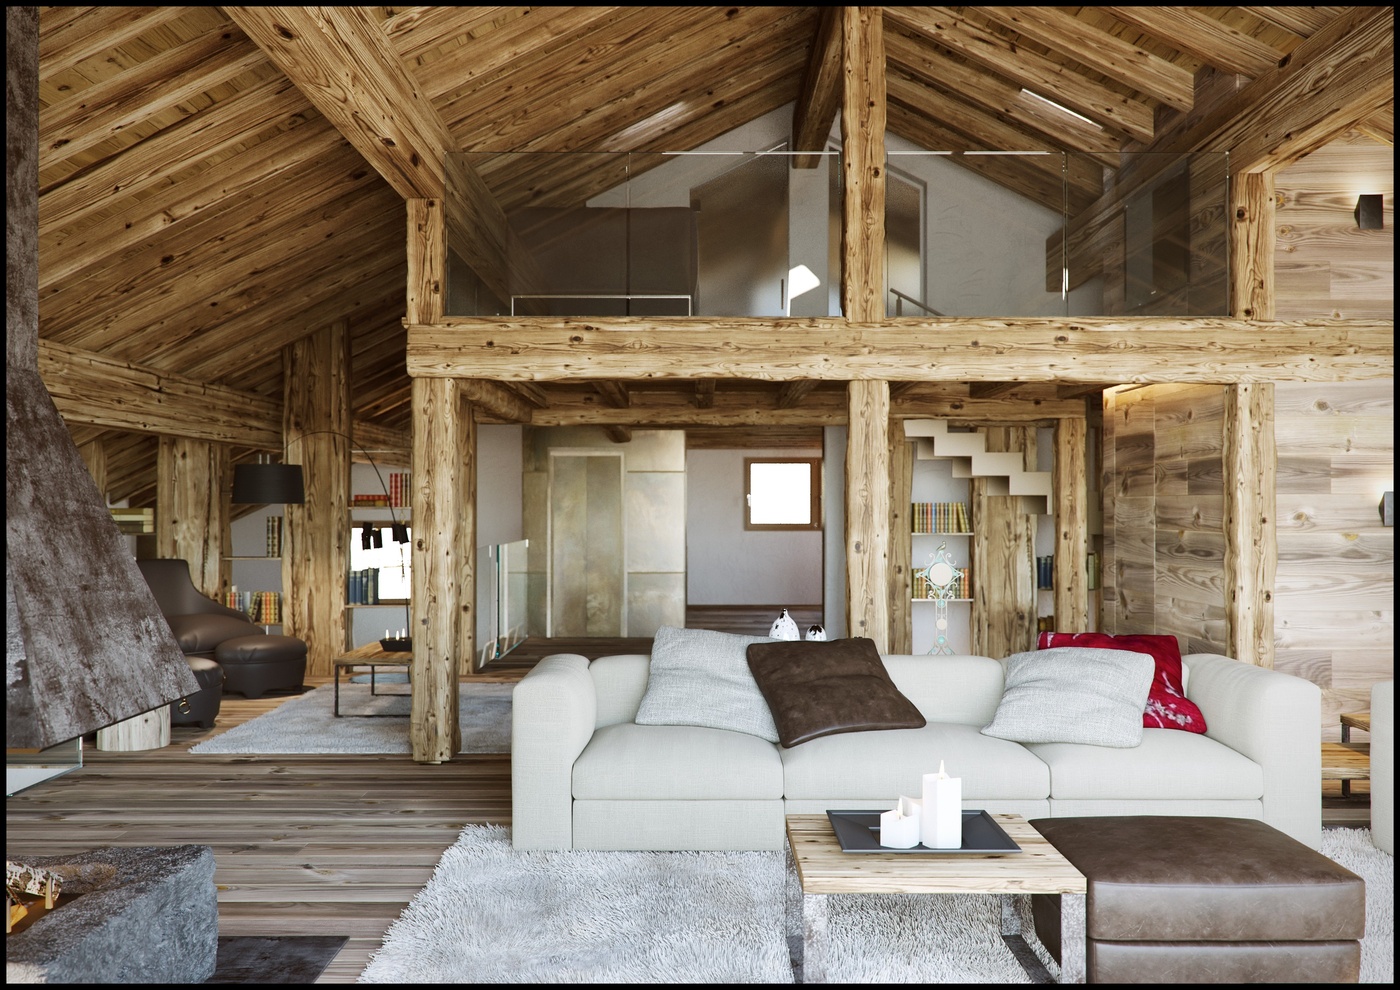
As most of you probably know, the customer is always right. Considering that, after several revisions, this is how we visualized the final project which was delivered to the customer:


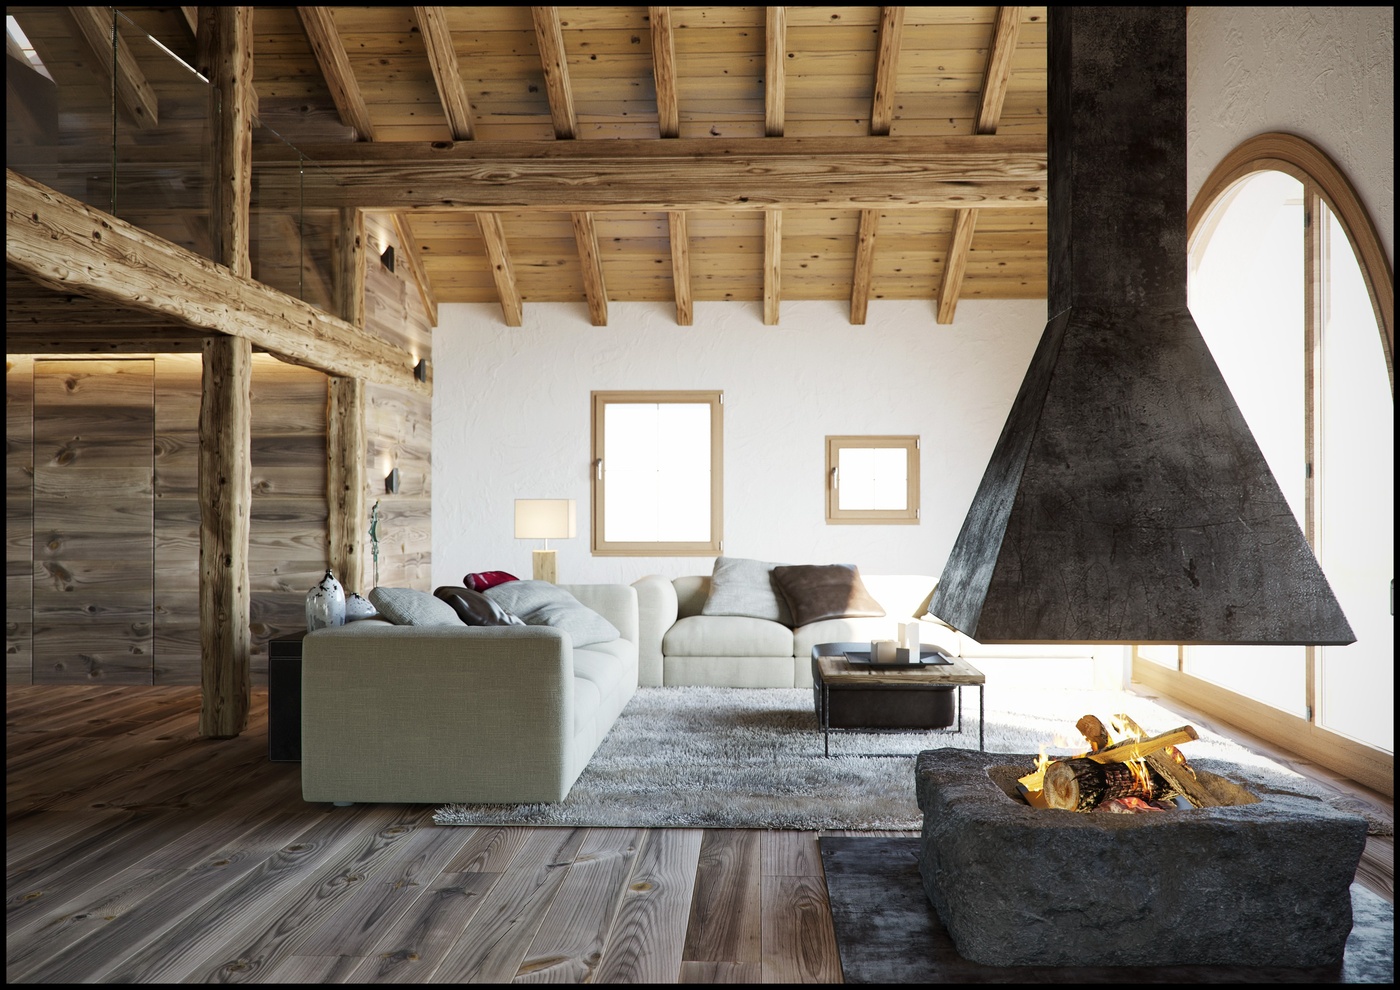
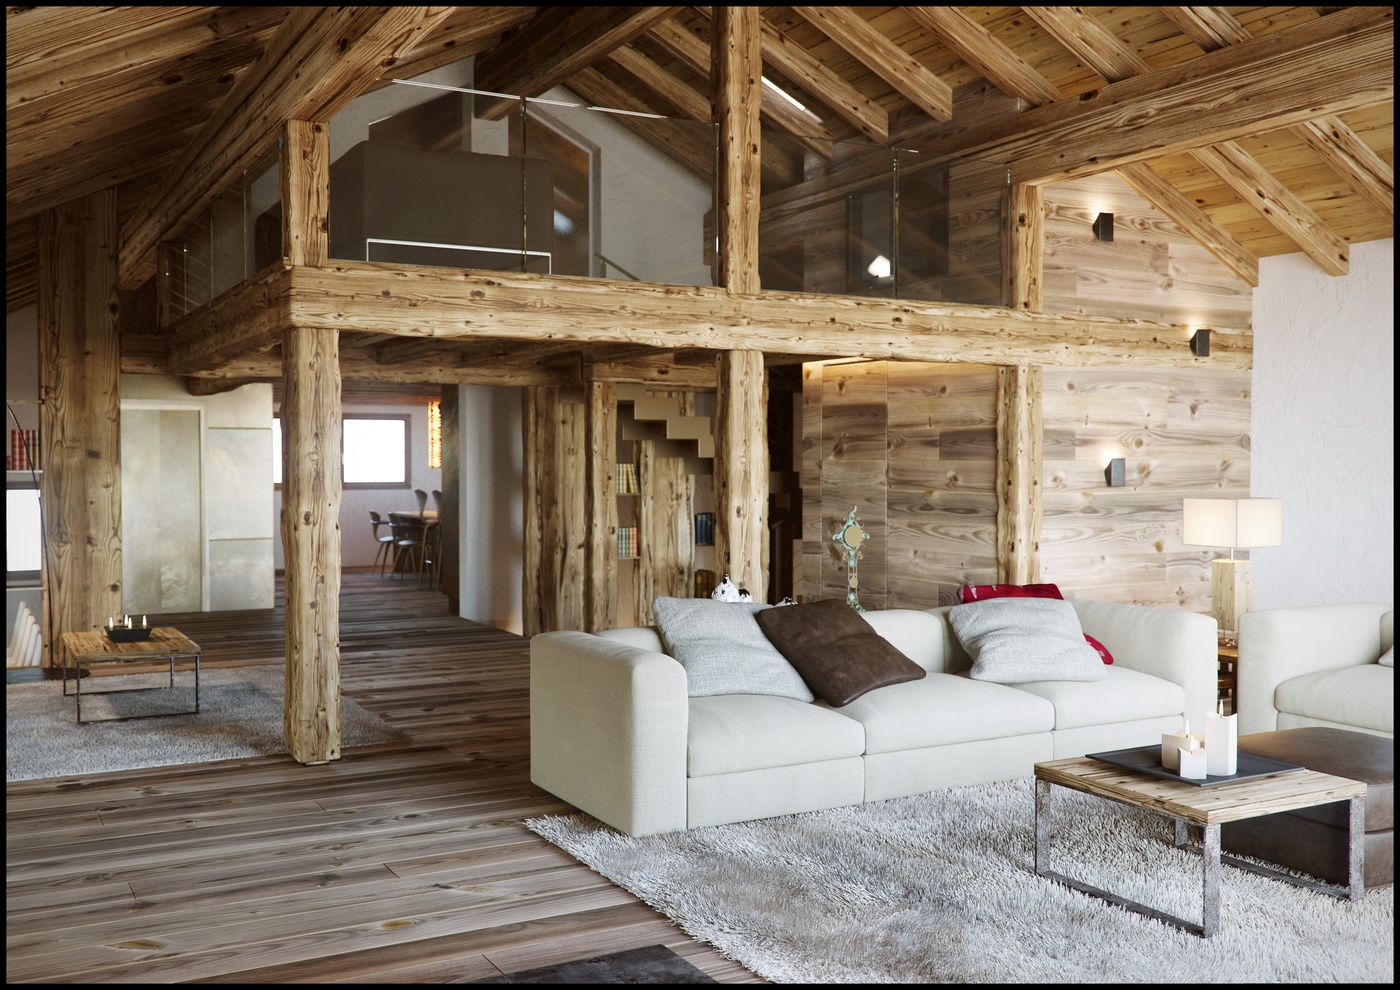
3. CONCLUSION
The project was produced in about seven working days, including a number of revisions and meetings with the client. Obviously, some of the furniture models were already in our library. Once we finished working on this project, as it usually happens, we were left with a feeling of great freedom and satisfaction. For people like me, who tend to fight with dozens of parameters for hours, Corona makes it easy to forget about devoting time to tweaking of render settings. One drawback is that render times are sometimes higher than one would expect, but that is always rewarded with great quality without any artifacts or splotches, and many, many, fewer headaches!
Finally, I am sure that many users will be amazed with revolutionary adaptivity and denoising features introduced in Corona 1.4!
I hope that you enjoyed my little making-of!
Francesco Legrenzi, LEGRENZI STUDIO
rendering meraviglioso!!! Bravo lorenzi
great work
A house in the mountains is probably everyone’s dream