Making high-quality product renders is an art form all of its own, especially when the product in question is itself exclusive and high-quality so that the images have to exude class. We spoke with freelance artist David Turfitt about how he uses Corona Renderer for Cinema 4D to create high-end marketing materials for whisky companies like Beam Suntory.
Hakushu 25 Animation from David Turfitt.
Read more about how David creates his product renders!
Introduction

Hello my name is David Turfitt and I am a freelance CGI Artist & Animator working out of my home studio in Kent, England. In a previous life some 25 years ago I was an artworker at a Newspaper group setting layouts and ads. As Macs got faster I moved into Design and Advertising agencies and taught myself retouching.
I got frustrated with my creations though, due to poor perspective and even poorer shadows, and I saw 3D as a way to improve my retouching. I was first introduced to Cinema 4D R7 in 2001 and I would like to say that the rest is history but that’s not the case. A colleague advised me it would take 2 full-on years to learn it and to stay away. Despite that warning though, I became more curious with it all as time went on, and in the end it took 8 years of learning in my spare time before someone would pay me to do a 3D job.

Fast forward to 2017 and an old client from way back contacts me to do an alcohol project and things went really well – and everything just snowballed from there! Now I have somehow managed to complete 121 projects in the last two years, with project durations of anything 1 day to 2 weeks.
After my lovely wife, my second love affair really is with bottles and their packaging. I’m just fascinated with their shape and form and the way the glass and liquids have a beautiful interaction with light. I see it as an endless challenge to get better at representing what my eyes see in CGI, and I have a long way to go yet, but Corona Renderer first made that journey possible in the first place, and then second, has made it a whole lot of fun too.
I now only work on alcohol related projects, which can be everything from a new product launch to a custom built travel retail stand and beyond. Having reached some level of realism with bottle and carton renders, I’m now being asked to do more and more drinks and cocktails which is another whole level up. Even that has now moved on to whole lifestyle scenes with the bottle and drinks in an emotive environment which is 100% CGI, so the challenges keeping being upped!
Enter Corona stage left
I was first introduced to the wonderful world of Corona Renderer by seeing what 3ds Max users were doing with Arch Viz. I could see a huge leap forward in the quality of imagery produced. When I saw it had been released for Cinema 4D on the Mac I knew it was something I had to investigate further. I’d had a lot of success with another render engine for some 10 years but glass was never its hot spot and I felt my imagery was starting to get behind with what I was seeing on the Corona for Cinema 4D forum
CVR_XO Bottle Animation_1920 x 1080px from David Turfitt (Corona Renderer Alpha 6).
When I was looking into Corona I was advised by Cormat (aka Bengamin Jerrems, who was well adept at using its features to produce some glorious materials and is now part of the Corona Renderer team) that it produced some of the best glass renders around. Now that really piqued my interest with more bottle work coming my way, and my dissatisfaction with my renders at the time and how glass was being represented.

I explored further, ticking off all the boxes of where all the tools were that I was used to. Then crunch time came when I was asked to produce an animation for a new can launch complete with spritz on top, and only 3 days to do it in. The previous render engine I knew would flicker in places and so I took a huge leap of faith and put all my eggs in Corona’s basket and went for it! Everything just flowed, the rendering was smooth and easy, and I even threw in a heap of Depth of Field for good measure. I hit the deadline with the client loving it and two years on I believe it is still playing in the foyer entrance to their office. Phew!
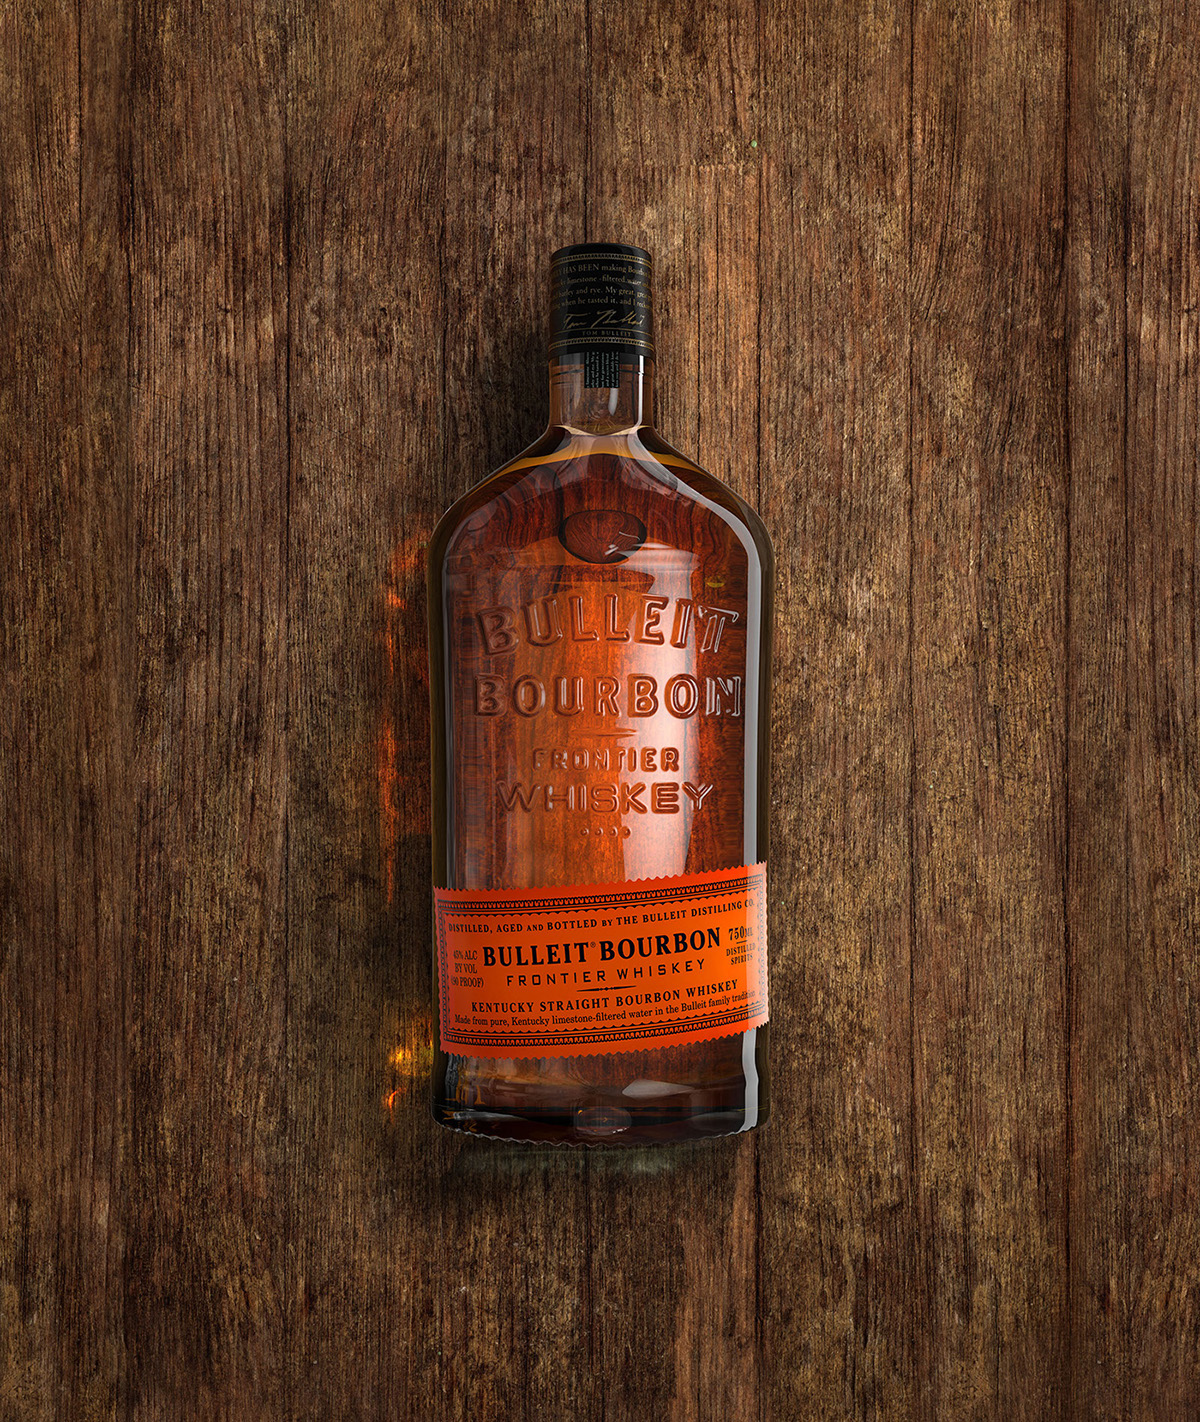
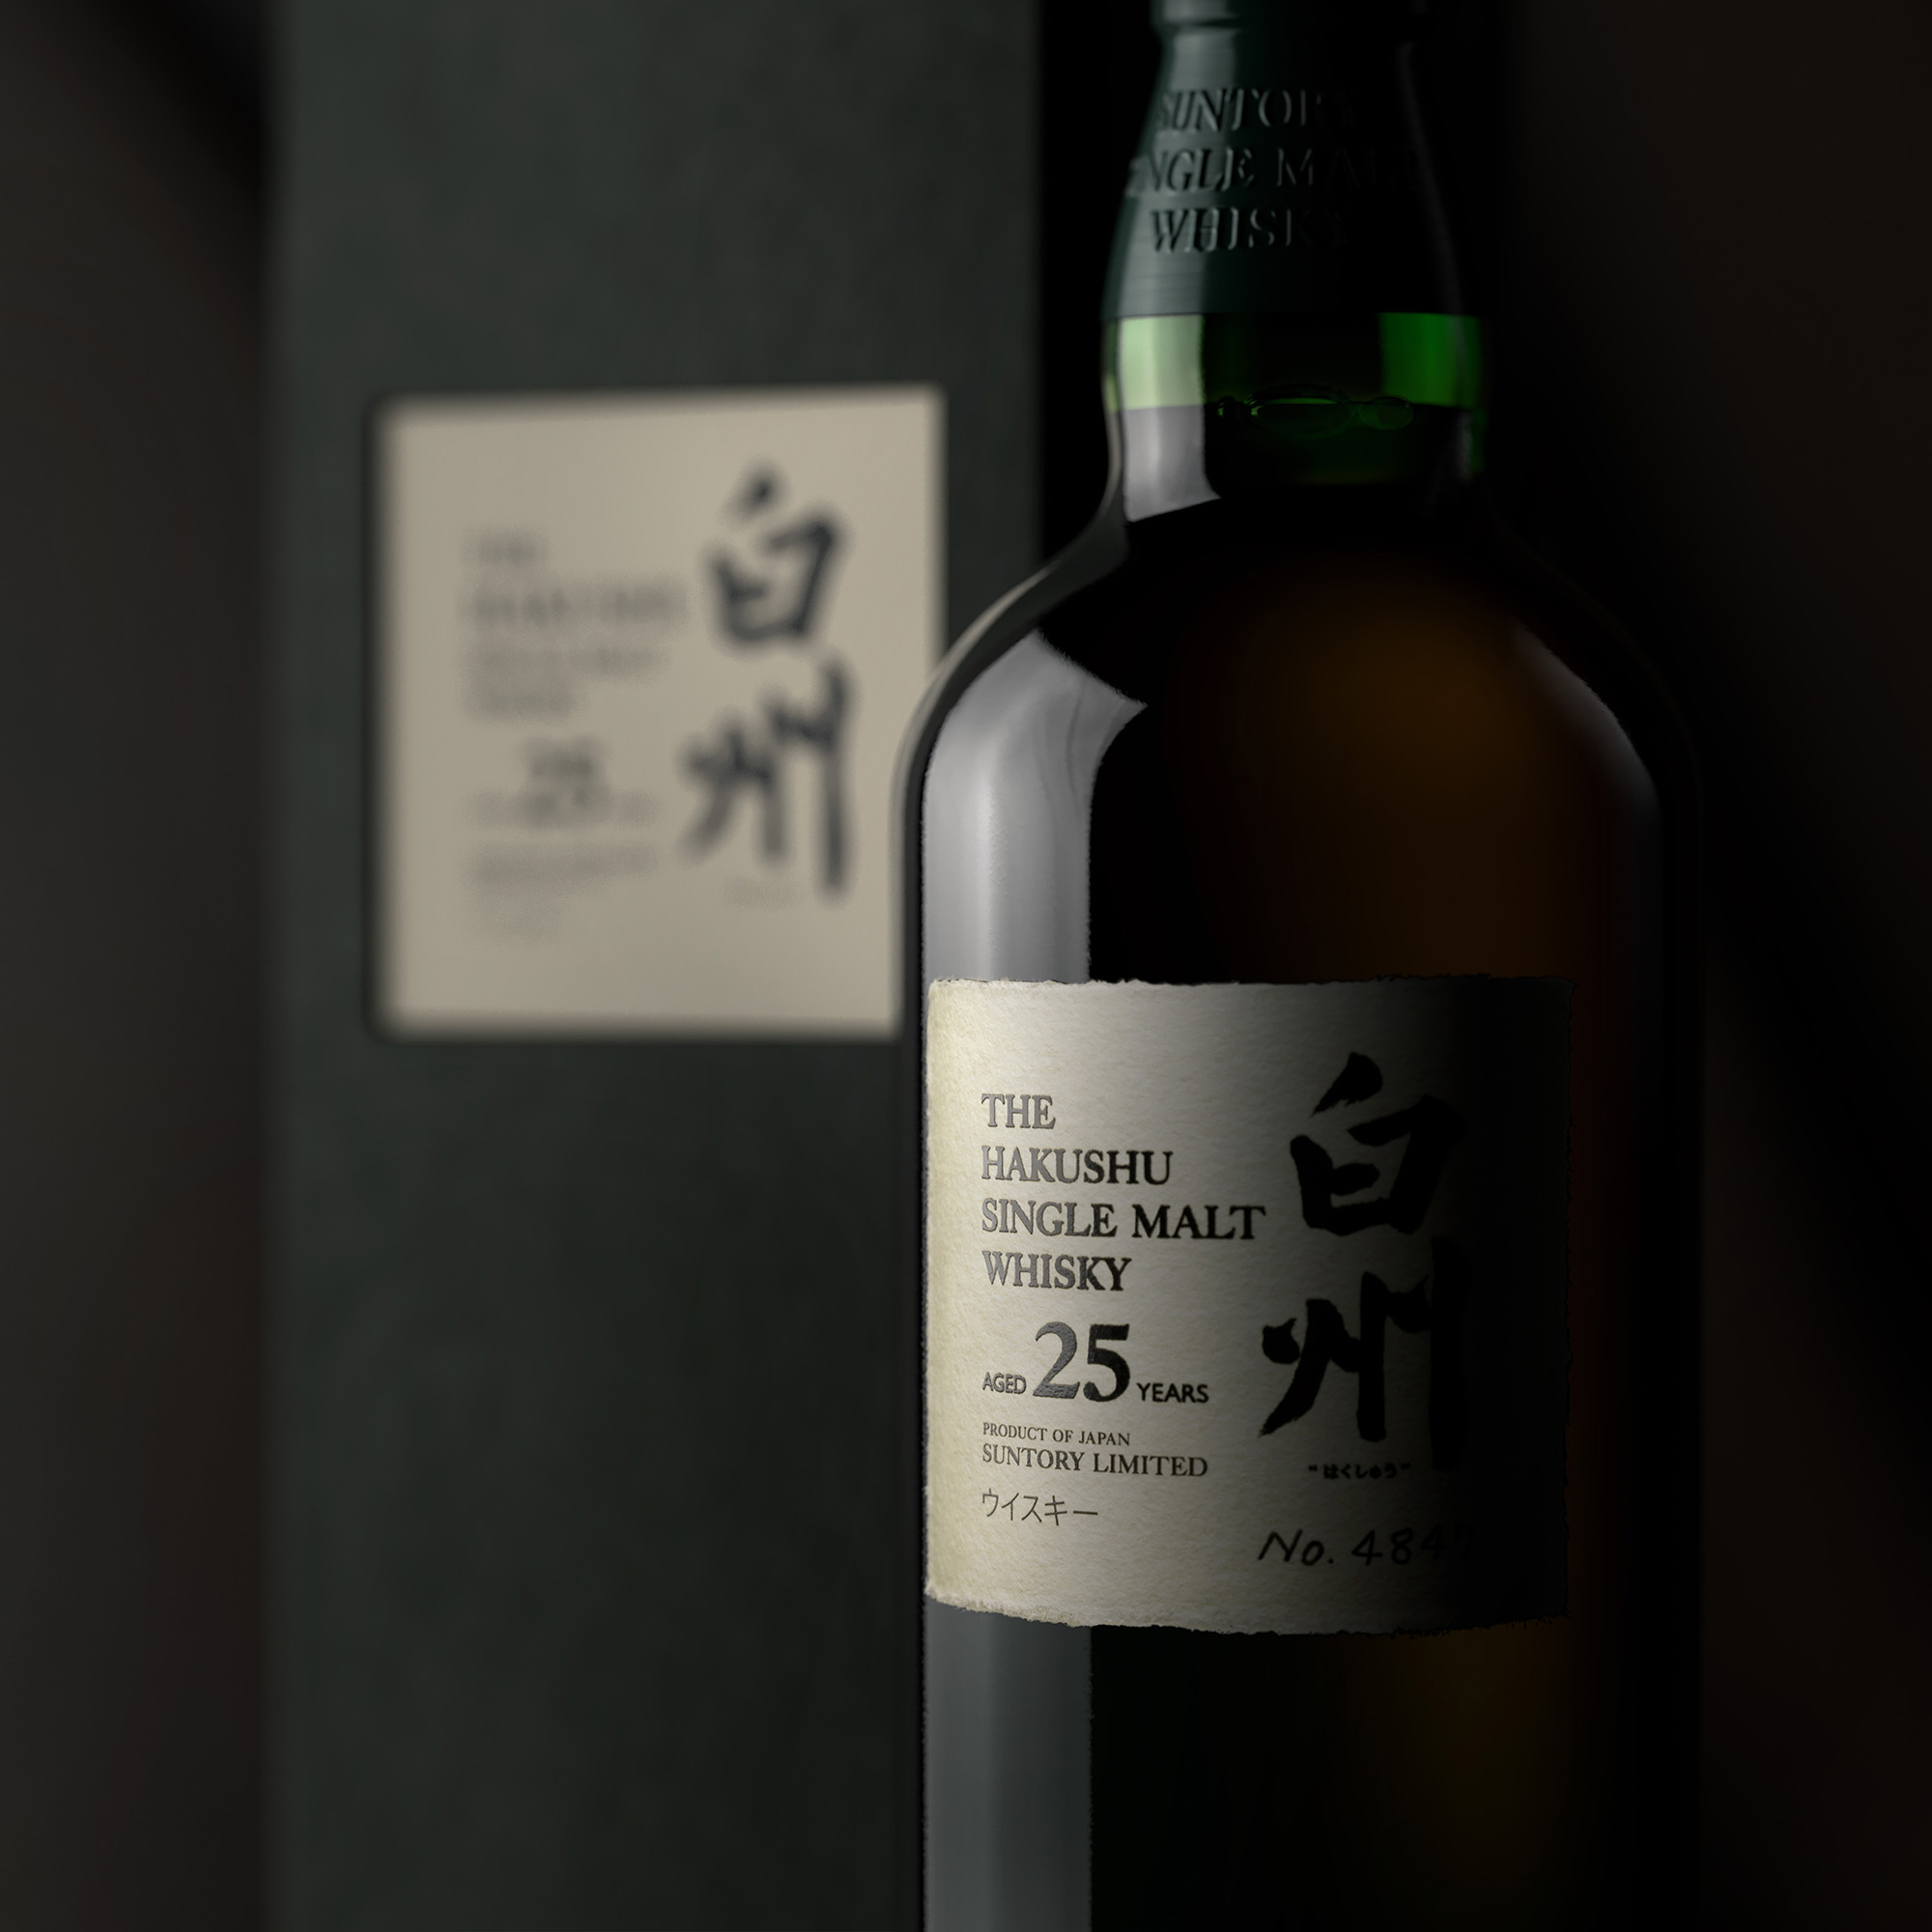
Hakushu 25 Stills and Animation
The Hakushu 25 series of images was born out of the need to have some quality imagery to support this rare and extremely high quality Japanese whisky. It never ceases to amaze me that for products that must take years to develop the bottle shape, box, and labels, there is very little in the way of aspirational works to support it. My goal with any high quality alcohol product is to be able to Google it and see great inspirational shots. Even though I may not be able to afford those products, I can at least marvel at its beauty.
In this project, the series of stills came first and then after spending some time in a Breitling store and seeing their slow moving camera pan animations, I thought it would be great to see how the Hakushu 25 ones could come to life in the same way.

Clients always want a full bottle shape to be shown with lots of main light sources along with rim lights, but this time I deliberately wanted to go for a single light source as much as possible, in a black environment to create the most “premium feel” that I could. When you reveal only certain parts of a product there remains the element of mystery to it all and your eye seems to fill in the rest automatically. I believe in Renaissance paintings they called this effect ‘chiaroscuro’.
Modelling
For most bottles I generally start with an 18 segment cylinder, unless their shape is unique, and if possible I use a CAD image of the bottle in the backdrop to get the shape just right. If not, then I find the most straight-on and undistorted image I can and place it in the view settings of the front view.
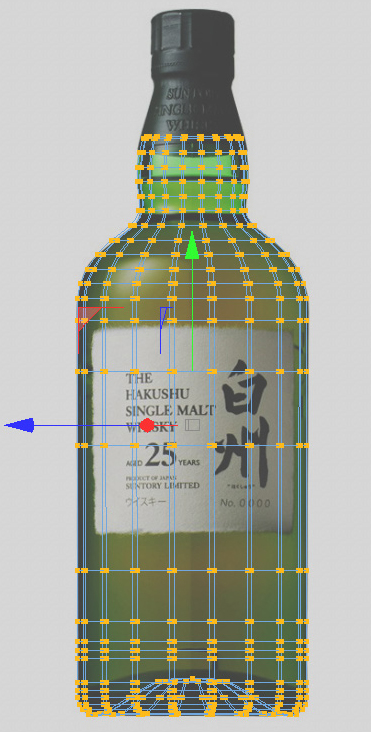
Lots of loop cuts give me just the right amount of mesh density to drop into a Subdivision surface cage, and I always place a Corona clay material onto the object to see how the shape is progressing.
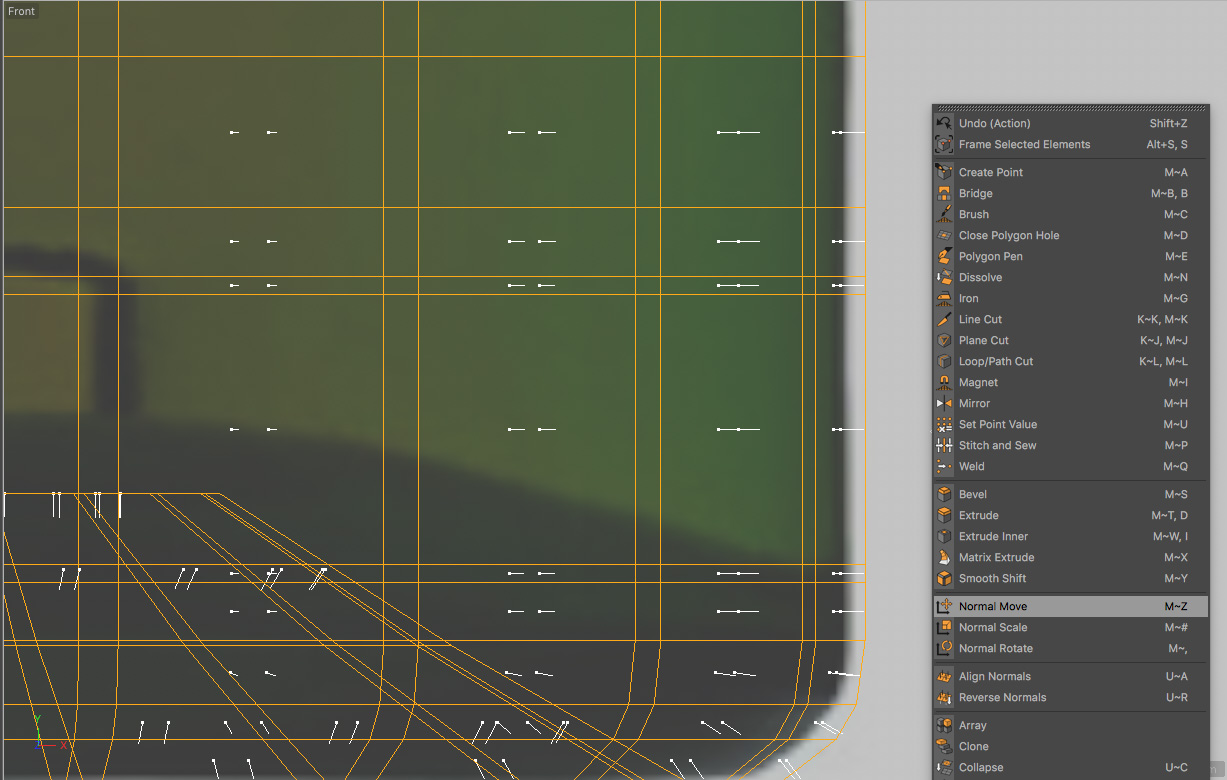
Glass bottles need to be double skinned for the render engine to compute the refractions properly, so I duplicate the main outer bottle, select all polygons and use the ‘Normal Move’ tool to scale them all inwards (and I keep a copy of this object for the liquid).

‘Connect Objects + Delete’ and then use ‘Stitch and Sew’ to join the top section (incredibly important to join these two otherwise the refractions will not behave as you expect).
That’s the outer and inner glass walls completed. Back to the liquid object, and again use ‘Normal Move’ to expand outwards ever so slightly so that they are just in the space between the two glass walls. Lower the top areas to the liquid line and seal up the top with ‘Close Polygon Hole’ and some ‘Extrude Inner’ moves to create some cuts.
I also place a squashed cylinder with fillets at the liquid line as there always seems to be a darker strip at that point and this trick works well with the refractions.

Some bottles require additional modelling for indentations and notches, and the starting off point with an 18 segment cylinder (rather than using lathe nurbs) allows this to take place.
Materials
It’s Corona’s excellent materials that really take over and make things come to life. It’s truly superb with refractions and the way different light sources react to liquids, and everything becomes so much more enjoyable when you have faith in the tools you are using.
Displacement is another huge area that Corona has made my life easier with. You used to need a dense enough mesh to get a decent result in other renderers, but that doesn’t matter anymore. No more rough results when having heavy reflection in areas, and the render time is no different to not using it – which is incredible when you come to think of it.
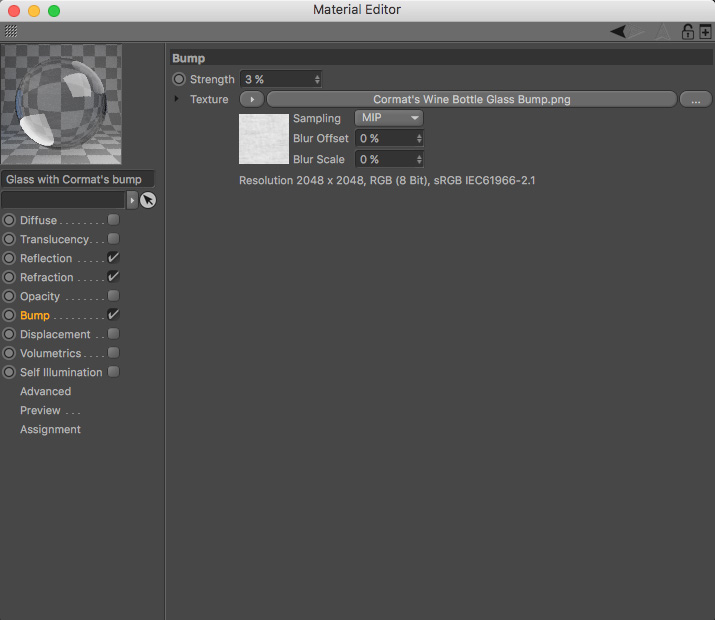
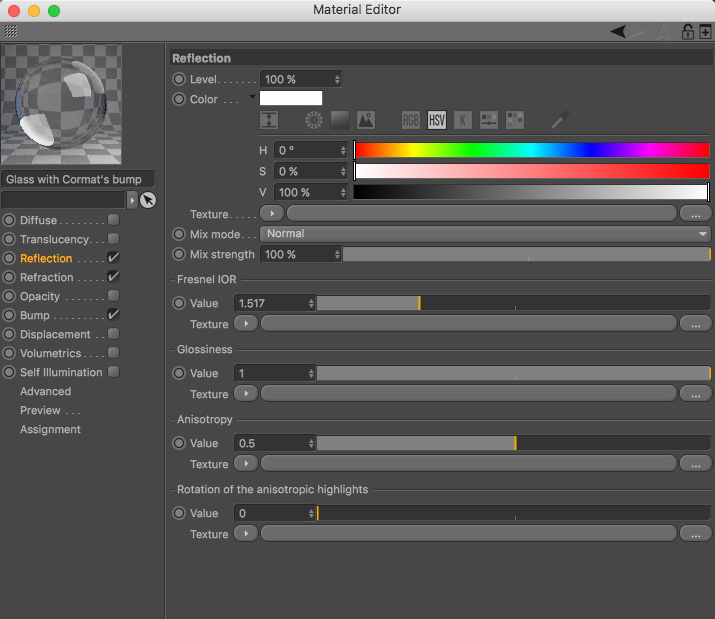
With the glass material, I always use Cormat’s wine bottle glass bump map (https://cormats.wordpress.com/glass/) at 3% mapped cubically to around a 1/3 of the bottle’s width:
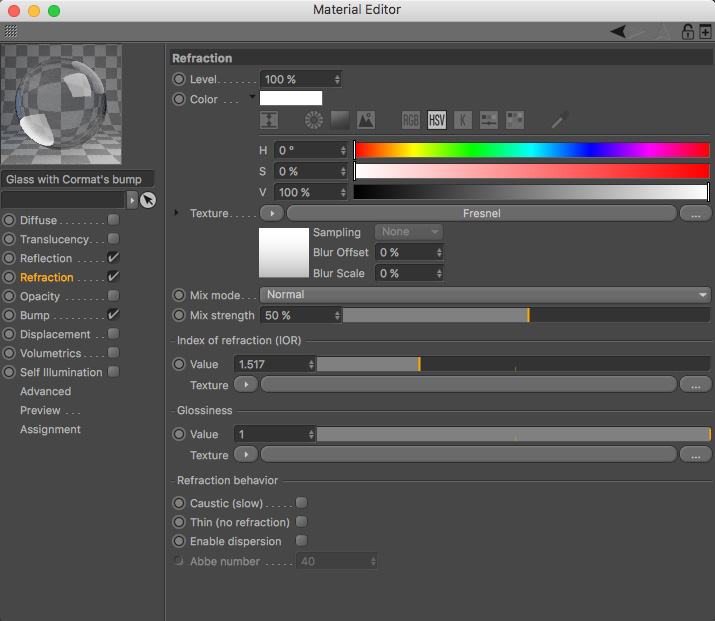
In the Refraction channel I place a Fresnel falloff, as glass tends to look too light and transparent on its edges otherwise, and this helps to give it a slightly thicker and more believable look:
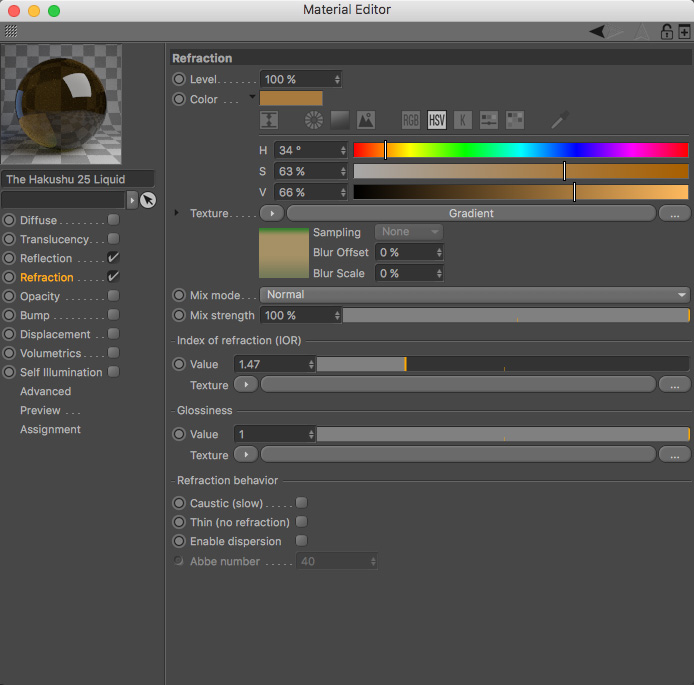
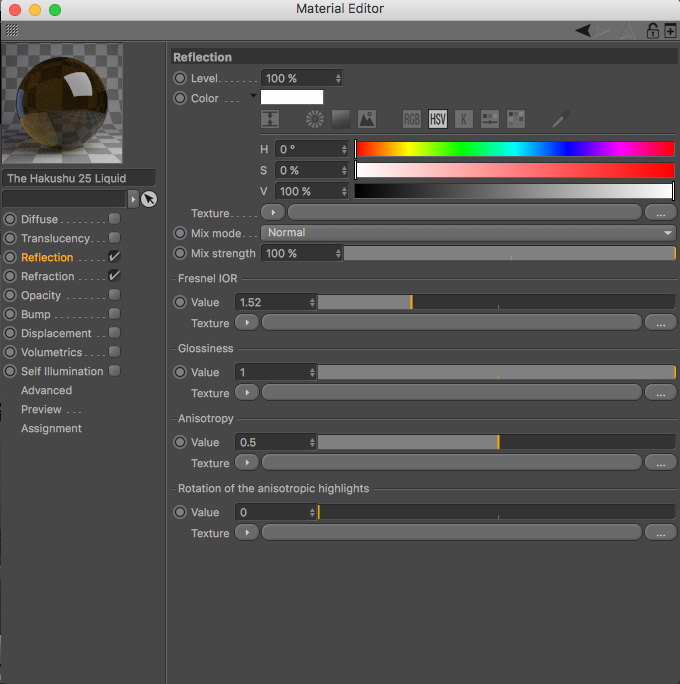
The Hakushu 25 liquid was actually pretty tricky as I am still trying to get to grips with the Volumetrics settings, so in this instance to replicate the change in colour as the width of the bottle changes I used a gradient which is then cubically mapped the length of the liquid. In this way I can have control over exactly at which point the tone changes from green in the neck to a more brown colouration at the widest part. A cheat I know, and I hope to get better at that aspect as time goes on.
For the embossed text on the back I would love to say I unwrapped all of the UVs of the bottle and mapped out a totally correct Photoshop file with the text and then the ‘lugs’ at the base of the bottle. Unfortunately I am still getting to grips with all of that as well – an ongoing journey all of this! So instead I used a Displacement map the height of the bottle glass set to 0.1cms raised height and mapped it cylindrically.
To get the right width to height ratio in Photoshop, in Cinema 4D you create a circular spline which is the width of the bottle, make it editable, then go to Mode / Project Info / Structure, and the Spline Length tells you the correct real world measurement. That way when you cylindrically map there should be no distortion.
The text always has to be blurred a certain amount for displacement to work properly, and in this case it needs quite a bit to replicate what happens on the real bottle as it is quite soft. So it all depends on how large you have made your Photoshop file but something around 5px to 6px Gaussian blur on a smart object (so it is not permanent and you can alter on the fly) is a good way to go.

I always test out my displacement maps using a glossy clay material first so you can see more clearly what is happening, as with glass you can get fooled with things.
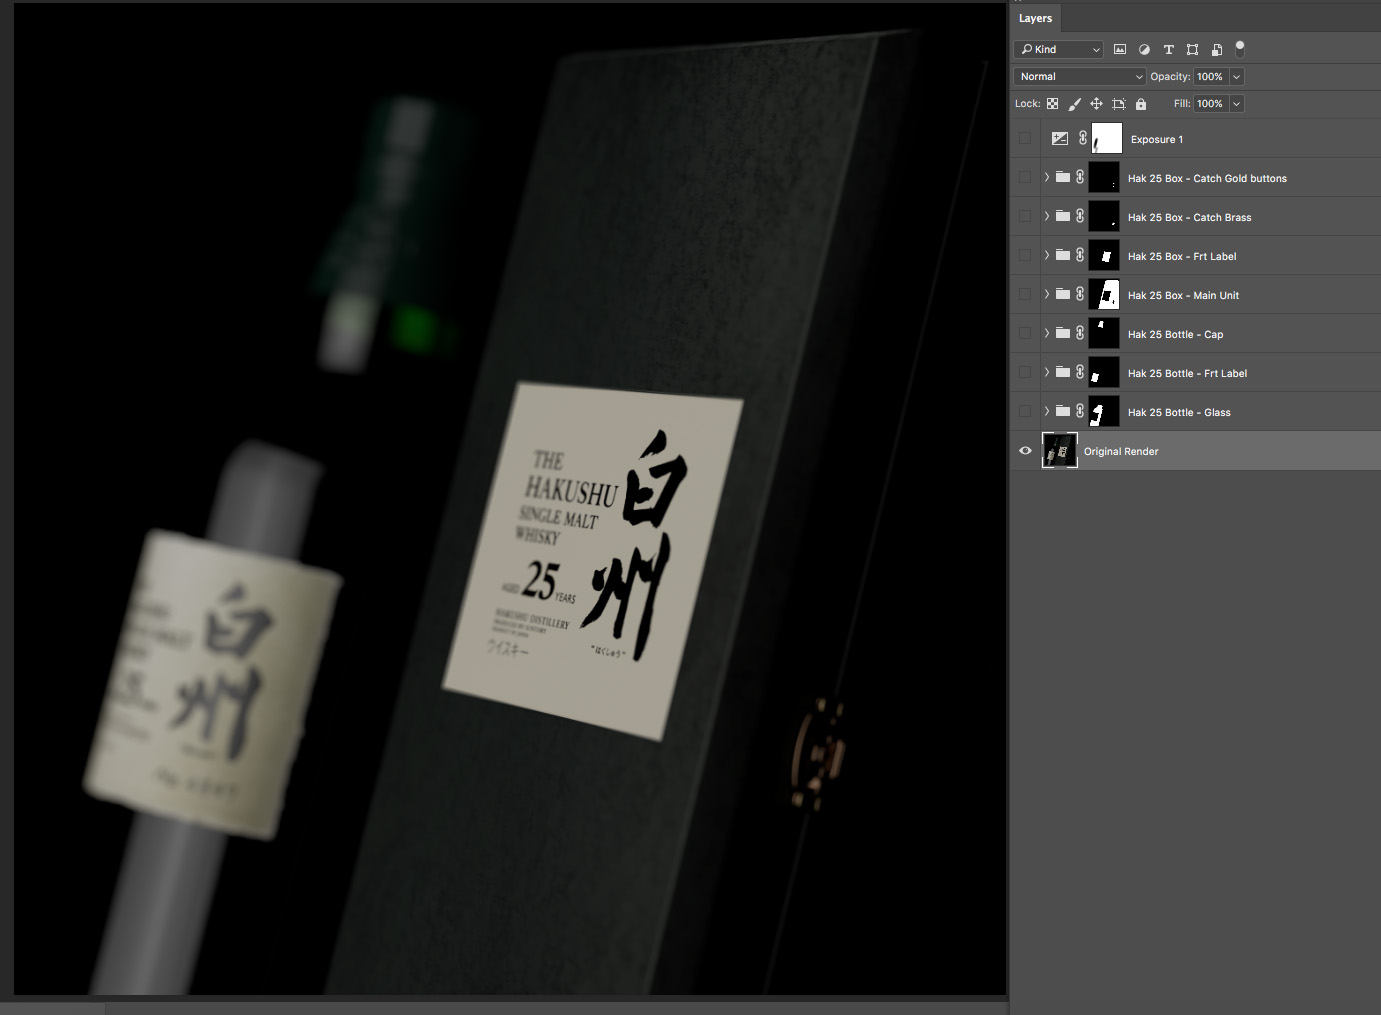
The box front material was perhaps the hardest of them all and it all starts with a rough textured Photoshop file the exact size of the box front. This is then used in the Diffuse, Reflection and Bump channels with all kinds of filters and tricks going on to get just the right effect. I don’t know how many hours I spent trying to get it look right in the test renders, and then there’s a tonne of post work done to it with the Multipass in both the stills and animations. I even took this same rough map and used it with different layer modes masked into areas again on both the stills and the animations.

The rough edges around the bottle front label were created as a Photoshop file using custom brushes, the main one of which was the curved grass blade one with constant size and angle changes to make it look like hand made paper edges. A lengthy process to get this right as well!

Everything is topped off with a good old Layered material to allow some parts of the bottle front label to have a glossy feel with the printed text on the matt Japanese washi paper, backing all with a subtle displacement map to give the type a slight raised feel where the ink has collected. I do love Corona’s layered materials and can sometimes have 7 or 8 layers to achieve different foils and glossy effects on a label.

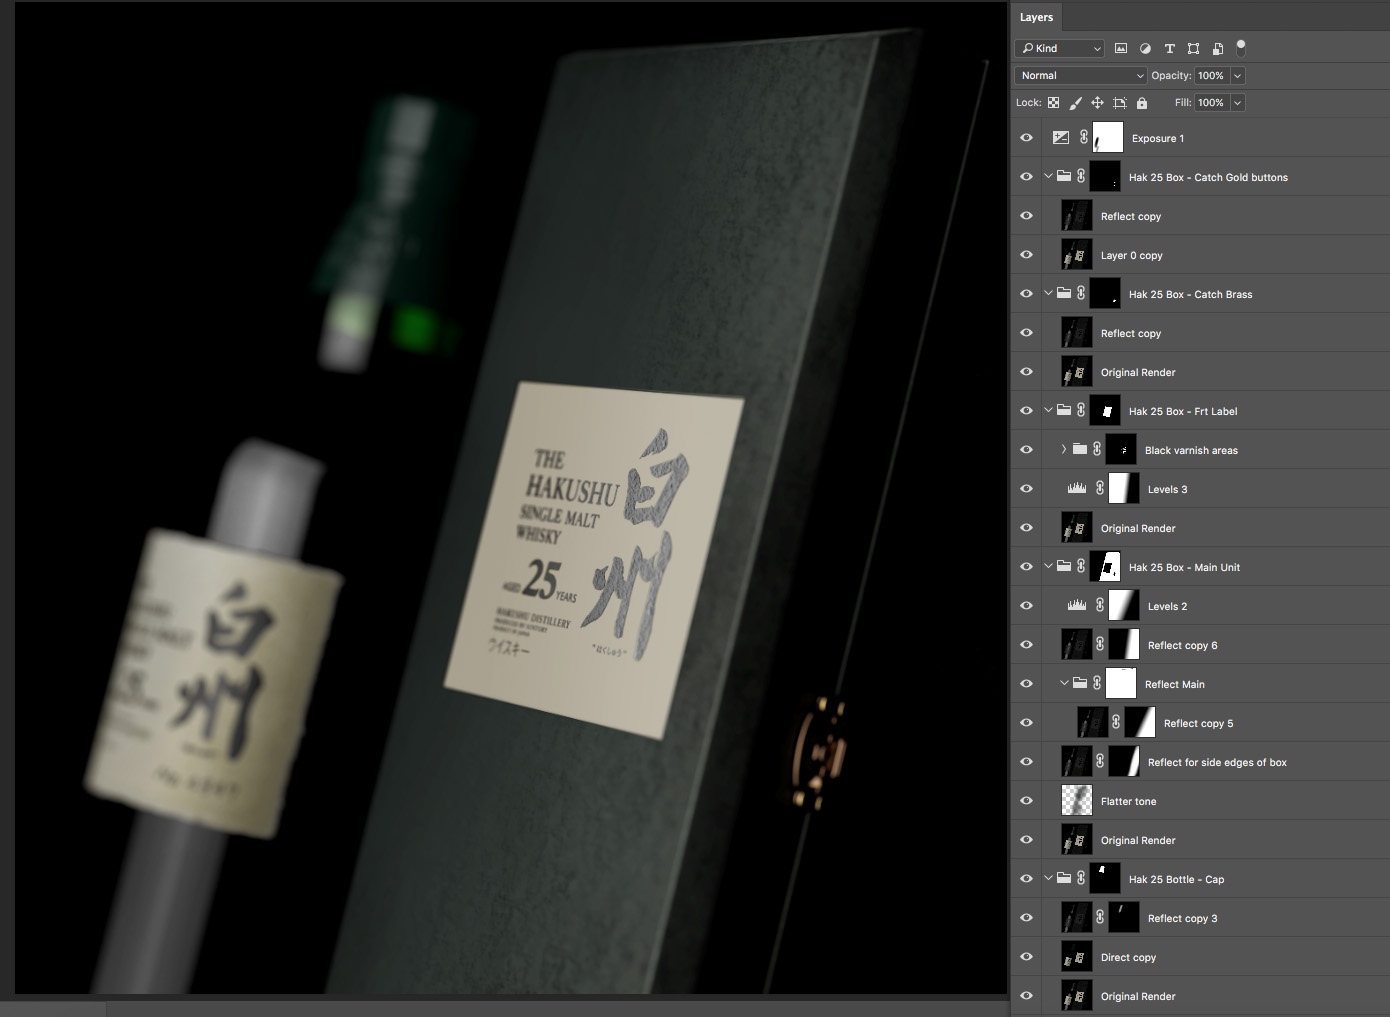
Rendering with Multipass
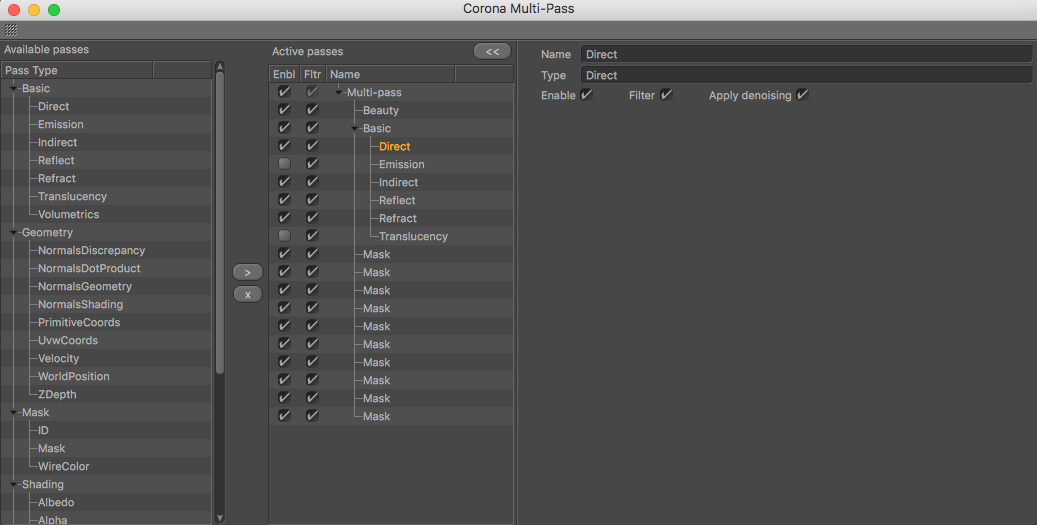
In every still or animation I do, I always use the Multipass feature. I like to have control over every aspect of a render, and I like to tinker too much to try and get everything out of the VFB.
My usual setup is to have passes for Refraction, Reflection, Direct, Indirect and Beauty (VirtualBeauty in Corona 3) combined with Alpha masks, for pretty much everything I do. This allows me to dial in to a particular area without disturbing others that I’ve got right.
I still get excited to see what the Reflection pass can give me with renders, especially with the front of the box which has quite a dull, slight green hue to it but when the light hits it, a rich, velvety texture is revealed and this is what I tried hard to convey. My hope was that if you were to one day hold the product you would already know what it looks like and it would react to light in the same way.
Depth of Field
Depth of Field in Corona version 3 is superb and takes just a few small steps to setup. Gone are the days of rendering out ZDepth passes and compositing them in post, thankfully, as you can just use Corona’s really quick Interactive Renderer to check exactly how it will look as you dial up or down the numbers.

It’s always a temptation to use too much DOF in an image and you have to rein yourself in a lot to not go overboard. I re-rendered several of the images again, even though they were all finished, because in the fresh light of day they went a touch too far with the amount of blur.
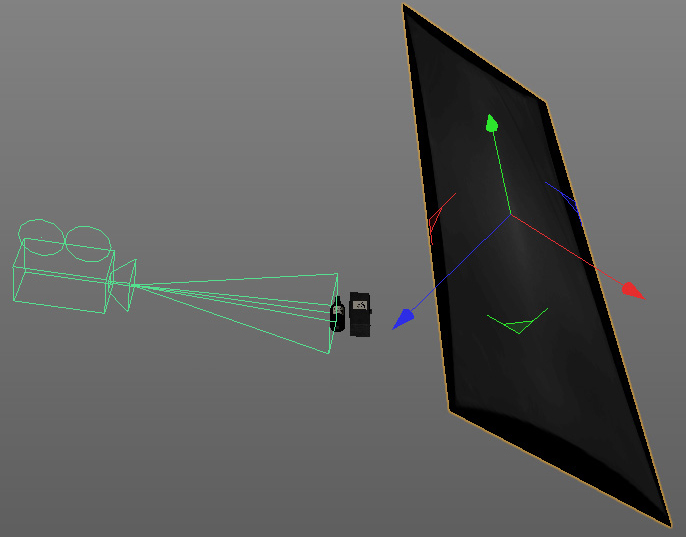
Make sure to get the camera green cone to where you would like the sharpest area to be and then play around with the F-stop to increase or decrease the amount of blur you see. Lower F-stop numbers produce more Depth of Field and higher numbers means less is visible.

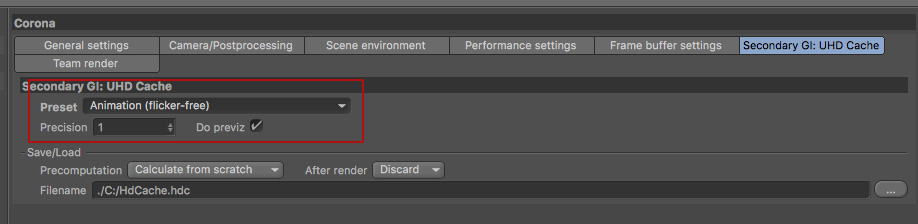
Animation
This is an another area that Corona excels in with ease of use and totally flicker-free results. Just like Depth of Field, all it takes is a few clicks to set up and away you go. You set your number of frames, the frame rate and switch the Secondary GI Preset from Still Frame to Animation and that’s about it – what could be simpler?
What’s next?
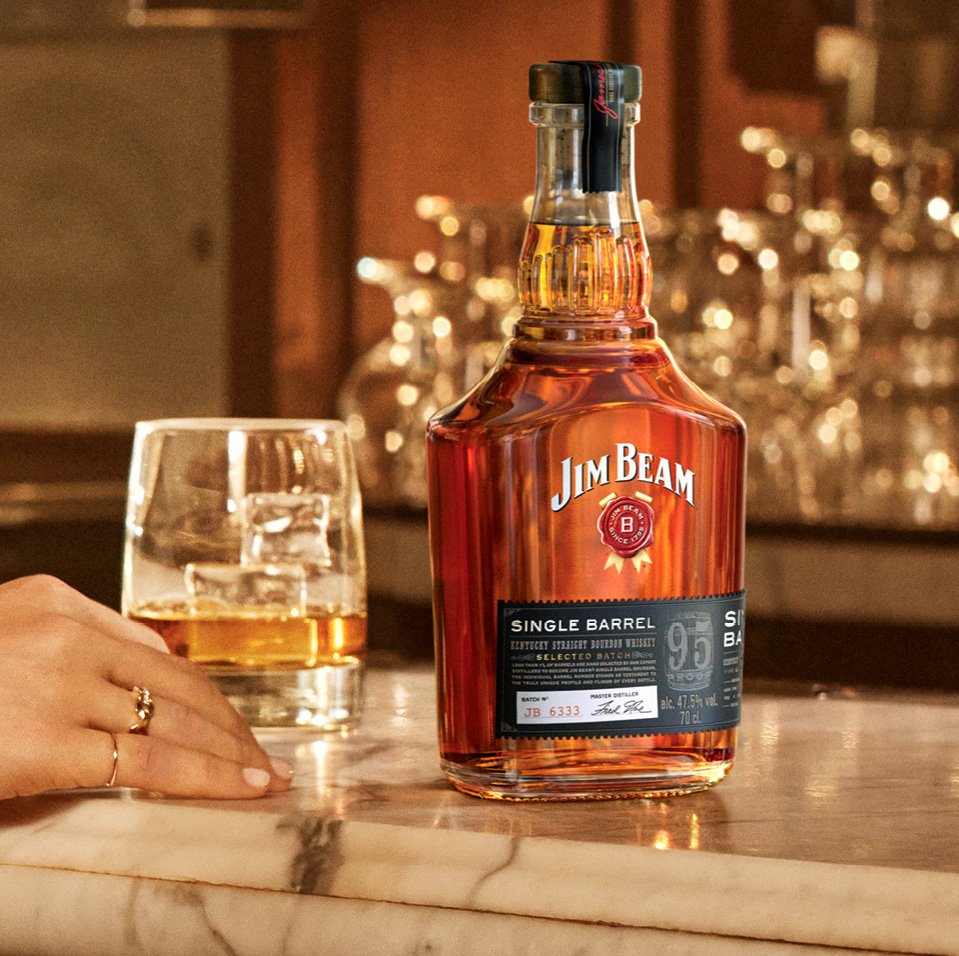
I’ve been working on a systematic method for producing better CGI bottle studio packshot visuals within the existing environments I get provided with, using a series of different lighting setups which are then comp’d together in Photoshop. All seems to be working well and the Maker’s Mark 46 and Jim Beam Single Barrel bottle images are an evolution of where that is now at. That’s a whole other topic however and best left for perhaps another tutorial in the future!

Hopefully this article has been interesting and helpful to you in some small way and can contribute to the wonderful world of Cinema 4D and Corona Renderer – thanks for tuning in!
Links
Website: davidturfitt.com
Behance: behance.net/davidturfitt
Beautiful work. Thanks for sharing parts of your workflow!
Very Nice work exactly what i am looking for, if it’s possible to send me an example if a bottle setting scene with a glass and lighting it will be great !!
Since these are all commercial scenes produced for a client, the client will in effect “own” those and the scenes won’t be available, sorry.
Wow very nice work! Thank you so much for sharing the things about the textures etc.
Just read this article as it was referenced on the forums about someone complaining that the C4D version of Corona didn’t render as nice as the Max version. Such great work. I do have a couple questions though. I noticed the materials are created in the Legacy Material. I’m guessing the Physical Material hadn’t been added yet, but I don’t remember. On the materials, the Glossiness setting says “1”, but the slider looks to be all the way up?
Curious if you’ve updated your materials to use the new Physical Material system?
Hi Alex,
Yes, this was prior to the physical material being introduced. And back in the old days, it was 0-1 for glossiness which has changed to 1-100%.