Materials
Accurate. Physically based. Intuitive.
Introducing Chaos Corona materials.

Accurate. Physically based. Intuitive.
Introducing Chaos Corona materials.
Our design goal for the Corona Physical Material was to make it physically based and full realistic, yet keep it intuitive, flexible, and easy to set up.

You won’t find yourself having to tweak unnecessary sampling values and other confusing parameters, and can instead focus on the physical parameters that determine the look of a material, and you also won’t have to choose between 10 or 20 different material types – you can pretty much do it all using the single Corona Physical Material.

The Physical Material conforms to industry standards for Physically Based Rendering (PBR) materials. Since some of those “standards” are not actually universal, the material offers you:


Clearcoat lets you define a layer of varnish or lacquer for a material – think varnish over wood, or the final coat in car paint. It has its own independent reflectivity, its own independent Bump map separate from the Base layer, and Absorption parameters that control how it colors the Base layer beneath it.
Sheen lets you adjust the way a material reflects light, most commonly for fabrics and other materials – think satin or velvet, and how those reflect light differently from non-fabrics at the grazing angles.
35 Presets for quick starting points, or to “reverse engineer” good settings for the various parameters for the most common materials you will want to create.
Metalness Workflow which lets you specify whether your material is a metal or a non-metal. This can also be mapped to blend between the two different ways materials behave in the real world.
Edge Color for metals, which can be quickly and easily defined with a single color which will be ideal in 99% of cases – but when the ultimate in realism is required, there is the option to use a Complex IOR instead.
Anisotropy correctly affects both reflection and refraction simultaneously.
Oren-Nayar shading model which the more technically-minded among you will know gives more realistic fall-off for the Baser layer at grazing angles.
The materials also allow for easy import from third–party applications such as Allegorithmic’s Substance tools, and Quixel’s Megascans.
The Material Library is available in both 3ds Max and Cinema 4D, and it provides more than 520 ready to use materials, each with a high-quality preview. You can read full details about the Material Library on our Premade Content page if you want to learn more about it!
You can instantly convert your scene to the Corona Physical Material with the click of a button, whether that is from other render engines such as V-Ray, or from older Corona materials like the Legacy Material.
Note: The Legacy material exists to ensure 100% compatibility in the look of a render from older scenes - do not run the Converter if it is essential that the look remain identical.
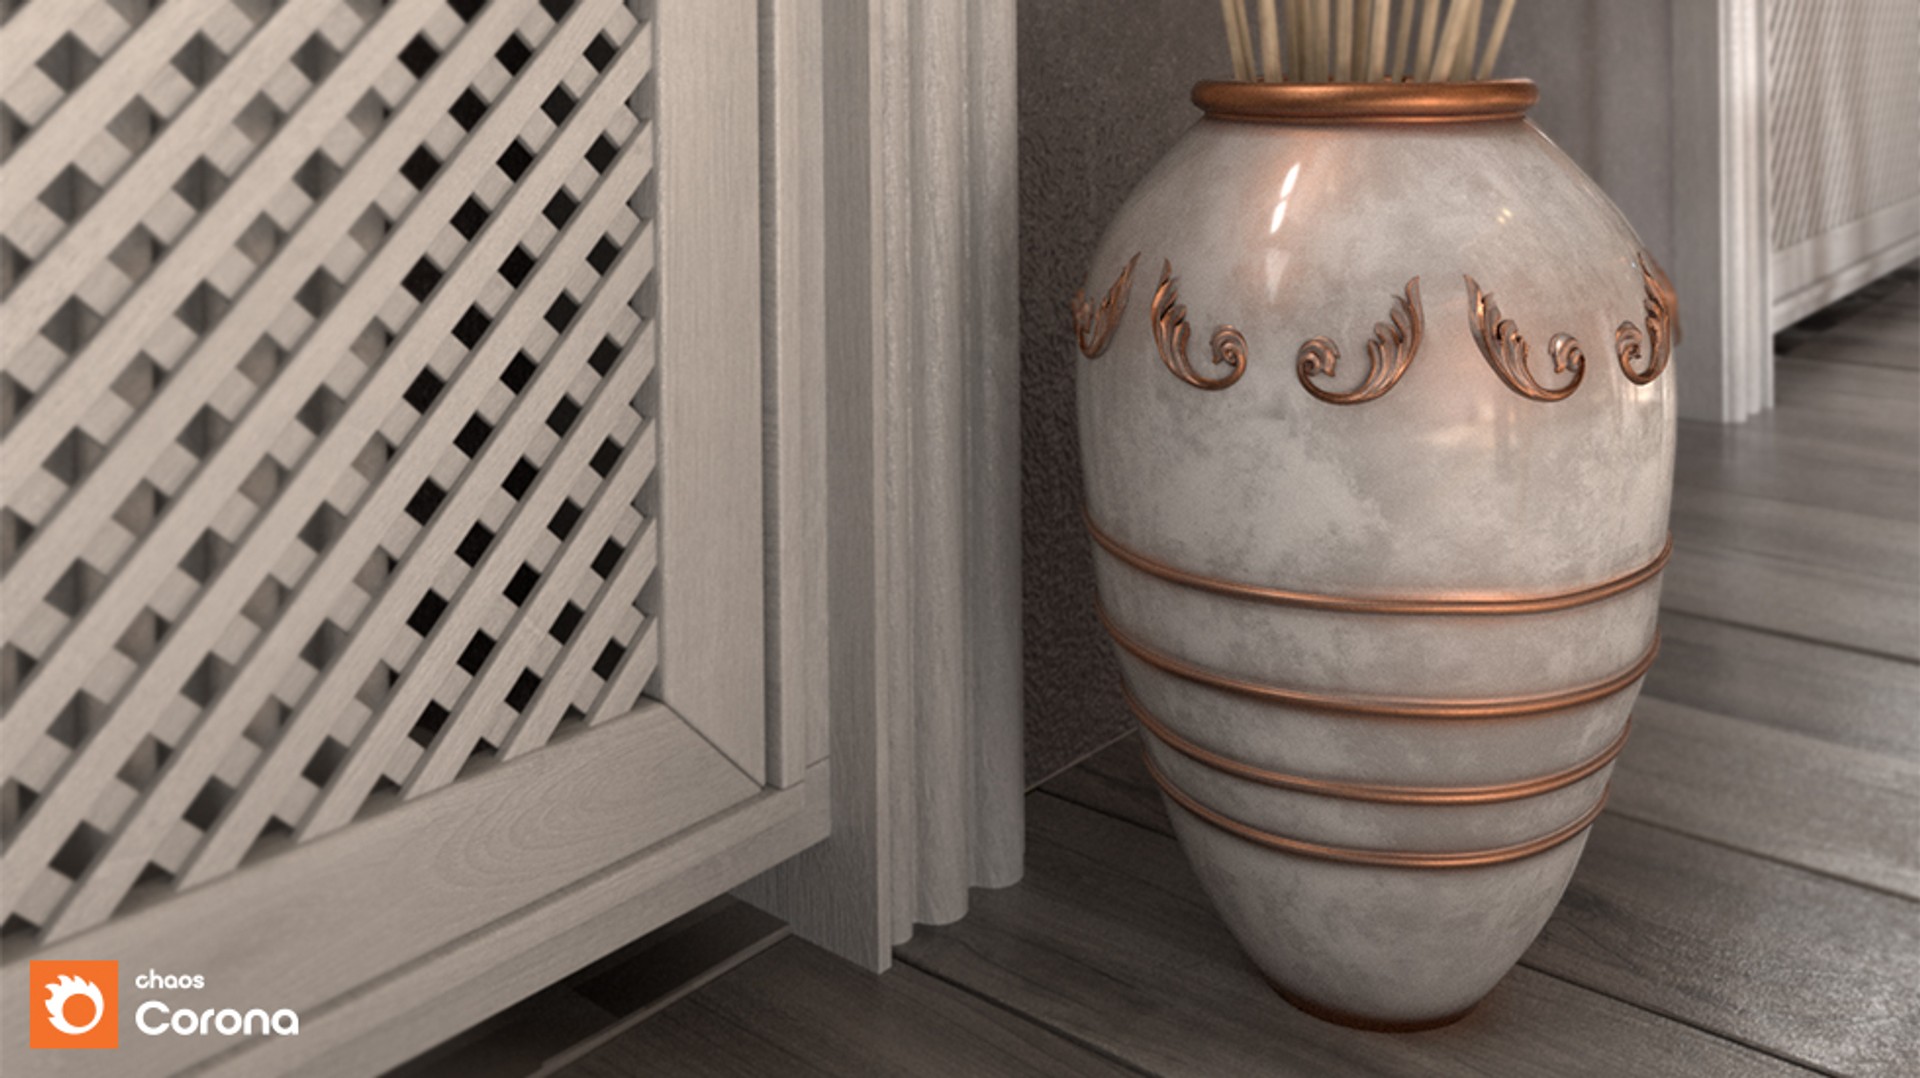
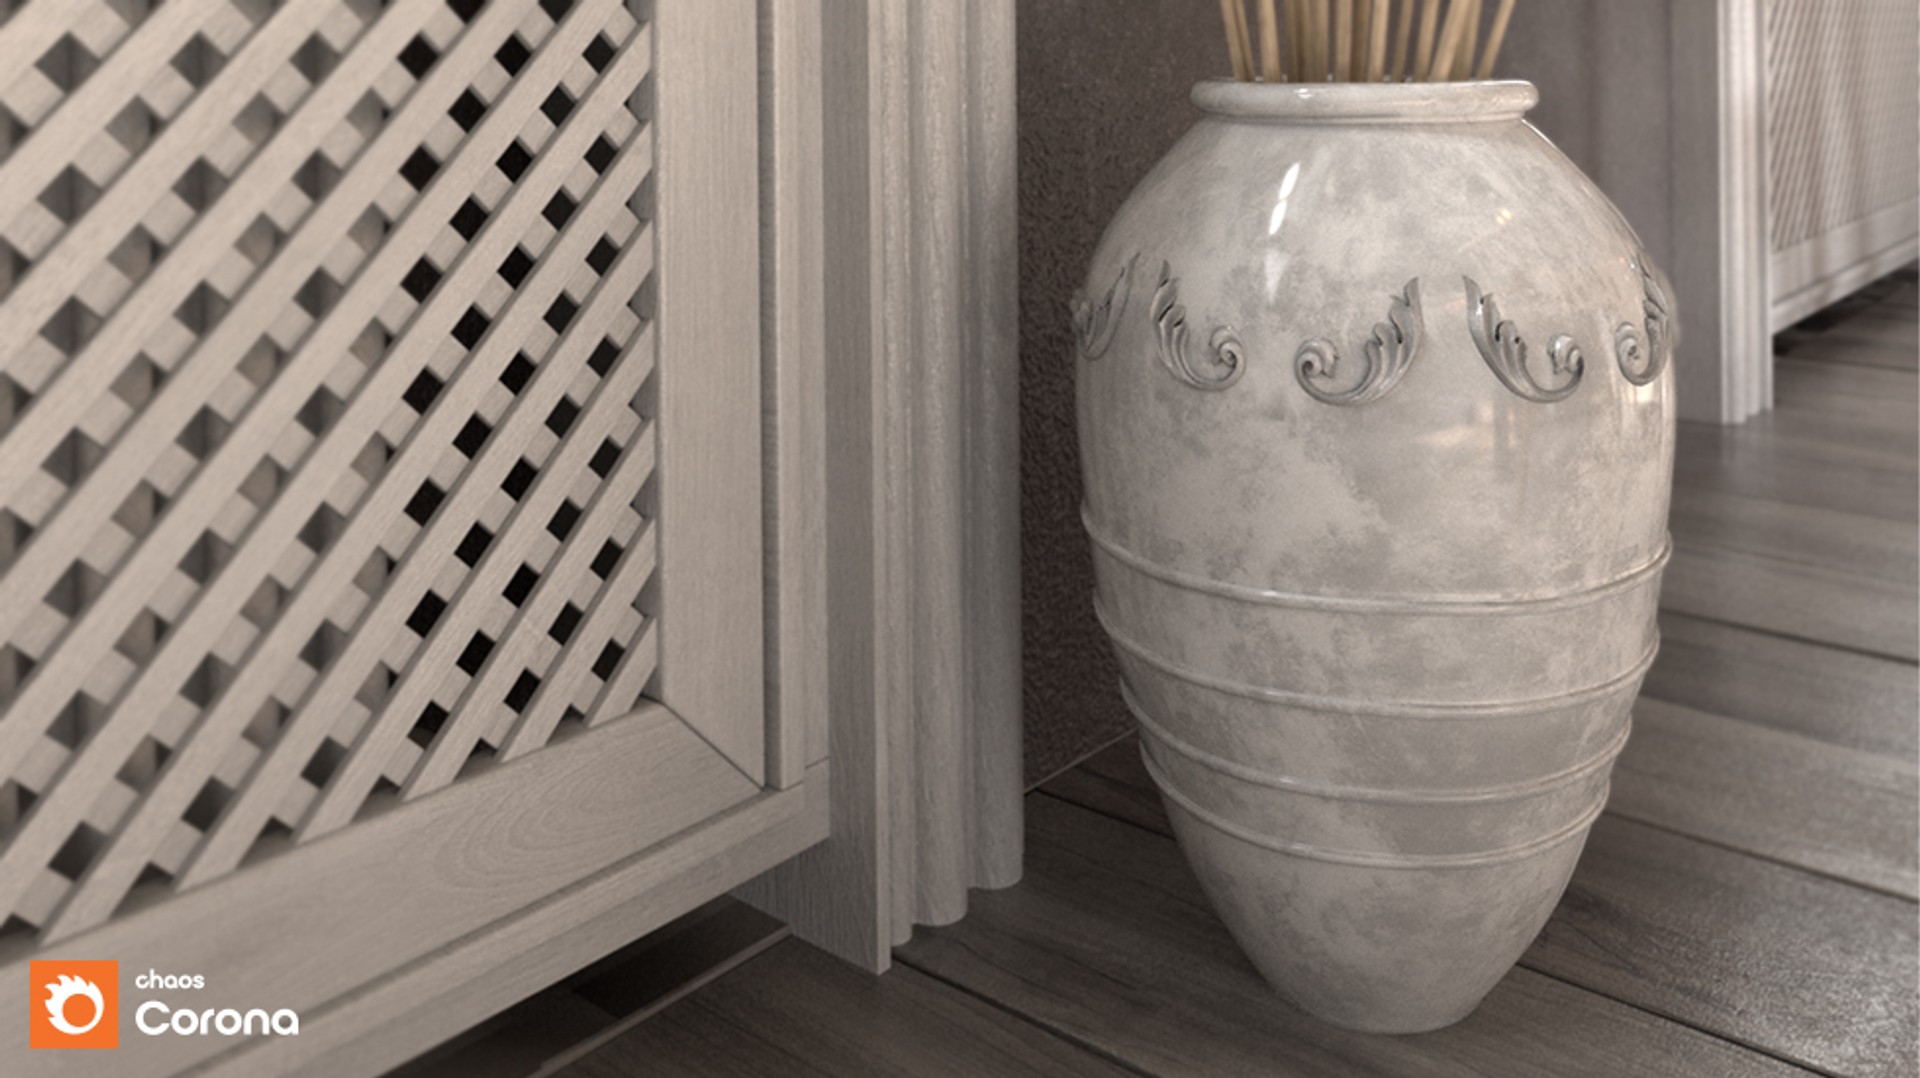
Material previewing uses the same rendering engine as the final frame rendering. The default 3ds Max or Cinema 4D material preview scene is replaced with a custom, more representative Corona scene, so you get a genuine “What You See Is What You Get” material editor. The example below shows the material preview on the left, and the material in a rendered scene on the right:

Chaos Corona's 2.5D Displacement lets you achieve detailed and accurate displacement while still optimizing parsing times and memory usage.
.webp)
You can also control how displacement is handled when using a Layered Material, choosing between Blend All Layers (default), Only from base, or Add all layers.

Chaos Corona also features a powerful approach to Volumetrics and Subsurface Scattering.
Historically, there were many algorithms for volumetric rendering, most of which relied on interpolation, fakes, and heavy bias to compute the result. Fortunately with modern CPUs in combination with our research, we have been able to ditch all of these outdated options and go straight for the most accurate, 100% ray traced solution. Even we were surprised by how fast the unbiased, un–interpolated solution could be!
Skin is one of the most complex materials to render, with many unique properties that cannot be covered in an all–purpose shader. The new CoronaSkinMtl shader makes it easy to control and adjust the look of the skin, and renders fast and efficiently with realistic results.

Even if you have never tried rendering realistic skin before, you’ll find it easy to use and will get great results with the default settings.
Setting up volumetric scattering or SSS is often especially challenging, but Chaos Corona’s implementation in the all–purpose Corona Material makes it simple. It doesn’t need any sampling controls, as all sampling is done automatically. This makes its UI extremely simple: just set up the scattering and absorption properties for Volumetric mode (for liquids, glass, clouds, etc.) or the Amount, Radius and Scatter color for SSS mode (for skin, wax, food, etc.), and press “Render”.

The Corona Volume Material offers an “Inside Volume” mode for true 3D volumetric materials. For example, by using a 3D noise map, you can have fog that varies in density in true 3D throughout the scene. Combined with the Corona Distance map, the possibilities are endless!

The example below compares the “On Surface” mode with the “Inside Volume” mode:
Chaos Corona is compatible with most features of Chaos Phoenix, letting you use its simulations directly in 3ds Max – for example, a Phoenix explosion as the one shown below:

The equivalent of Chaos Phoenix for Cinema 4D users would be Maxon’s built-in simulation system called Pyro. You can now add an extra layer of action to your scenes with fire, smoke, and other Pyro simulations directly in Corona for Cinema 4D.
.webp)
In both 3ds Max and Cinema 4D, you can also load and render the industry–standard OpenVDB format using the Corona Volume Grid object. This allows you to work with the results of simulations exported from Blender, Houdini, Chaos Phoenix, and more. The material settings in the Corona Volume Grid let you achieve a range of different looks and effects, even from the same OpenVDB data:

You can’t have a great skin shader without also having a great hair shader! Chaos Corona’s dedicated hair shader keeps with our philosophy of delivering physical realistic results, fast rendering, and a simple UI. Once again, even if you have never rendered hair or fur before, you will get great results even from the defaults.

Chaos Corona also supports native 3ds Max hair and fur, and Ornatrix and Hair Farm, so that the Hair shader will work for you, whatever plugin you use.
Some refractive materials bend light by a different amount depending on the wavelength of the light. This is called dispersion and creates a rainbow effect in the refracted light. Dispersion can be enabled in the standard Corona Material, and is controlled by the single Abbe number parameter. Enabling it adds realism to gemstones, glass, liquids and other materials. Dispersion also works with Caustics.
By default, 3ds Max treats bump maps differently, so that some maps do not work as inputs to bump mapping. The Corona Bump Converter resolves this, allowing you to use any map as an input to the bump map channel in a shader. It also lets you use the 3ds Max native Output to apply adjustments to your bump map and get the results you would expect.

Easily create stunning bathrooms, kitchens, walls, and floors with procedural tiles thanks to Corona Tile Map. You can now use bitmaps or procedural maps to define the colors of the tiles and repeat, randomize, or even tessellate an image onto the tiles, depending on your needs.
.webp)
The Corona MappingRandomizer and MultiMap now come with “by tile id” modes, so that you can randomize results by each tile if desired. Corona Tile Map also lets you create multiple inputs and outputs, which means one tile map can be used to control results for color, glossiness, bump, displacement, and more, rather than having to keep several different tile maps in sync.
Chaos Corona comes with many useful maps that you will soon find indispensable, such as Ambient Occlusion, Mapping randomization, Multimap, Triplanar mapping, Edge Map/Shader, and more. We’ll take a look at a few of them:
Adding wear and tear or dirt into the nooks and crannies of an object is made easier thanks to the Curvature map. Here is an example:
This flexible map has two main functions. First, it lets you randomize the UVW positioning, rotation, and scaling of a texture across different instances, objects, material ids, etc.
Second, it lets you randomize UVW positioning, rotation, and scaling in just one object by dividing the UVW space into a series of tiles. This lets you avoid unwanted repetition and patterning which can be seen even with seamless textures when they are scaled to fit large surfaces such as floors, walls, ground surfaces, etc. It even works for procedural maps too, as seen in the image above.
This flexible map can be used with Corona Scatter to easily achieve effects like keeping paths, roads, etc., clear of plants and trees. It can also be used for creative effects, like adjusting materials based on distance, creating ripples around objects in water, causing objects to glow as they approach each other, and more. It really is only limited by your creativity!
In the example below, the ground (with water included) and log were brought over from Quixel Megascans. The “Corona Distance map disabled” image looks a little unnatural, as the water appears completely still.
By using the Corona Distance Map to add extra displacement around the log, blended with the original displacement from Megascans, we can give the effect of ripples specifically around the log. Best of all, since this is procedural, if you move, scale, or rotate the log object in the scene, the displacement effect will update automatically.

Easily apply effects like weathering and staining to the edges of objects with Edge Map/Shader. This is particularly useful for objects with no thickness like leaves, photos, maps, paper, etc. The new Edge Map/Shader creates a color gradient based on how far away a point is from a geometric edge.
.webp)
For quick tests, or even for debugging a scene, it can be useful to override the materials with one simple material. This is easy to set up in Corona, with options that let you leave some materials (such as portals, glass, or light materials) unaffected by the override, in both 3ds Max and Cinema 4D.

We invite you to test drive Chaos Corona for FREE for 30 days without any limitations! Get the trial.